Improperly exposed or saturated skin frustrates every video editor at one point or another. Maybe you thought you were shooting a subject who simply used a heavy hand with the cosmetics, but your equipment captured a living, talking cheese puff. Perhaps you were shooting near some business-casual lighting, but when you loaded the footage into Final Cut Pro X, you found your subject’s skin appeared with a faint, sickly chartreuse tint.
Tint happens. The good news is, you’re in the right place to learn how to fix it.
By the end of this article, you will have a clear understanding of how to fix skin tones that didn’t capture quite the way you had anticipated, using FCP X’s built-in tools. These foundational techniques will also help you strategically adjust the look and feel of your footage for stylistic purposes.
Dedicated color-correction software will always give you more advanced tools (and an upcoming article will cover those), but sometimes you just need to be quick and dirty and get the job done.
The following fixes are for editors who have neither a generous budget for extra editing plugins, nor assistants to whom all the annoying, tedious tweaks can be delegated.
Narrow Down the Problem
Here’s a breakdown of the issues that happen with skin:
- Wrong temperature, either too warm or too cool, which we’ll discuss.
- Green or Magenta tint, usually from cheaper fluorescent or LED lights.
- Wrong exposure, the low, mid and high tones are either too light or dark; there are visibly blown-out highlights or muddy shadows.
- All the delightful combinations of those elements, because everyone loves to hate a blown-out orange forehead.
More often than not, you will deal with a combination of exposure and temperature creating a skin issue. The way to address this is to target a specific color to correct.
When you need to color correct, the most important factor is how colors interact with each other.
Each of the methods in this article works better if you have some basic knowledge of color theory. It’s important to understand how color works, as a video editor, so you can adapt these methods to any color in any situation.
Use Color Theory to Figure Out the Exact Problem
Because skin itself is actually many shades of grey and semi-transparent, (blood and melanin give it visible warmth and tone, but all by its lonesome, skin cells are not particularly vibrant) you cannot make footage of orangey or greenish skin look normal by adding a flesh-colored tint.
Think back to the last time you played with a pack of markers. If you were ever the one who picked the pack of markers with a dirty yellow, you know that using someone else’s clean yellow marker on top of the murky problem areas of your project didn’t create a crisp, pure color – just more mud.
The skin color problems in your video footage are essentially places you covered with dirty yellow marker, and putting a natural skin color on top won’t truly solve the issue. This is where color theory comes in. We need to work with complementary colors.
Wait, What Are Complementary Colors?
Complementary colors are two colors that neutralize each other to create gray. They are easy to find, because they are always on opposite sides of the color wheel.
In the wheel below, check out how the colors (and different versions thereof) are arranged in a circle. Yellow is the complement to purple, red to green, blue to orange, and so on.
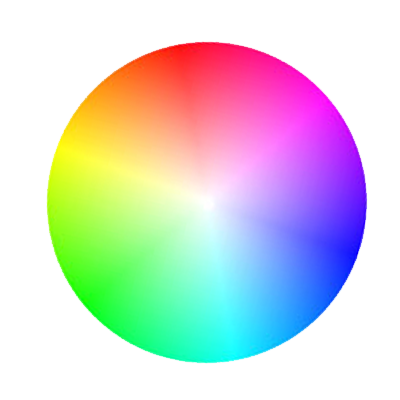
For example, if you have determined the problem in your video is that the skin looks too warm, with a red-orange cast, the color you would use to neutralize that unwanted tint is its exact opposite, which is blue. If the skin looks to yellow-green, you would use a red-purple. Even in the event that the tint you wish to eradicate is in between tones on the wheel, the complement is always directly across from it. A red-orange that’s slightly more red, for instance, cancels out when paired with a blue-green that’s slightly more green.
Look at your footage for the problem color, then determine which complement you need to use in order to neutralize it. It will vary from project to project, but keep those two colors in mind as we move on to the hands-on part. Final Cut Pro is equipped with a number of automatic color filters that you can apply to your footage, and with the information you now have on color, it’s time to use them.
How to Use the Balance Color Option
First, see if FCP X can figure it out for you.
This option is entirely automated by Final Cut; it may not be selective enough to parse out an issue with skin tone because it’s quite subtle, but as you attempt different fixes, it’s worth a try.
- To Balance, pull clip into your timeline and click to select it.
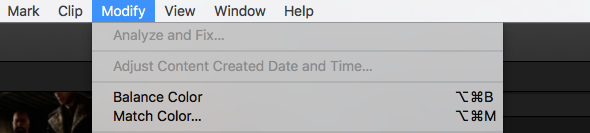
- Under the top program menu, select Modify, then select Balance Color. That’s it.
Some people will turn up their noses at this automated tool, but we believe in using whatever gets the job done. If it doesn’t fix your problem, well, you wasted 15 seconds.
How to Use the Match Color Option
If the first tactic didn’t help, and if you have an additional clip to use as a reference for how you want your frame colors to look, try matching the color next.
A few points to note with this option: it affects the whole image, and again you must have a good clip to use as a sample of how you want your problematic clip to look. You will have the best results if your sample clip is very similar to your problem clip, except for the color. The most common scenarios where Match Color can help are when you have multiple cameras in the same setup, and one of them has a bad color cast, or on an outdoor project where the lighting changes subtly from minute to minute
For this method, have two clips handy – one with the look you want, the other one with the skin issue. The good one doesn’t have to be in your project timeline, but it does have to be in your Final Cut Library. It can’t be open in a separate program or preview.
- Click on the problem clip to select it.
- Under the top program menu, select Modify, then select Match Color. Your project viewer will split so that the clip you’re modifying appears on the right.
- Skim your cursor over the good clip with the appearance you want to match. You will be able to see the adjustment in your project viewer, but it won’t be applied until you click on the exact section of the good clip that you want your bad one to emulate, then click the blue Apply Match button.
How to Use the Color Correction Effect
If the Balance, and Match didn’t solve your skin issues, it’s time to get your hands dirty with the Color Correction effect.
This tool is the bread and butter of color correction in FCP X, and it gives you great control over the color as well as the exposure of your image.
Pull up your Effects menu:
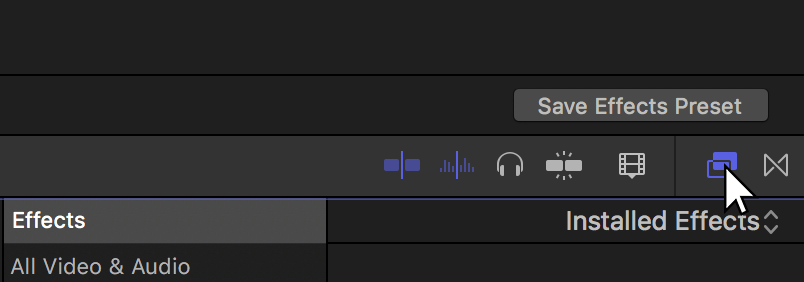
Under Color, drag the Color Correction effect to your clip. The effect will appear in your video inspector with a small arrow button to the right of it.
Click on this arrow; it opens a rainbow-colored panel with a horizontal line down the center, and four circles on the line. There’s also a “+” and “-” on the color box; these indicate more or less of each color. This is the Color Board. You will also see tabs for Saturation and Exposure.
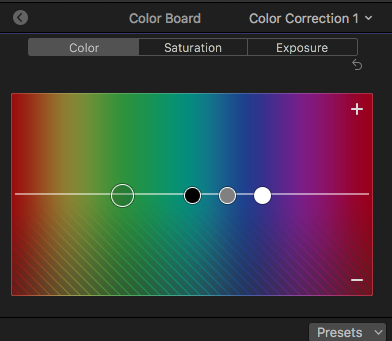
Starting with the Color Board, you will see four circles:
The larger circle affects all of the colors in the image.
The black circle affects the darker colors in your image (the shadows).
The grey circle affects the mid-range colors in your image.
And the white circle controls the lighter colors in your image (the highlights)
You have two options here to adjust your skin color:
- You can cancel out the unwanted skin cast by using the circles to increase the levels of the opposite color (if the skin looks orange, you’ll want to increase a shade of blue). Drag a circle up above the horizontal line to increase the amount of that color in the image. In this case, you would drag it up into the appropriate blue area.
- Or, you can decrease amount the unwanted color, click on one of the circles and drag it down under the horizontal line in the area of that color. You would, in the same case, have a circle under the line, in the orange area. These two operations will achieve the same effect.
To adjust saturation in the Color Correction effect, click on the Saturation menu. It opens a rectangular panel with a simple graph, similar to the Color Board, minus the larger circle, allowing you to fine-tune your saturation.
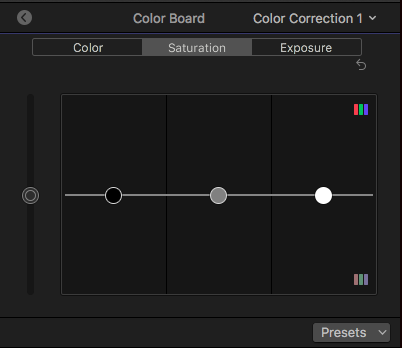
Keep in mind, if you’re neutralizing orange tones in skin, use a light hand on the highlight saturation, as it can quickly negate any fine-tuning you did in the Color panel.
To adjust exposure in the Color Correction effect, click on the Exposure menu. It opens another rectangular board with a simple graph, identical to the Saturation Board in appearance and function, but it controls the brightness of your shot. The dark circle, again, represents the shadows in the shot, the gray is midtones, and the light is highlights.
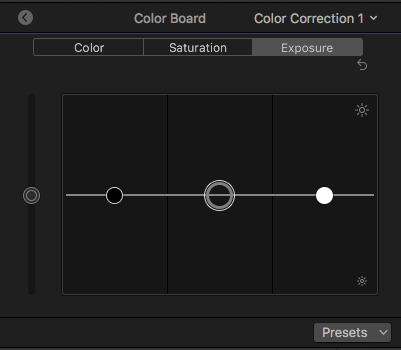
With problematic skin, the most helpful slider to move is often the middle one, for midtones. If you want to lighten or darken your exposure, adjusting the shadows and highlights can look too severe. The midtone slider is most forgiving.
How to Isolate Parts of the Frame with Masks
Still no luck? If the above methods didn’t help, you probably need to tweak the color on one part of the image while leaving the rest alone.
As you edit, there will be cases in which you need to isolate people. This isn’t about banning antagonists from the set or putting anyone in a time-out (although if that’s something you hope to see addressed in a future post, by all means, send a note to our team).
There are two ways to isolate part of the image: color masks, and shape masks. With a shape mask, you draw a circle or rectangle on the image, and you can use that shape to decide what parts of the image to change. With a color mask, you use the eyedropper tool to select a certain color, and you will then be able to change just that color.
- Pull the clip you want to adjust into your timeline and apply the Color Correction effect the same way we discussed above.
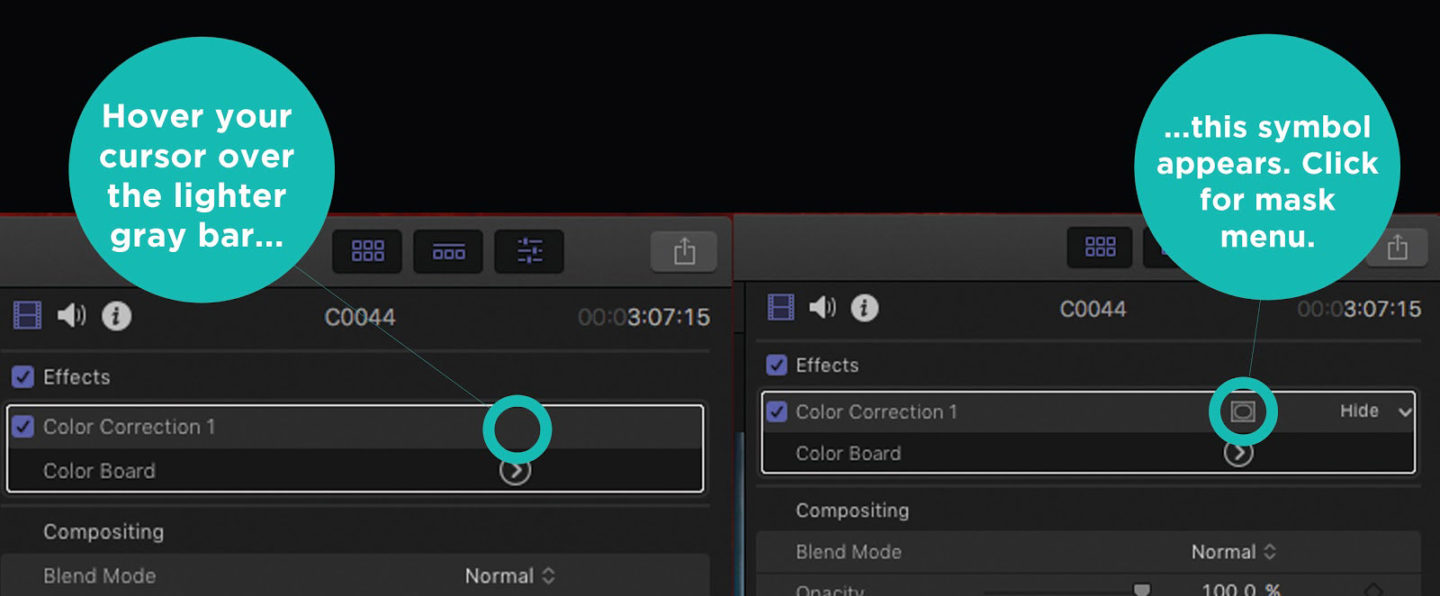
- In your video inspector, hover your cursor over the lighter gray bar that says Color Correction. A small rectangle-and-circle icon appears.
- Click on that to bring up your mask options: Add Shape Mask, or Add Color Mask.

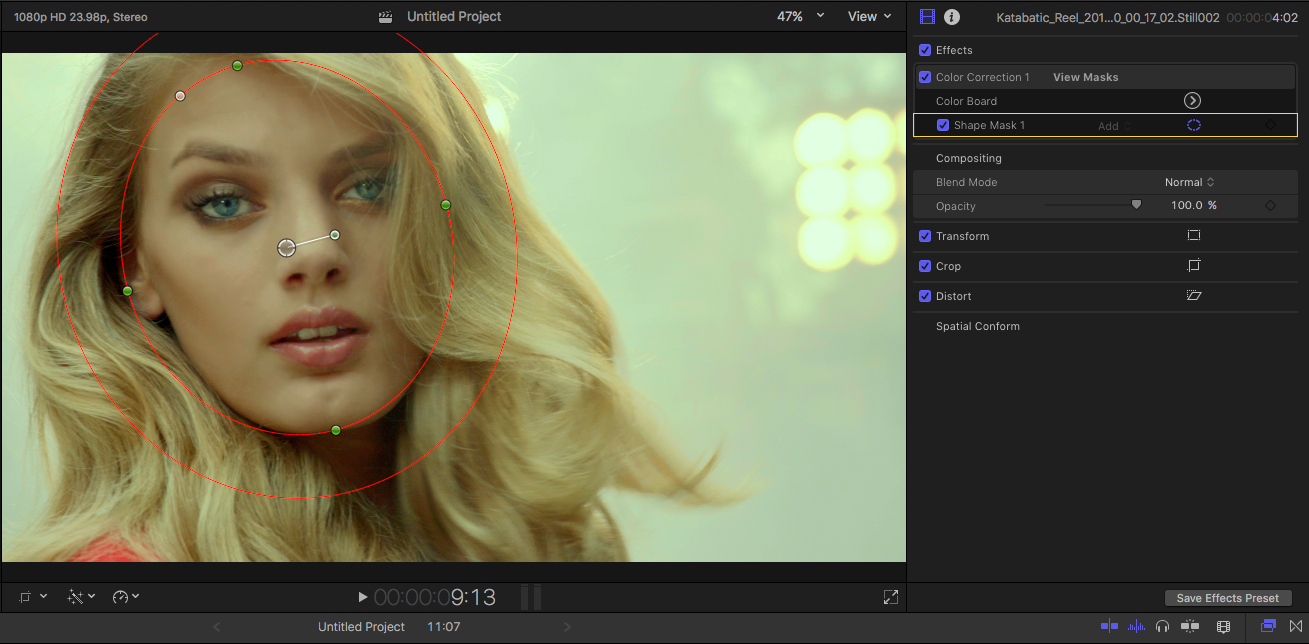
- Click and drag your cursor over either the area you don’t want to change with your color corrections, or the area you do (you’ll tell Final Cut which one you’re intending in a minute). Two concentric circles will appear, and your footage will appear monochrome in the viewer. Don’t worry, it’s not going to get stuck this way.
- Now, to adjust the color settings, click the small arrow to open the Color Board. This is where you tell Final Cut how to treat the area you selected. Next to Mask, select whether you want to apply your color edits to the area outside the color you selected, or to only that color.For example, if you selected color on your subject’s face, you would want to apply the edits inside the selection. If you selected the color of your subject’s face, but the background is what you want to adjust, then you’d apply the edits to the outside.
- At this point, you can make your adjustments to the Color Board the same way as is detailed in the “How to Use the Color Correction Effect” section of this piece.
The two circles mark the area where the color-correction fades out. If they are very close together, there will be a sharper edge, while if they are farther apart, the fade will be much smoother. You can also stretch and rotate the mask to fit the shape of the area that you want to isolate.
The mask is a very powerful tool for color-correction, because you can create several different masks and combine them for extremely precise adjustments.
If people are interested, we might write another article all about working with masks. Let us know!
How to Use the Tint Preset
We recommend using the other methods first, but if you have time, are intrigued by color theory, and want to try organic correction, play with Tint.
This tool works best if the full frame, including your subject’s skin, is affected by an undesired color, without any exposure issues.
- Drag the affected clip into your timeline and click it to select.
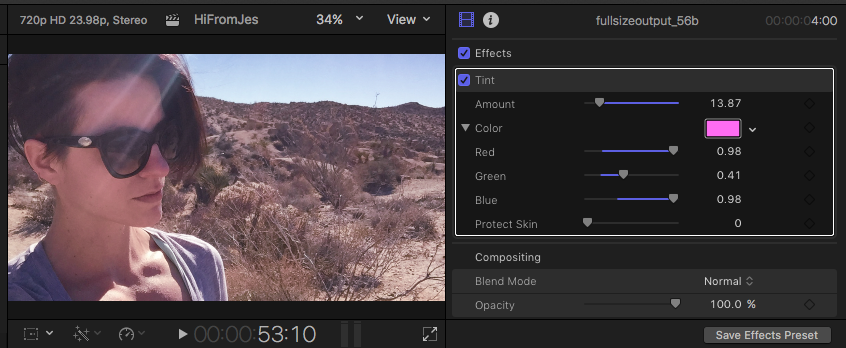
- Pull up your Effects menu, and under Color, drag the Tint effect to your clip. This will pull up a few options in your video inspector: Amount, Color, and Protect Skin.
- Start with the Color section. You have the option to either click the small arrow to open the dropdown menu, which has sliders for Red, Green, and Blue, or you can select a color from the color sample displayed. It typically defaults to a shade of blue, but the key here is to select the complementary color to the problem skin.
- This is where you need to be able to fine-tune the tint color so it’s the exact opposite of the skin.
- Next, under Amount, use the slider to adjust how heavily your footage is tinted. Usually, the more subtle, the better. Remember, the goal is always to neutralize.
- Leave Protect Skin option unchecked, since the skin in particular is what we primarily want to change.
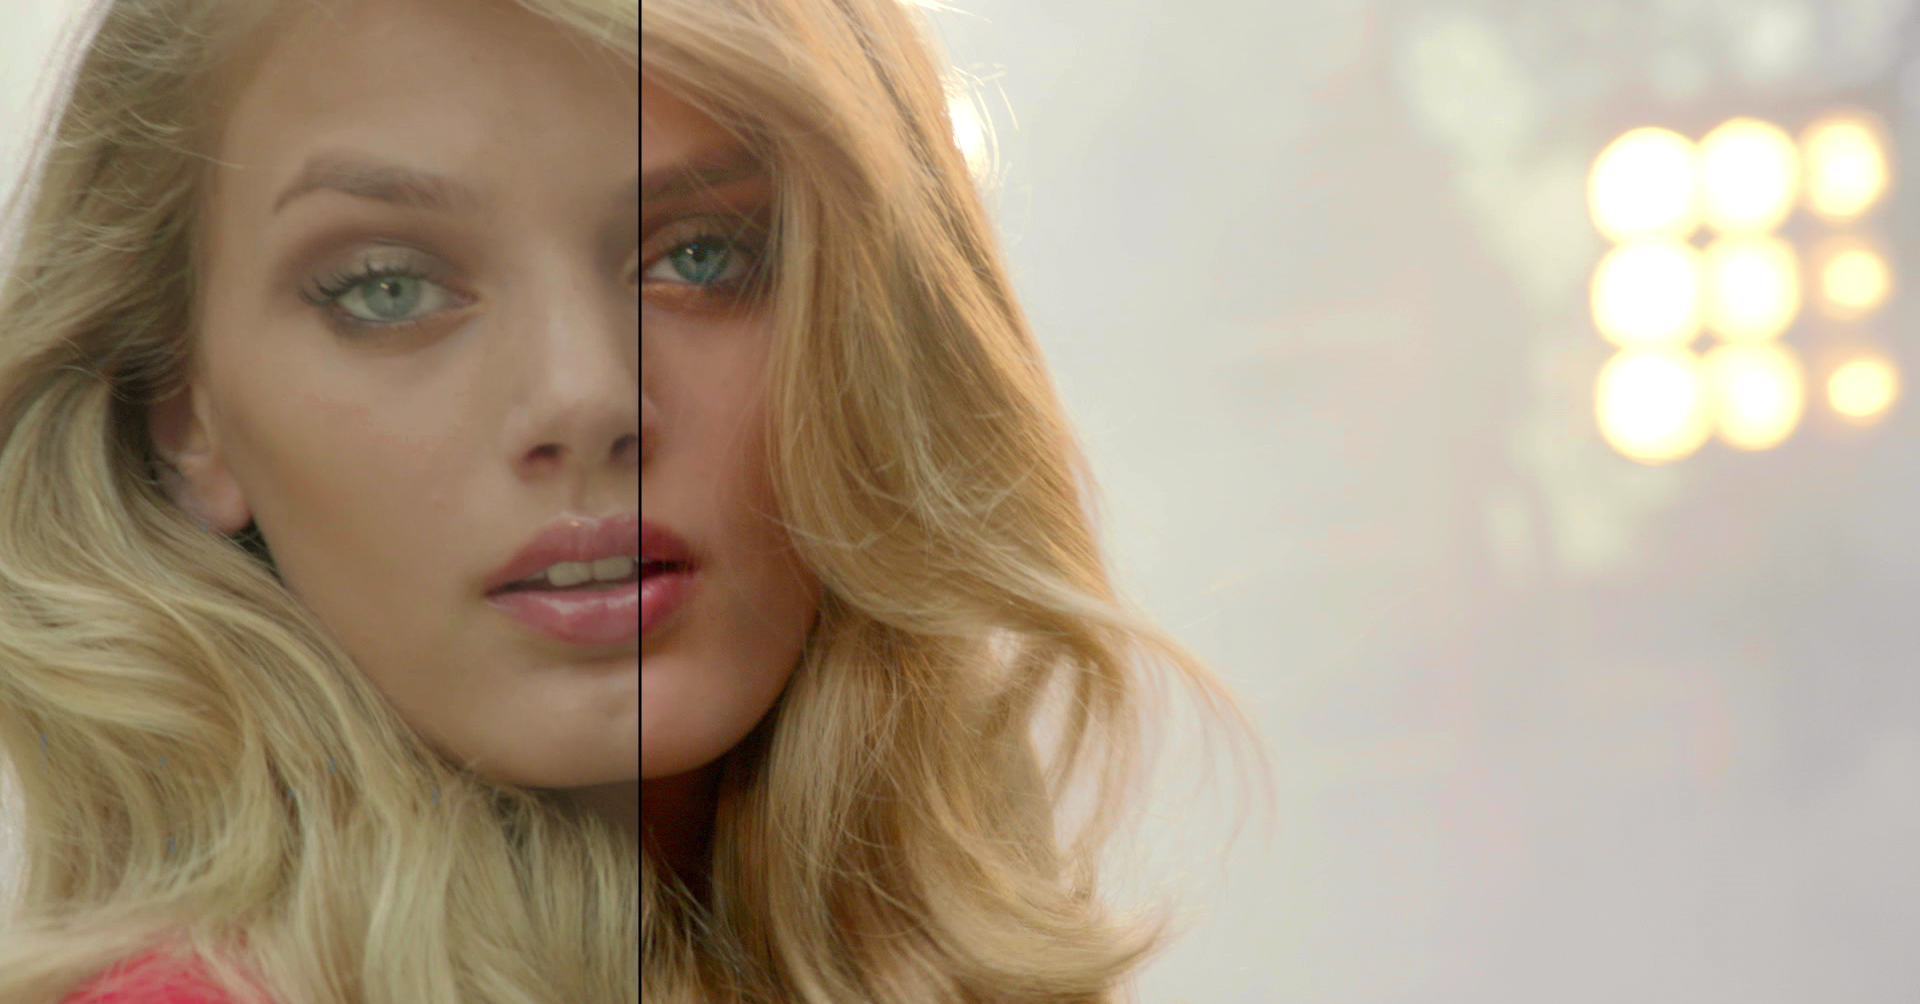
Below, see an unaltered shot with a slight green tint to it, then check out the after shot once a tint was applied in a complementary color (in this case, a pink-violet tint).
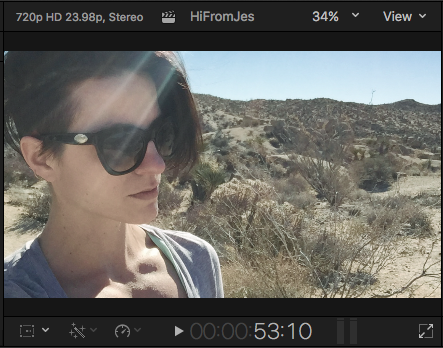
Take note of the controls in the video inspector, to the right of the frame, as well. Play with the amount so you don’t end up with too intense of a color overlay.
Layering Is Allowed
As we wrap up color correction methods, it’s worth noting that you are able to layer multiple color corrections the same way you would layer any other pair or group of effects. You may find it necessary to do multiple masks for specific areas – by all means, go for it. Simple repeat the process stated above for each color or part of the frame that you seek to manipulate.
How to Use the Vectorscope Display to Check Your Changes
Use the scopes to check your work because, after scrutinizing color for this long, your eyes might be playing tricks on you.
The vectorscope is a circular graph of all the colors in your frame with the saturation levels of each color. The closer the marks are to the center of the graph, the less saturated they are. The closer they are to the perimeter, the higher the saturation. What’s useful about this tool is the Show/Hide Skin Tone indicator, which you can use to check your work and see the changes mapped out.
Assuming your vectorscope doesn’t open automatically when you’re in Final Cut (for most, it doesn’t), open it by clicking on the View dropdown menu that shows above your frame. Here, select Show Video Scopes. A graph panel appears next to your footage.
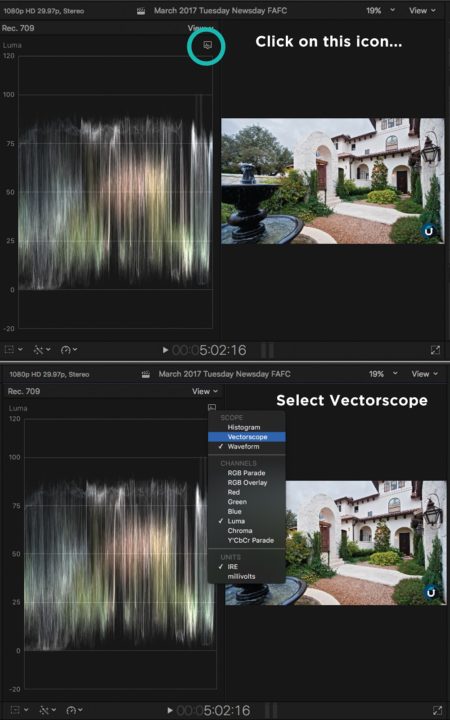
This brings up the circular vectorscope graph, which looks like this:
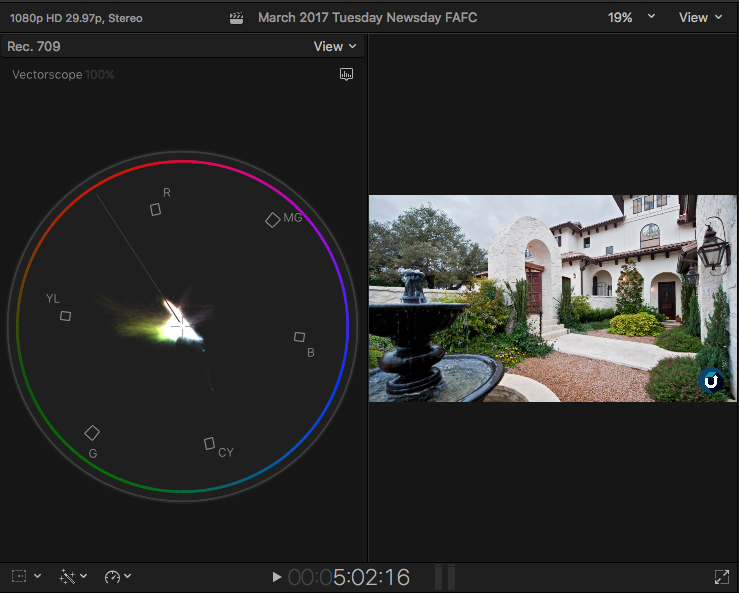
The bright areas in the center represent the colors in your image. The more saturated they are, the farther they will be from the center.
The diagonal line extending from the center of the graph out to the perimeter, between red and and yellow is your skin tone indicator. As you play around with your color correction, you’ll see the bright areas on the vectorscope move around. The skin tone line is just a guideline, but it can be useful. If none of your colors are lying along that line, you probably have a problem, and you should see your colors move closer to the line as you correct your skin tone issues.
For instance, if your subject was faintly purple, you would see less purple on the vectorscope when you finished your changes than before you began to edit.
Make It Work for You
It probably occurred to you earlier, but the same techniques used to remedy skin issues can be honed to deliberately manipulate the look and feel of your piece. Take a look at these examples:
Scenes in The Matrix were edited to emphasize blue during present-day scenes, and green during scenes in which the characters were in the Matrix. While we read the characters’ clothing as shades of gray, they’re actually blue.

In Mad Max: Fury Road, all the colors are highly saturated, with boosted golds and blues. Final Cut does have presets in your Effects menu that are built to give the look of desert heat, but if you have a very specific look in mind, it’s best to create it from scratch with the aforementioned tools.

Your Assignment
Ok, now that you’ve learned how to use the tools, it’s time to practice!
We’ve provided a couple images for you to download that have some color cast issues. Download them, import them into Final Cut Pro X, and see if you can fix the skin tones with the techniques we’ve outlined above. Give it a try, and then post a screenshot of your finished image below!
The first assignment image has a cast on the entire image. The second one needs an adjustment only to the face. See if you can use a Shape Mask to correct only her face.
Got Questions?
Fire away. We go through every comment and are here to help.
We’re working with the latest Final Cut Pro version (10.3.2, at the time of this writing), but we’ll try to keep this up to date if new color-correction tools make their way into FCP X.
While you explore the blog, here are a few other articles you may find interesting:
Five Excellent Reasons to Choose Silence Over Sound
Make the Most of FCP X: Log Interviews Better