Syncing production audio is one of the most tedious and time-consuming post-production tasks. Audio sync in Premiere Pro is no different.
I’ve already written about my preferred method—using DaVinci Resolve’s auto-sync feature—which allows you to sync an entire day’s worth of footage in one click.
Yet syncing in Resolve isn’t always the best option for your overall workflow.
Contents
Not always the best option
If you’re planning to use Adobe Premiere Pro’s built-in proxy workflow, which requires that proxy and full-resolution media have a matching number of audio tracks, then creating synced proxies in Resolve flies out the window.
Or, in some scenarios, you may be shooting in an edit-ready codec like ProRes or DNxHR. In these cases, you simply don’t need to create proxies.
On the feature I’m currently cutting, the DIT transcodes proxies as he offloads camera cards. But he doesn’t receive the day’s production audio until after wrap, which makes syncing on set impossible.
So what do I do in these scenarios?
Audio sync in Premiere Pro
Many people don’t realize that Premiere Pro actually has its own batch auto-sync tool. You’ll find it in a feature you’ve likely used many times already—Multi-Camera Source Sequences. Many seasoned Premiere Pro editors choose to edit with multi-camera clips.
Personally, I prefer to take the syncing process one step further and create merged clips. This may come across as a bold statement, and I’ll explain why I prefer merged clips over multi-camera clips. There are some pretty significant reasons that may change your outlook if you’re multi-cam proponent.
While not nearly as robust as Resolve, I find Premiere Pro gives me better results than third-party plugins. Without the hassle of having to pay an additional fee or switch between software.
It’s also fast and easy, so let’s get started!
Set yourself up for success
While it’s extremely rare to find errors with timecode syncing (unless of course your timecode has drifted), Premiere Pro can have a hard time with audio waveform syncing if your scratch track quality is poor or the sync sound has a low volume.
Talk to both your DP and on-set sound mixer. Let them know you’d prefer to have both jam-sync timecode AND a reliable scratch track running.
Sometimes the budget will only allow for the scratch track. In which case, make sure the sound mixer sets the levels to match back to the production audio.
Get organized
Before we start to sync audio in Premiere Pro, organize all of your raw footage into scene bins. Make sure both the audio and video assets are in a single container folder.
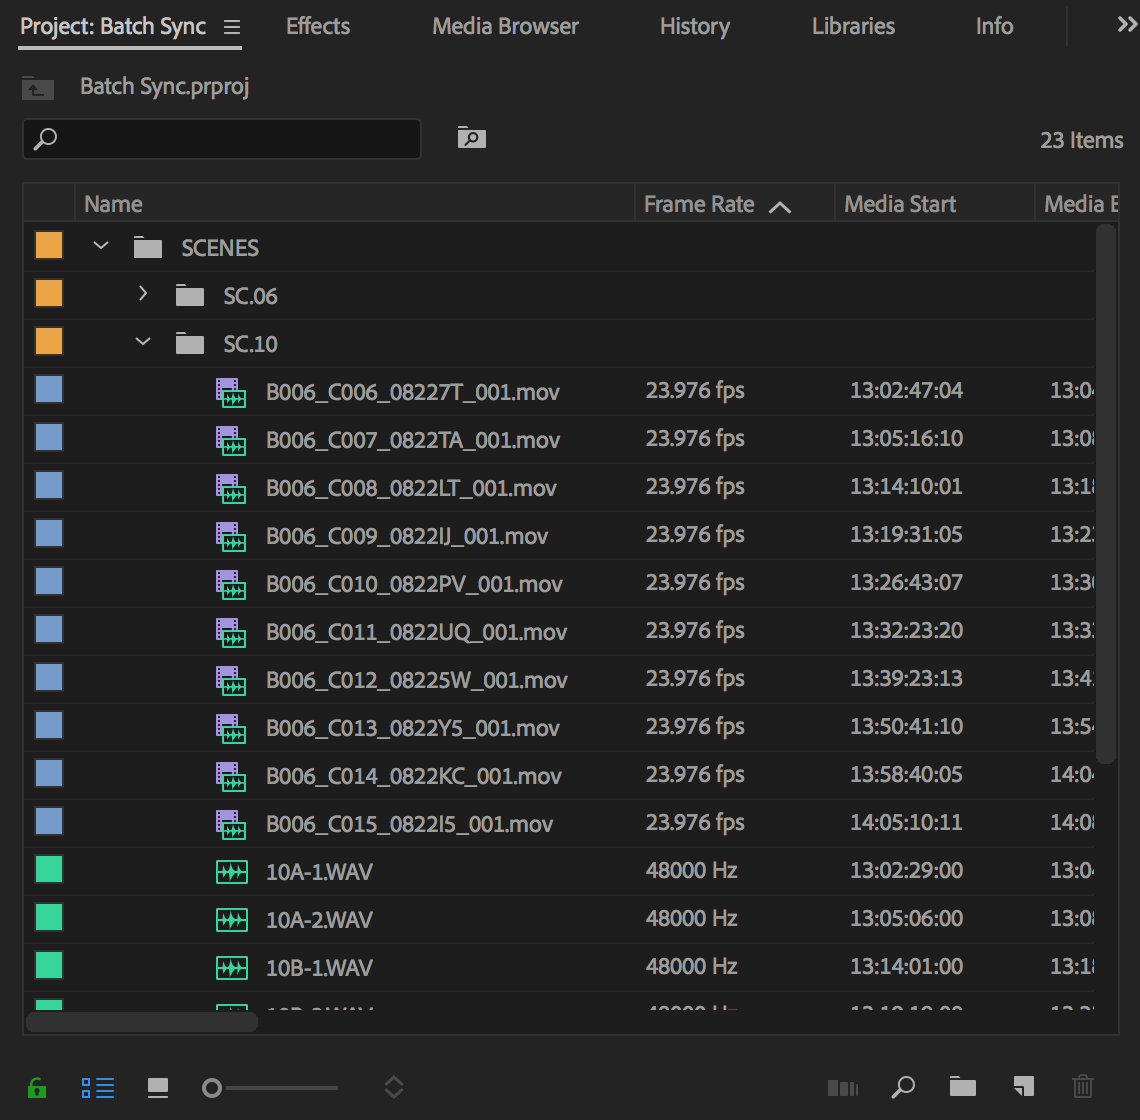
While you can sync in batches larger than a single scene, it’s easier to track any issues with smaller batches.
Plus, if you’re syncing by waveform rather than timecode, you’ll tax your system if you attempt to sync an entire day’s worth of material at the same time.
Sync audio in Premiere Pro by creating multi-camera source sequences
Once you’re organized, highlight the video and audio clips for the scene, right-click, and choose Create Multi-Camera Source Sequences.
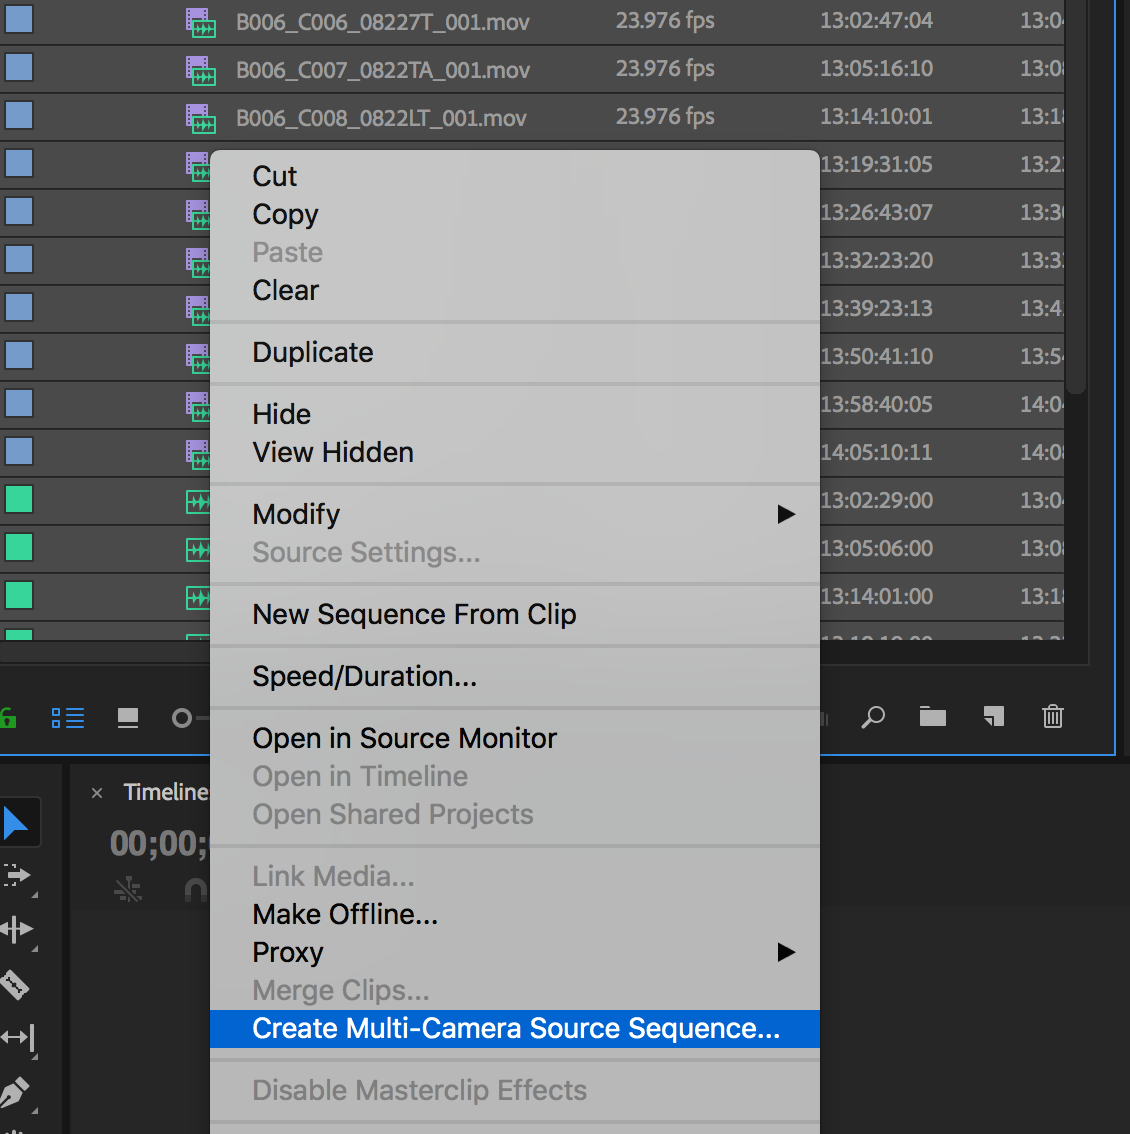
A settings box will come up with a number of options for the clips you’re about to create.
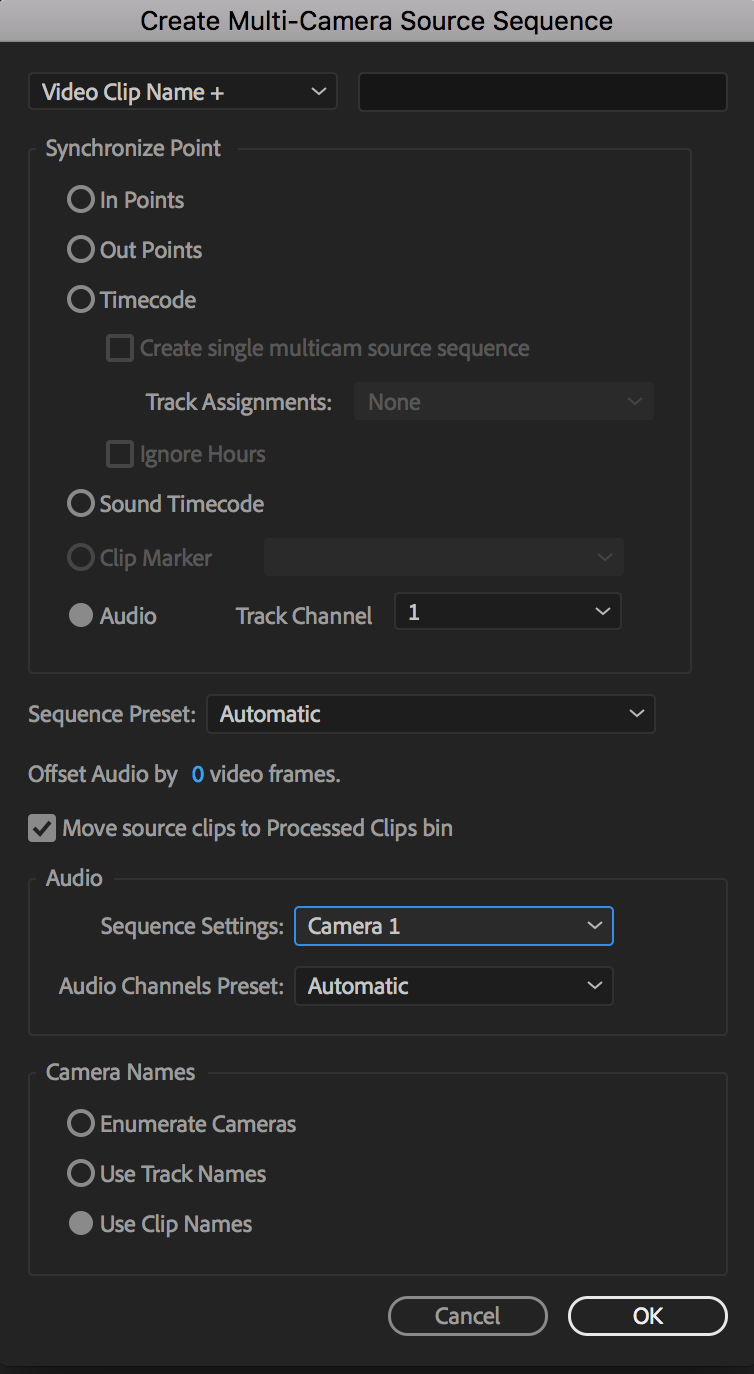
We can leave most of these settings alone. But, if you’re so inclined, at the end of this article I’ve included an Appendix which briefly runs through what they affect.
Sync!
With your settings selected, hit OK and let Premiere Pro get to work.
If you’re syncing by timecode, the results should be instantaneous. If you’re syncing via audio, you’ll see a progress bar as Premiere Pro analyzes the tracks.
In either scenario, you’ll soon see new multi-camera sequences populating your bin. If you selected this option, your raw audio and video will be moved into a Processed Clips bin
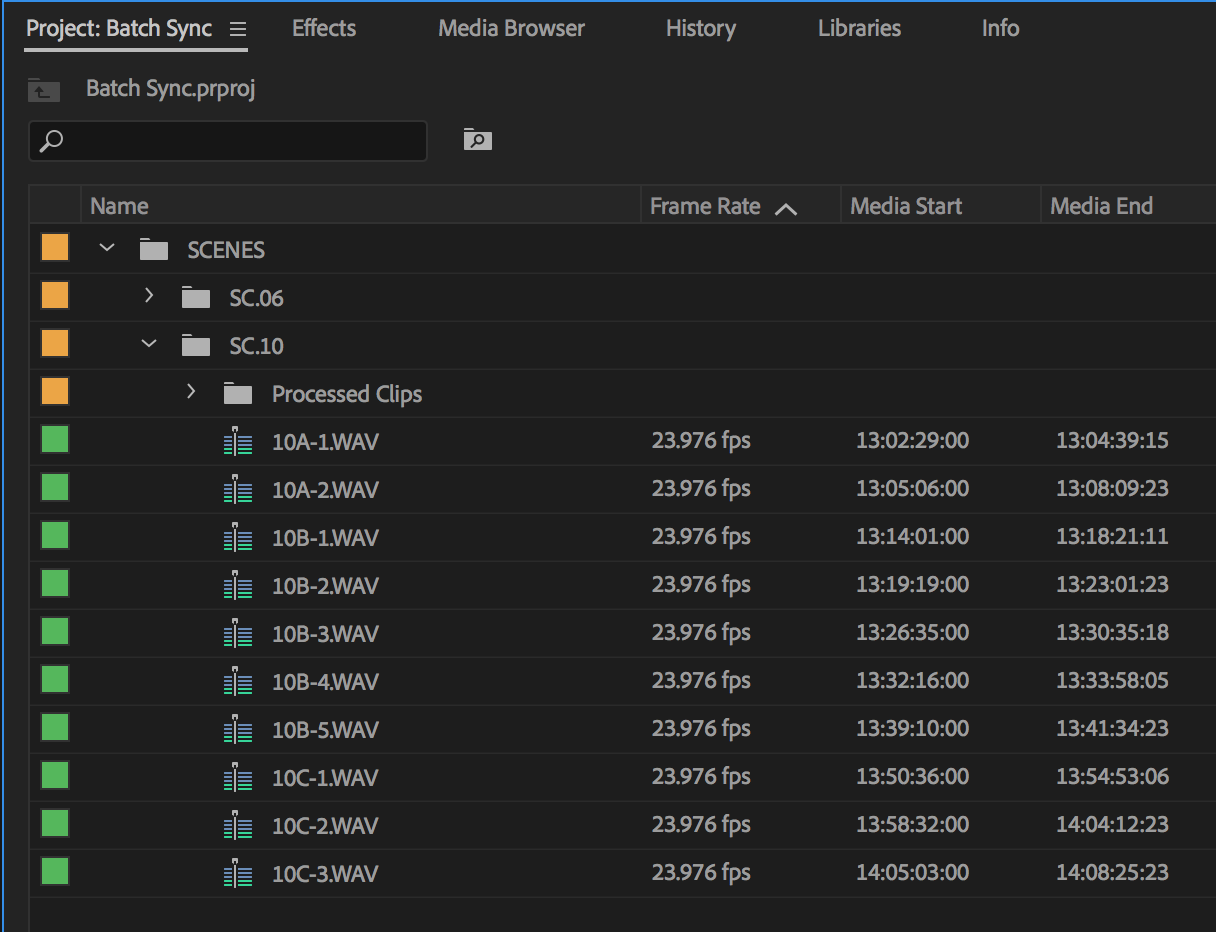
Automatic audio sync in Premiere Pro for an entire scene in a couple of mouse clicks!
Go ahead and load a few clips into the source monitor to take a look.
The yellow box
You’ll notice that the clips display a yellow box around them because we’ve just created multi-camera source sequences. These are generally used in scenarios where multiple cameras sync to a single audio track.
The yellow box signals which camera is currently active. In our clips, we’ve only got one camera, which is selected by default.
Technically, once you’ve reached this point and have a bin full of synced multi-camera clips (and potentially even labeled, if your production audio did the work for you), you can hang up the towel and jump right into the edit if you’d like. But, as I mentioned above, I prefer to take this one step further and created Merged Clips. I’ll first explain the “how,” and then get into the “why”.
Creating merged clips
With your multi-camera source sequences created, it’s easy and fast to merge the audio and video.
First, highlight the synced multi-camera clips in your bin. (You may decide to work in batches, depending on how many clips are in your scene.) Right-click and select Open in Timeline.
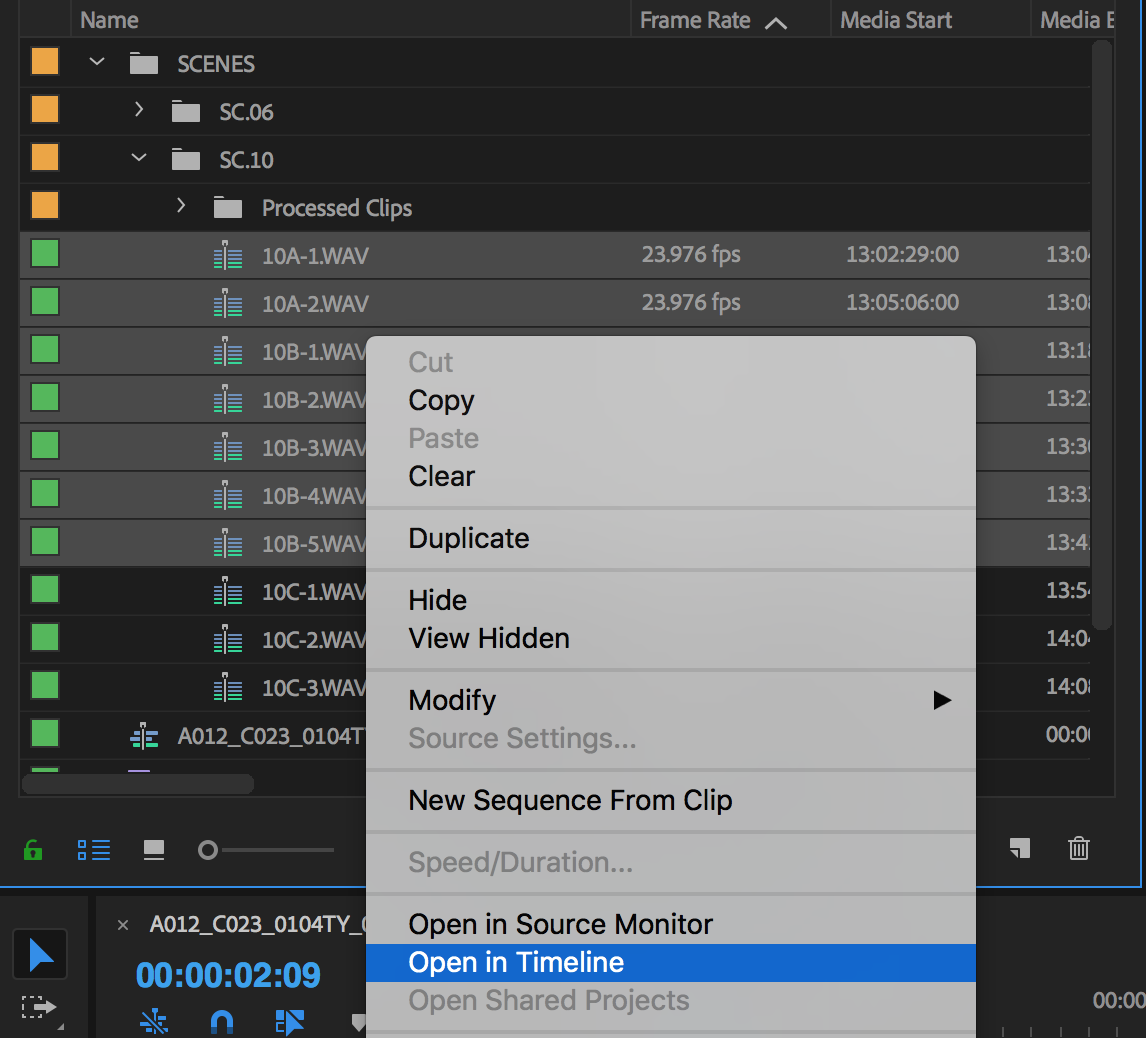
You’ll see that all of your synced multi-camera clips open up as tabbed sequences in the timeline panel.

Inside each sequence, you’ll see your video track on V1, your production audio beginning on A1 and populating however many tracks it came into the project with; and finally, on the last few audio tracks, you’ll find your camera scratch tracks, which are muted by default.
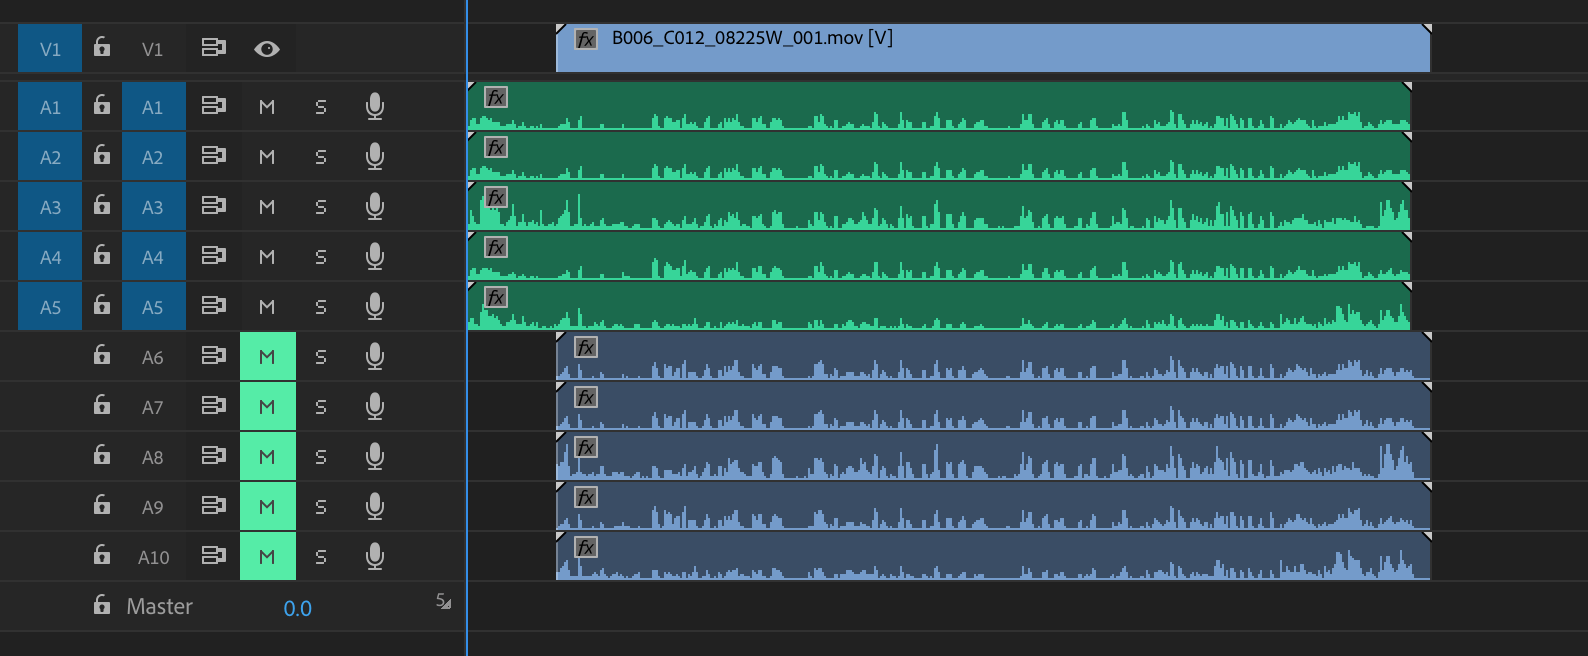
From here, merging is simple.
Turn Linked Selection off
Disable the Linked Selection tool. This stops the video and its scratch audio from being selected.
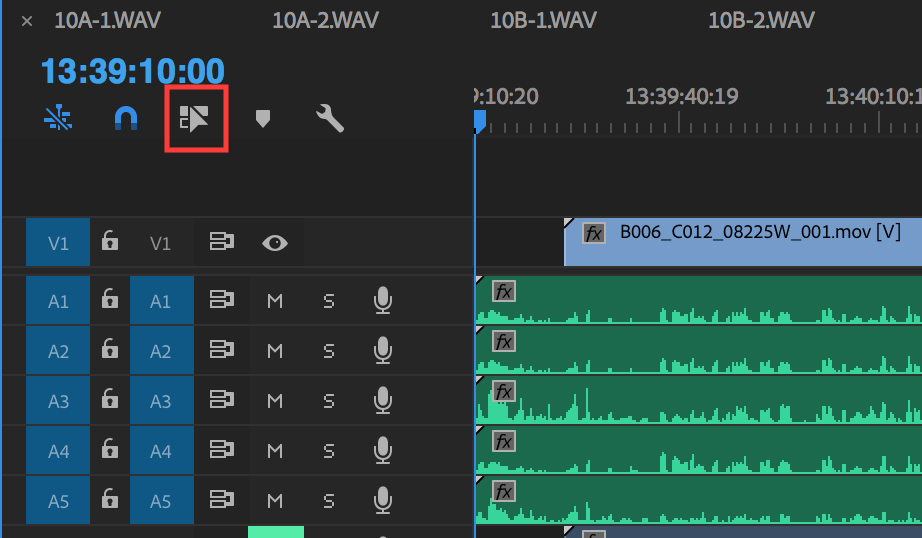
If desired, trim the top and tail of the audio so that it’s in line with the video, though this step isn’t necessary for the merge to work.
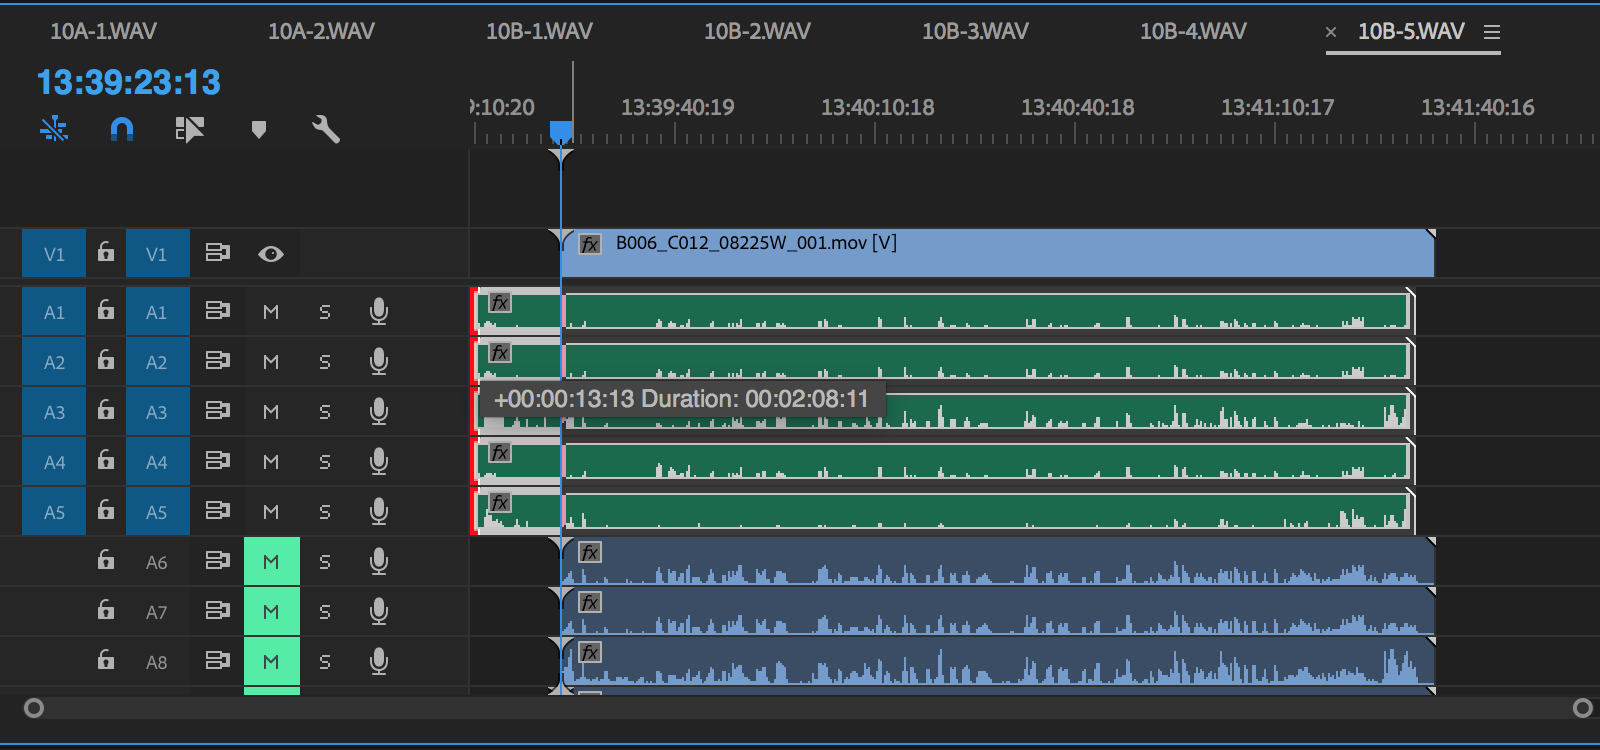
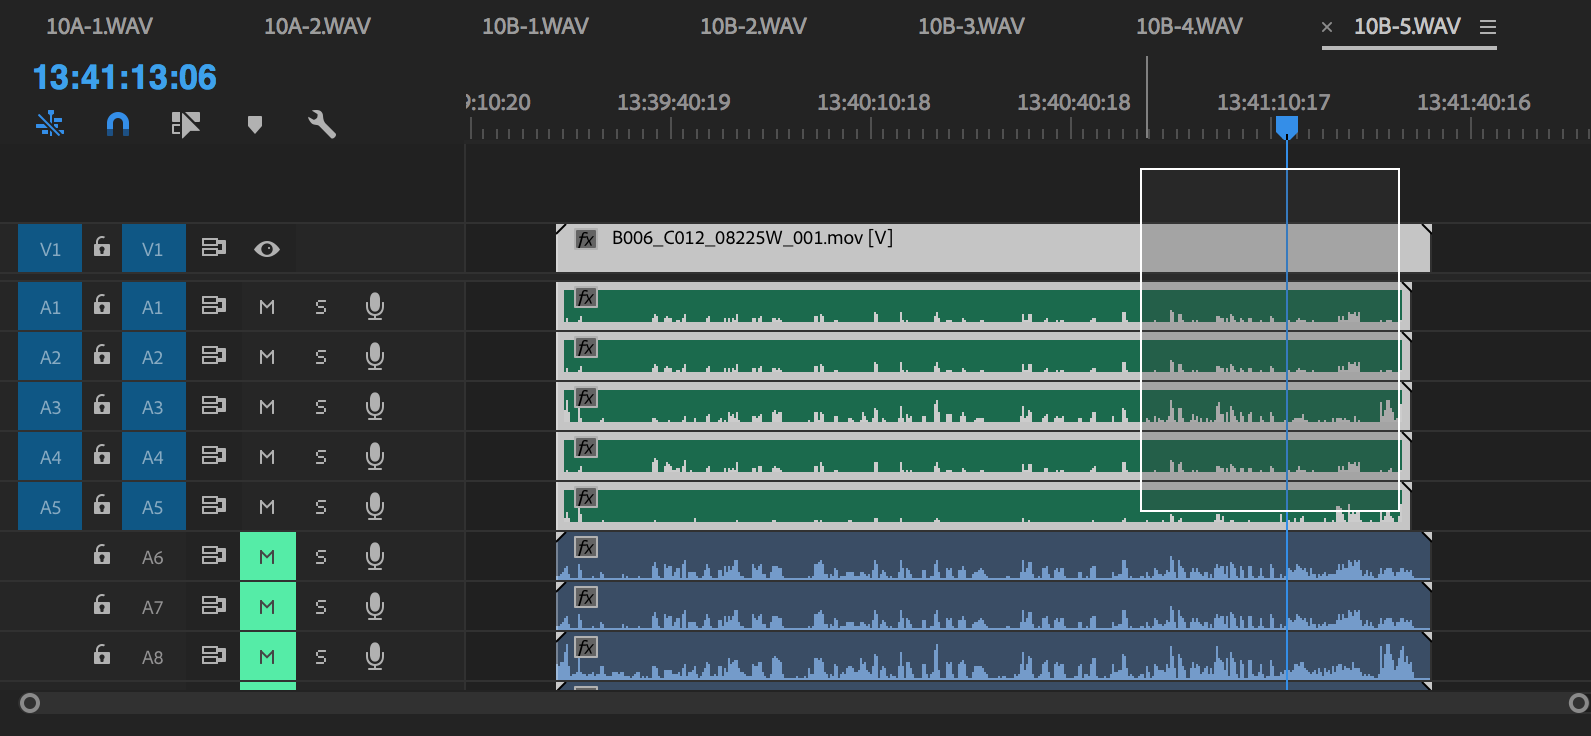
Then, simply drag a marquee selection down over the video track and through the production audio tracks.
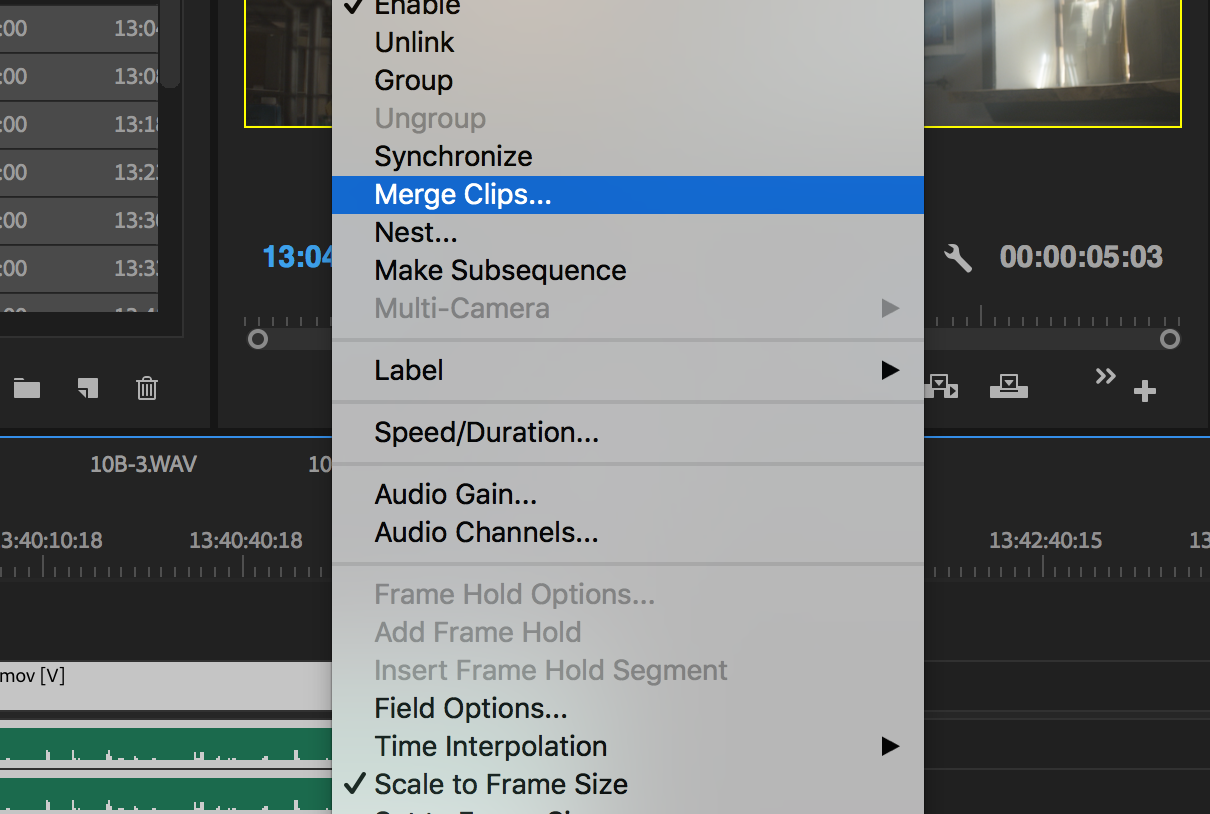
With everything selected, right-click and select Merge Clips. Map the Merge Clips command to a keyboard shortcut. (Mine is option+E.)
In the Merge Clips dialogue box, all we need to do is name our clip. Here’s where the earlier step of naming our multi-camera clips based on the audio tracks comes in handy.
The name for each sequence tab in the timeline panel will tell you exactly how to name your clips!
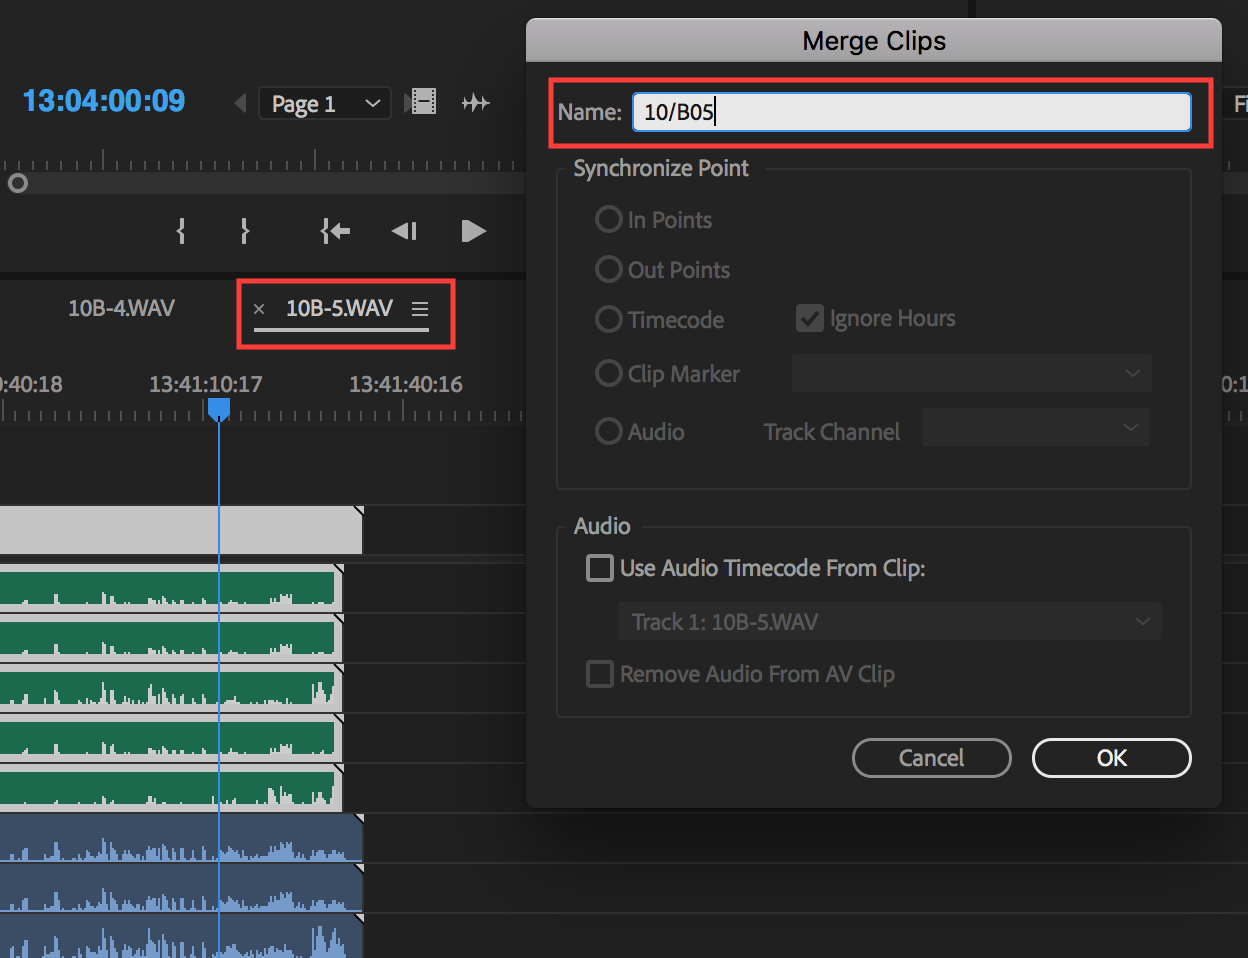
In the above example, I know from the production audio that this clip is 10B take 5, which I’ll write in as “10/B05” to make sure my clips stay in the proper order when sorting by the name column in the bin.
Once you’ve named the clip, hit OK, and you’ll see your new merged clip pop up at the root level of your project window.
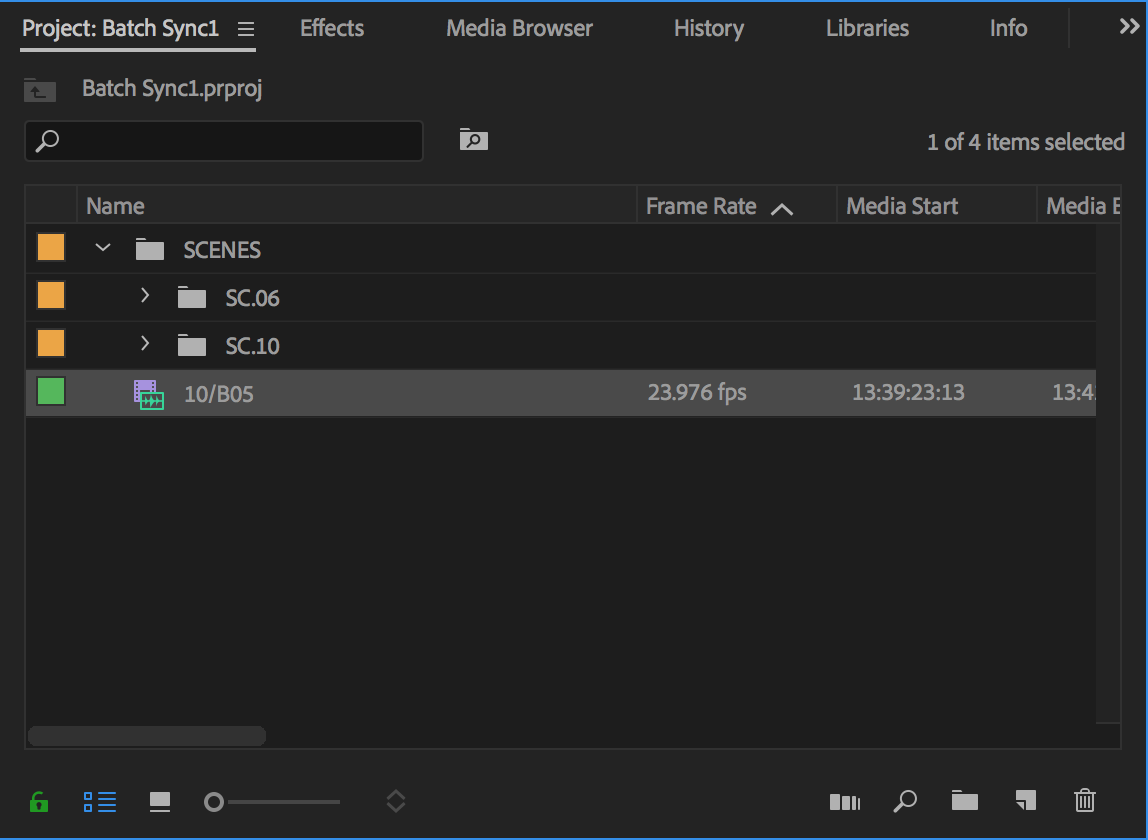
I like to keep my merged clips here while I’m working through the rest of the multi-camera clips, rather than move them back into the proper scene bin. That way I can open up my scene bin in a separate window and compare to make sure I’ve got everything.
Back to the Timeline
Back in the timeline panel, close the sequence you’ve just merged, and move onto the next one, repeating the steps.
The speed of this process might surprise you, especially if you map the Merge Clips command to the keyboard.
Delete the multi-camera clips from your scene bin, and bring in the merged clips for a finished working bin that looks something like this:
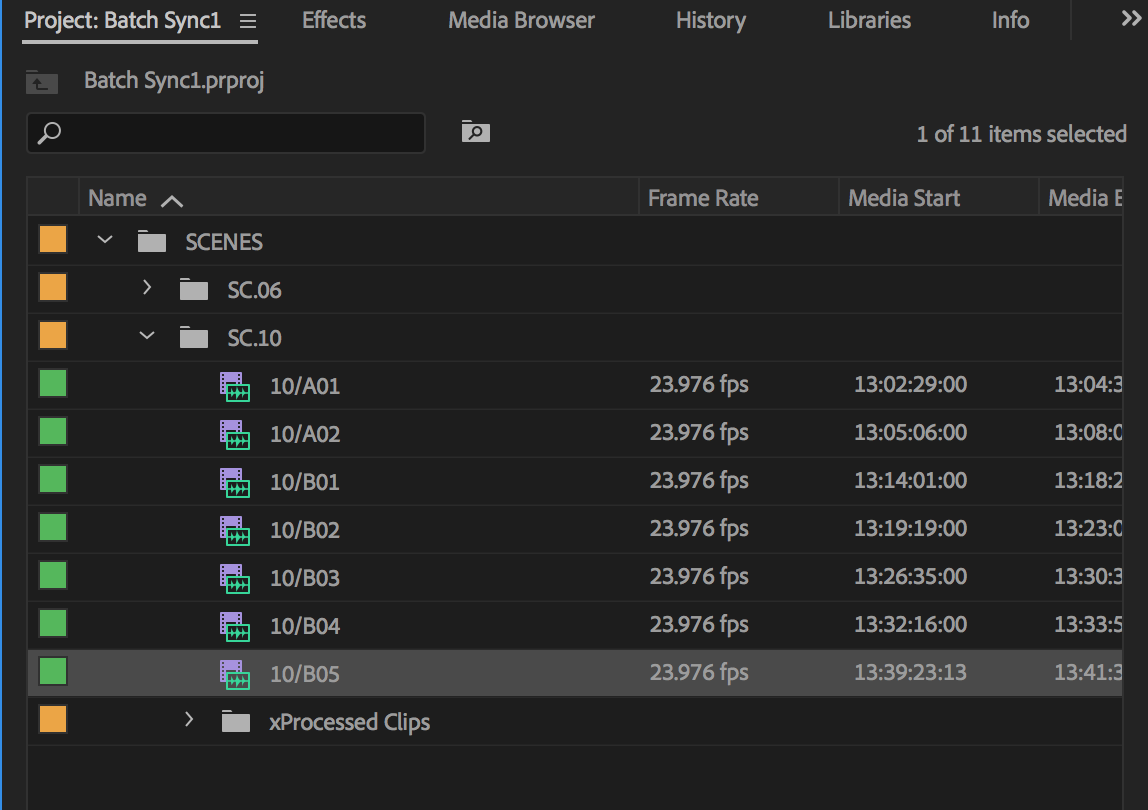
Tip: Adding an “x” to the name of organizational bins will keep them sorted at the bottom.
That’s it!
Repeat the process as needed per scene, or experiment with batching entire day’s worth of footage if you’ve got the hang of it.
Multi-camera source sequences vs merged clips
As promised, let’s wrap this up by discussing the pros and cons of these two valid editing methods so you can make an informed choice the next time you sync audio in Premiere Pro.
Multi-camera clip editing
Multi-camera clips are great when you’re editing multi-camera footage; but on a feature film, there are a couple of gotchas to consider.
First, that yellow box that’s always around your footage in the source monitor may not bother everyone, but it gets old pretty fast for me.
Second, if you’re a frequent laptop editor, then that yellow box means you won’t be able to enter full-screen mode with your source monitor active, which isn’t supported with multi-camera clips. Instead, Premiere Pro will switch over to your program monitor as soon as you enter fullscreen.
If you rely on a full-screen view while watching through takes, that’s a big downside.
And another thing
Another problem I’ve found is that I often end up unintentionally opening multi-camera clips as actual sequences, especially once I start unlinking audio tracks from their synced video tracks to swap out dialogue takes or begin rudimentary sound design.
If you double-click on an unlinked piece of audio from a multi-camera clip in your timeline, instead of loading up into the source monitor, you’ll find yourself in the multi-camera clip’s own timeline instead.
Unlinking your synced audio and video in the timeline (which is imperative for fine-tuning in most edits) poses a problem at the delivery stage as well.
The biggest advantage of cutting with multi-camera clips is that once you’ve locked your edit, you have the ability to “flatten” the clips, which simply replaces the multi-camera sequences you’ve cut into the timeline with their original source clips and it ensures that all of your intended audio tracks make it into your deliverable file.
You can batch this operation by selecting the entire timeline, right-clicking on a clip, and navigating to Multi-Camera > Flatten; however, any audio clips that have been unlinked from their video clips will not flatten.
To flatten these orphaned clips, you have to select them each individually, right-click, navigate to Multi-Camera, first click Enable to re-enable the audio as a multi-camera clip, and then navigate back to the same menu to select Flatten.
For a feature-length project, that can be a lot of tedious work.
Merged clip editing
To put it simply, I like merged clips because they behave like clips. They’re not sequences disguised as clips, they’re just clips (ok, technically they’re compound clips).
But these little compound clips have racked up an incredibly bad rap. Do a Google search and you’ll see posts likening the merged clip edit experience to damnation and hellfire.
Merged clips certainly aren’t perfect and let’s hope Adobe keeps improving them in future releases—but they don’t pose nearly as many problems as rumored once you understand how to work with them.
Here are a few of the most common gripes with merged clips, debunked or explained.
1 – You can’t match frame on merged clips. False.
This was true in the first iterations of merged clips (they were introduced in CS5.5), but it’s not true anymore. As a feature film editor, match frame is by far my most used tool. I simply can’t edit without it.
And I can tell you, it works fine, whether you’re matching back via audio or video.
2 – Merged clips don’t work with Premiere Pro’s proxy workflow. False.
You can use proxies AND merge your clips! The trick is your order of operations.
While you can’t create proxies for or attach proxies to already-merged clips, you can perform either task on your video clips BEFORE you merge them, allowing you to switch between proxy and full resolution media as needed. It’s not perfect, but it works.
3 – Merged clips won’t let you relink your offline media back to your camera originals. False (with a caveat).
When you’re ready to online your project with merged clips, simply pull your media offline and relink it back to the high-resolution media, making all of the appropriate adjustments to your timeline settings.
The only thing to watch out for is that the frame size displayed when hovering over your clip won’t update—it’ll still display your proxy frame size.
If you know you’re going to do your online in Premiere Pro, then I highly suggest using its built-in proxy workflow (see #2 above first) for the most fluid experience.
4 – Merged clips are a headache for post audio delivery. They delete metadata. They don’t work with AAFs. True.
This is a big one and it’s unfortunately mostly true. But I’ve got an extremely simple workaround that’ll take care of it.
For AAFs, Adobe acknowledges that merged clips are not supported. Try to export one without some prep work and you’ll create a big headache for your audio mixer. Sometimes they work and sometimes they don’t.
With OMF exports, Premiere Pro always references the merged clip name for the audio tracks, rather than the audio clip’s original file name.
Label your merged clips smartly, such as by scene and take (described above). Your audio mixer will be able to reference the original production audio as needed quite easily, assuming the production audio is also labeled by scene and take.
That’s one reason that I exclusively label my clips with scene and take information under the “Name” metadata column. I use the description column for more detailed labels, such as OTS, MS, WS, TRACKING SHOT, etc.
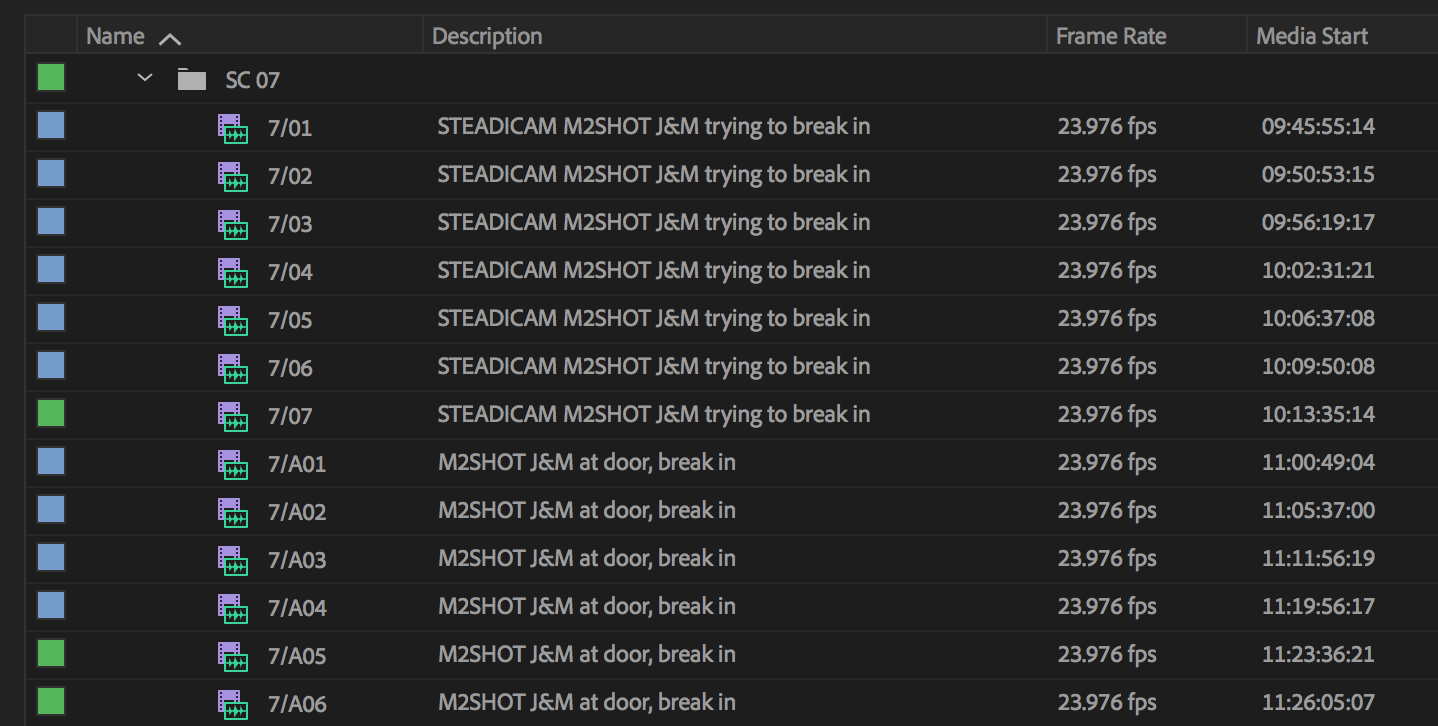
However, if your mixer wants to do a full conform, then having the audio clip file names in the OMF match exactly to your production sound is a huge help.
The simplest possible solution is to ask your post audio mixer if their software can read metadata from an EDL.
If you create an EDL (or two) for just the tracks that contain your production audio (you should always separate out your audio tracks on the timeline before a final delivery, so this should be pretty simple), you can set the EDL preferences to reference the audio clips’ original file names and timecodes, even on merged clips.
If an EDL won’t cut it, then it’s time to “un-merge,” which, believe it or not, is super easy.
When you’re ready to export deliverables for the mix, select your final sequence in the project window and go to File > Export > Final Cut Pro XML.
Tip: If you’d like, you can also duplicate your final sequence in this step, lock all your audio tracks (shift-click on one of the lock icons), then select all (⌘-a) and hit delete to remove your video, giving you an audio-only sequence.
Create a new Premiere Pro project called something like Online_AFF_Export.
Import the XML of your sequence into this new project, and voila!
All of your merged clips have been split back apart into their original components.
Take a look at your metadata in the project window. Make sure to enable the File Path and File Name columns and you’ll see that the original metadata has been restored.
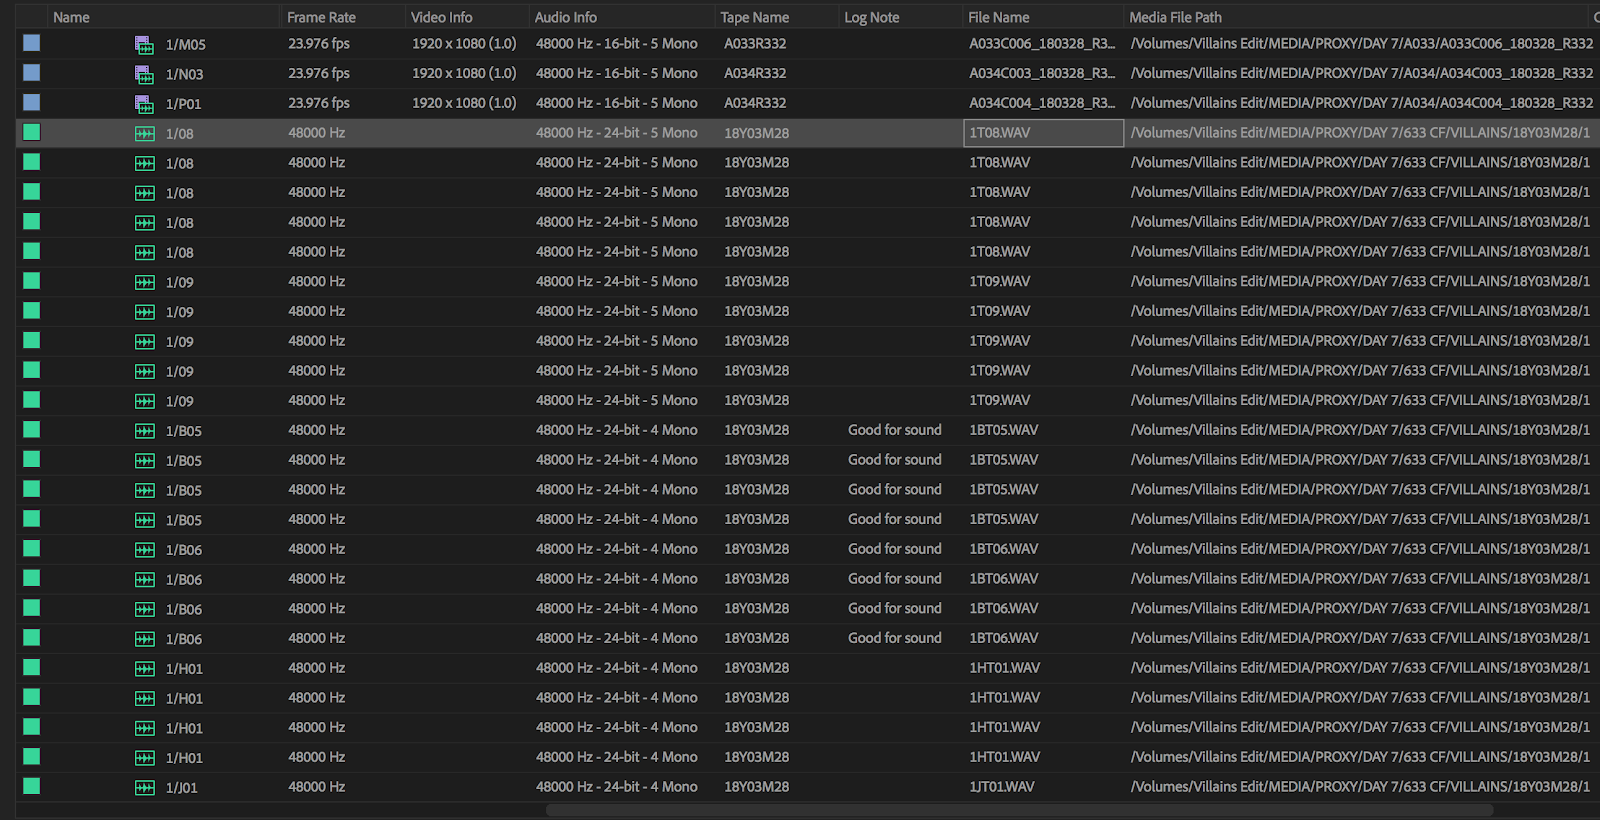
Go ahead and export an AAF or OMF for your post audio mixer. They’ll both work.
If you prefer, you can actually import your XML right back into a clearly labeled bin in your master project, without having to create a new project at all. Just be aware that you’ll end up importing a new set of independent audio and video clips.
This method gets sloppy if you’re not meticulous, so organize things carefully.
(Note: If you’ve worked professionally in FCP 7 in the past, you may remember a similar process involving making independent clips from your merged clips, and then renaming the newly independent audio clips back to their original file names before exporting out an OMF.)
Audio sync in Premiere Pro: the final word
Ultimately, neither merged clips nor multi-camera clips are perfect. For me, merged clips come out with a slight advantage, but you may lean the other way and that’s fine. It all comes down to personal preference.
In a perfect world, I’d love to see audio sync in Premiere Pro extended to merging clips in addition to creating multi-camera sequences.
From there, a better version of the “flatten” command or an officially supported way to “un-merge” clips right from within Premiere Pro would be very welcome. But for now, the process outlined in this article does the job.
What do you think? Does this method of syncing work for you? Let us know in the comments.
Appendix: multi-cam source sequence menu
As promised, here’s the low-down on the options in this menu.
Synchronize Point
The Synchronize Point tells Premiere Pro how to sync up your clips. If your media has jam-synced or matching timecode, then select timecode. To sync production sound to an in-camera scratch track, select Audio and set your Track Channel to the default “1.” This tells Premiere Pro that this is the primary track to use for matching audio.
Sequence Preset
Generally, you should leave sequence settings on Automatic, which will allow Premiere Pro to match the settings of your newly created multi-camera sequences to your source clips.
Move source clips to Processed Clips bin
This does just as it claims, which helps keep your project tidy! Once you’ve successfully created your synced clips, you won’t need the raw audio and video cluttering up your working bins.
Offset Audio
Leave this option off by default, but return to it if you notice a sync drift in footage you’re syncing via timecode.
Open up a clip with a drift in a timeline (you’ll learn how to do this below) and shift the audio until it’s lined up properly while counting the number of frames you’ve moved it by. You can then re-sync clips with a drift and set the correct offset here.
Audio
You can leave the default setting for both options, but here’s what they mean:.
Setting Sequence Settings to Camera 1 tells Premiere Pro that you want to use the audio track associated with camera 1 as your primary audio; however, this setting is overridden, however, if you’re using an audio-only clip in combination with video clips (like we’re doing here).
When you use an audio-only clip (e.g. your production sound) Premiere Pro will place that audio first in the synced timelines (above your camera audio, which will be muted).
Setting Audio Channels Preset to Automatic is a good rule of thumb as well.
The setting determines how the multi-camera sequence’s audio tracks are mapped. This includes the type and number of audio tracks that are active when the source sequence is nested in the edit.
“Automatic” reads the audio type of the first clip and uses the same mapping setup.
Video clip name and camera names
Lastly, consider the two options that automate the names of your soon to be created multi-camera clips.
In the dropdown menu at the top of the dialogue box, you can choose between Video Clip Name, Audio Clip Name, or Custom. The blank box to the right allows you to add a custom appendage to your clip names.
If your production audio is named according to scene and take, choose Audio Clip Name as your naming convention.
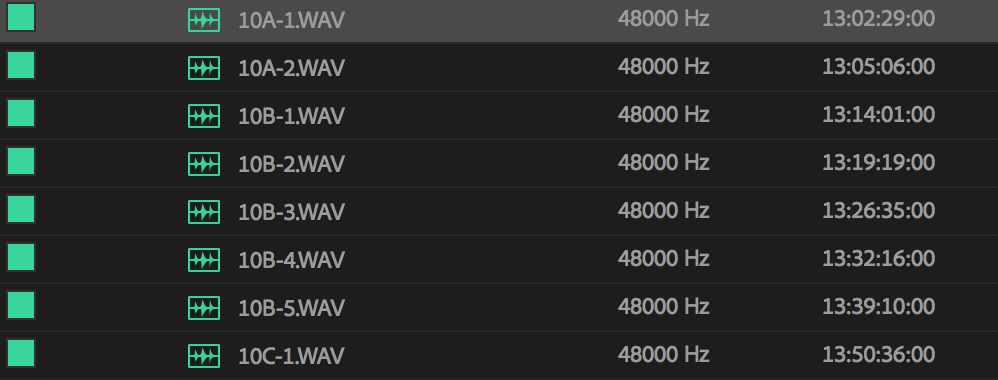
We’ll use this information a little bit later to help speed up naming our newly synced clips.
Finally, at the bottom of the dialogue box, I suggest choosing Use Clip Names. That way, you’ll be able to easily reference your source clips if any sync problem arises. The media in your multi-camera sequences will retain its original project name.

