Over the years, Blackmagic’s DaVinci Resolve has matured into a robust and versatile grading platform, boasting hundreds of tools for manipulating and refining motion images. But within this vast ecosystem, most of us get comfortable with a dozen or so tools that work for us, and the rest go largely unused.
This isn’t necessarily a bad thing — having a handful of “go-tos” you know well is critical to good color work. But if we never branch out, we never give ourselves the opportunity to find the tools that work best for us.
In this article, we’re going to take a look at five under-utilized tools in Resolve that can improve both the quality and the efficiency of your grades.
Contents
The offset wheel
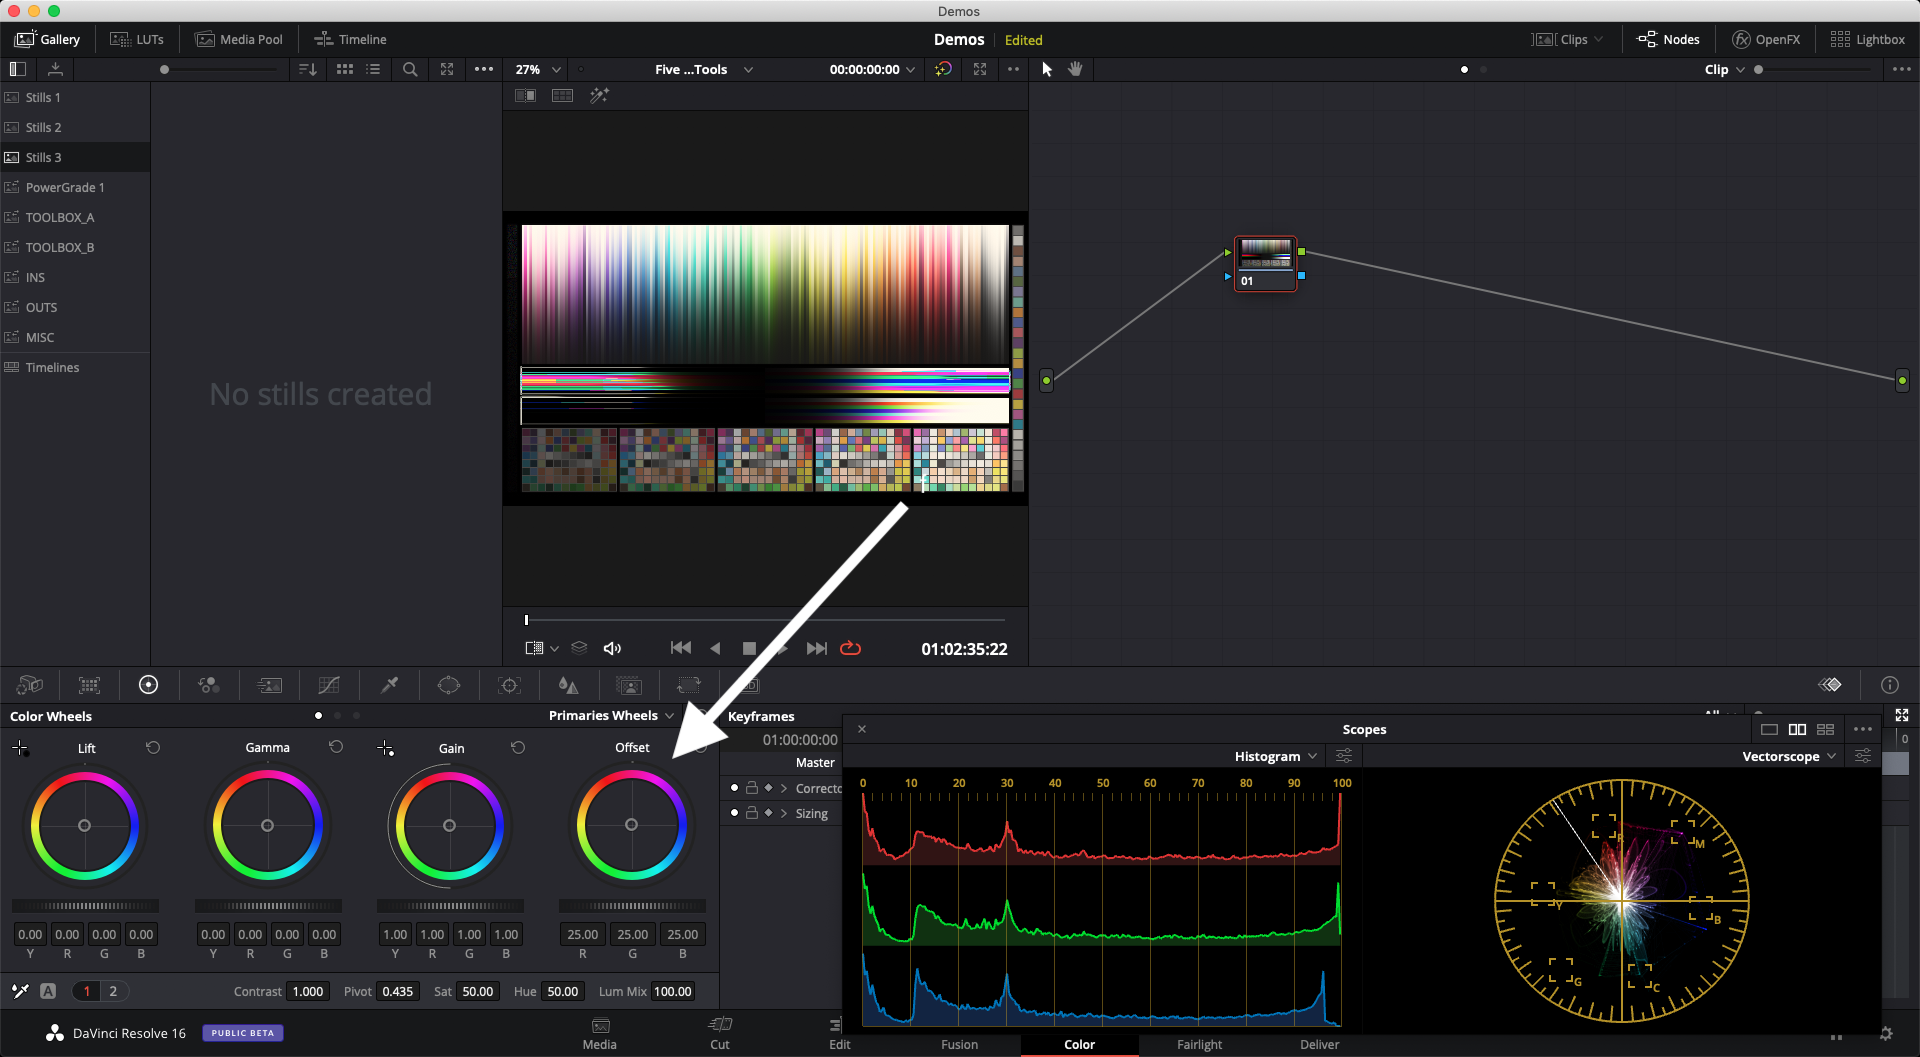
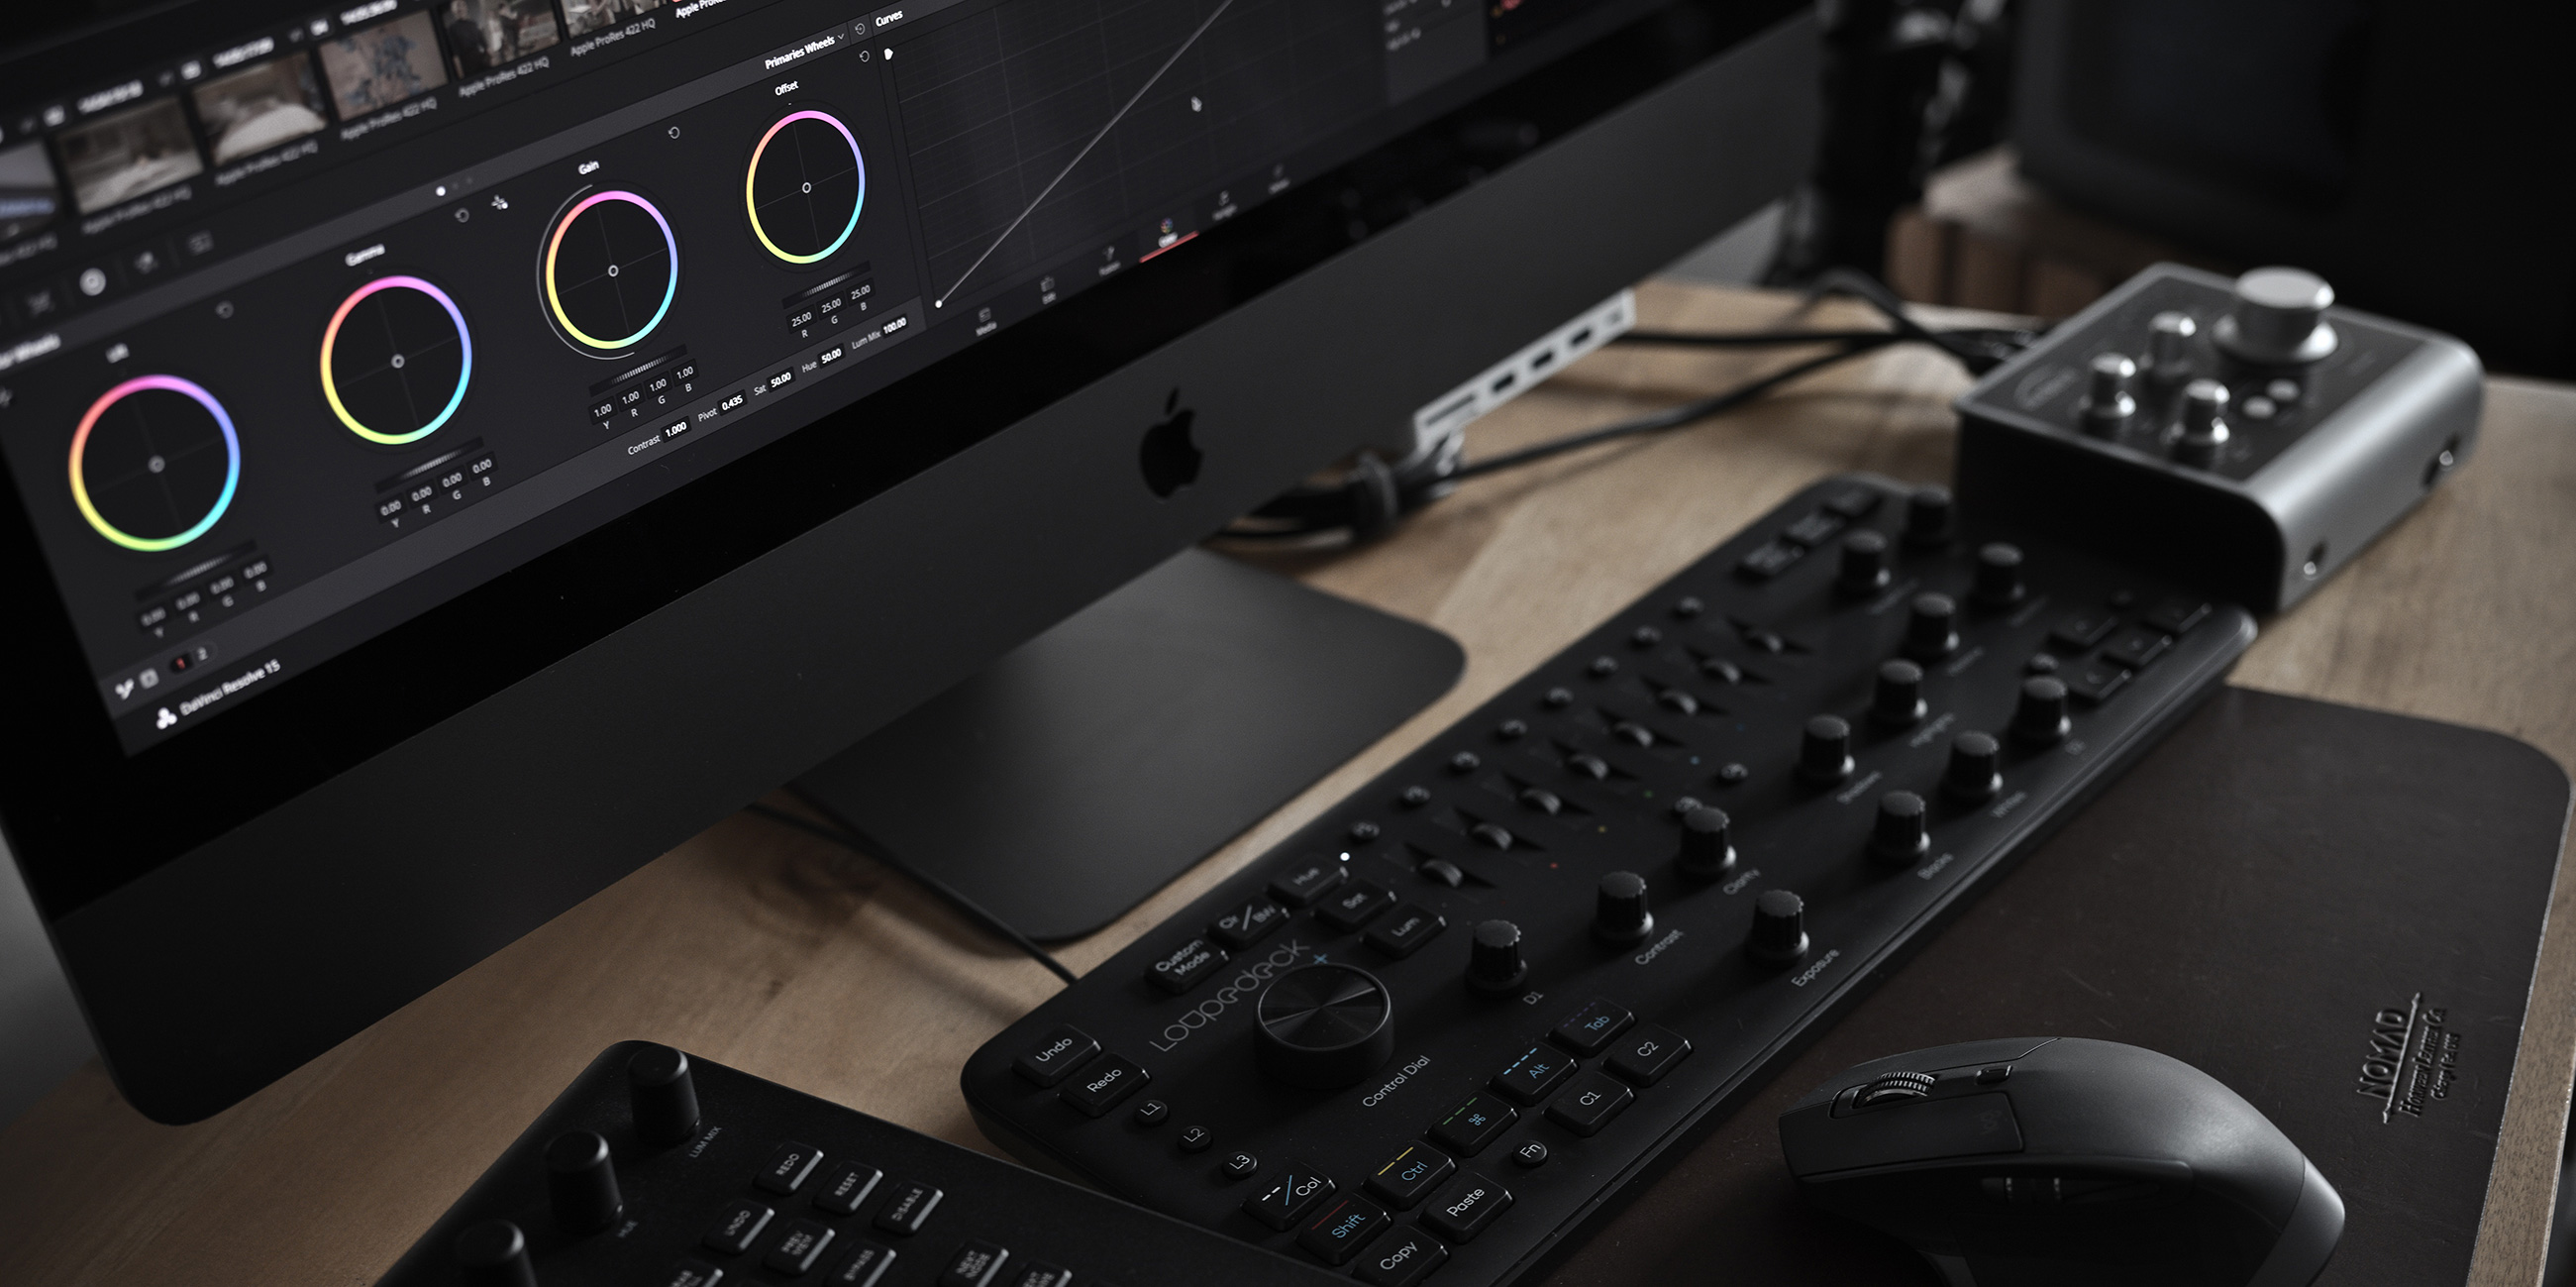
This is the rightmost of the four main color wheels, and represents the most basic operation you can perform on an image: uniformly raising or lowering the signal. There’s great power in this simplicity — it’s efficient, clean, consistent, and yields pleasing, naturalistic visual results. There are tons of applications for this tool, but my two favorites are:
Lens-like exposure shifts
In any log space (Cineon, Arri LogC, RedLog3G10, etc), adjusting the offset control approximates the physical opening or closing of a lens’ aperture blades to admit more or less light. This allows you to work and think in terms of t-stops and lighting ratios, which is a much more cinematic approach than adjusting lift, gamma, and gain.
Color balance adjustments
In any color grade, a good rule of thumb is to accomplish your goals with the simplest, broadest possible tool. For matching and balancing, there’s no simpler approach than adjusting the offset of your individual RGB channels. These individual channel adjustments are sometimes referred to as printer lights, a term dating back to the days of color timers, who used to grade entire films with only offsets!
The next time you’re in a log workflow, try making offset adjustments the foundation of your grade. You’ll be surprised how far you can take things before needing to reach for another knob!
Lum-only qualifier
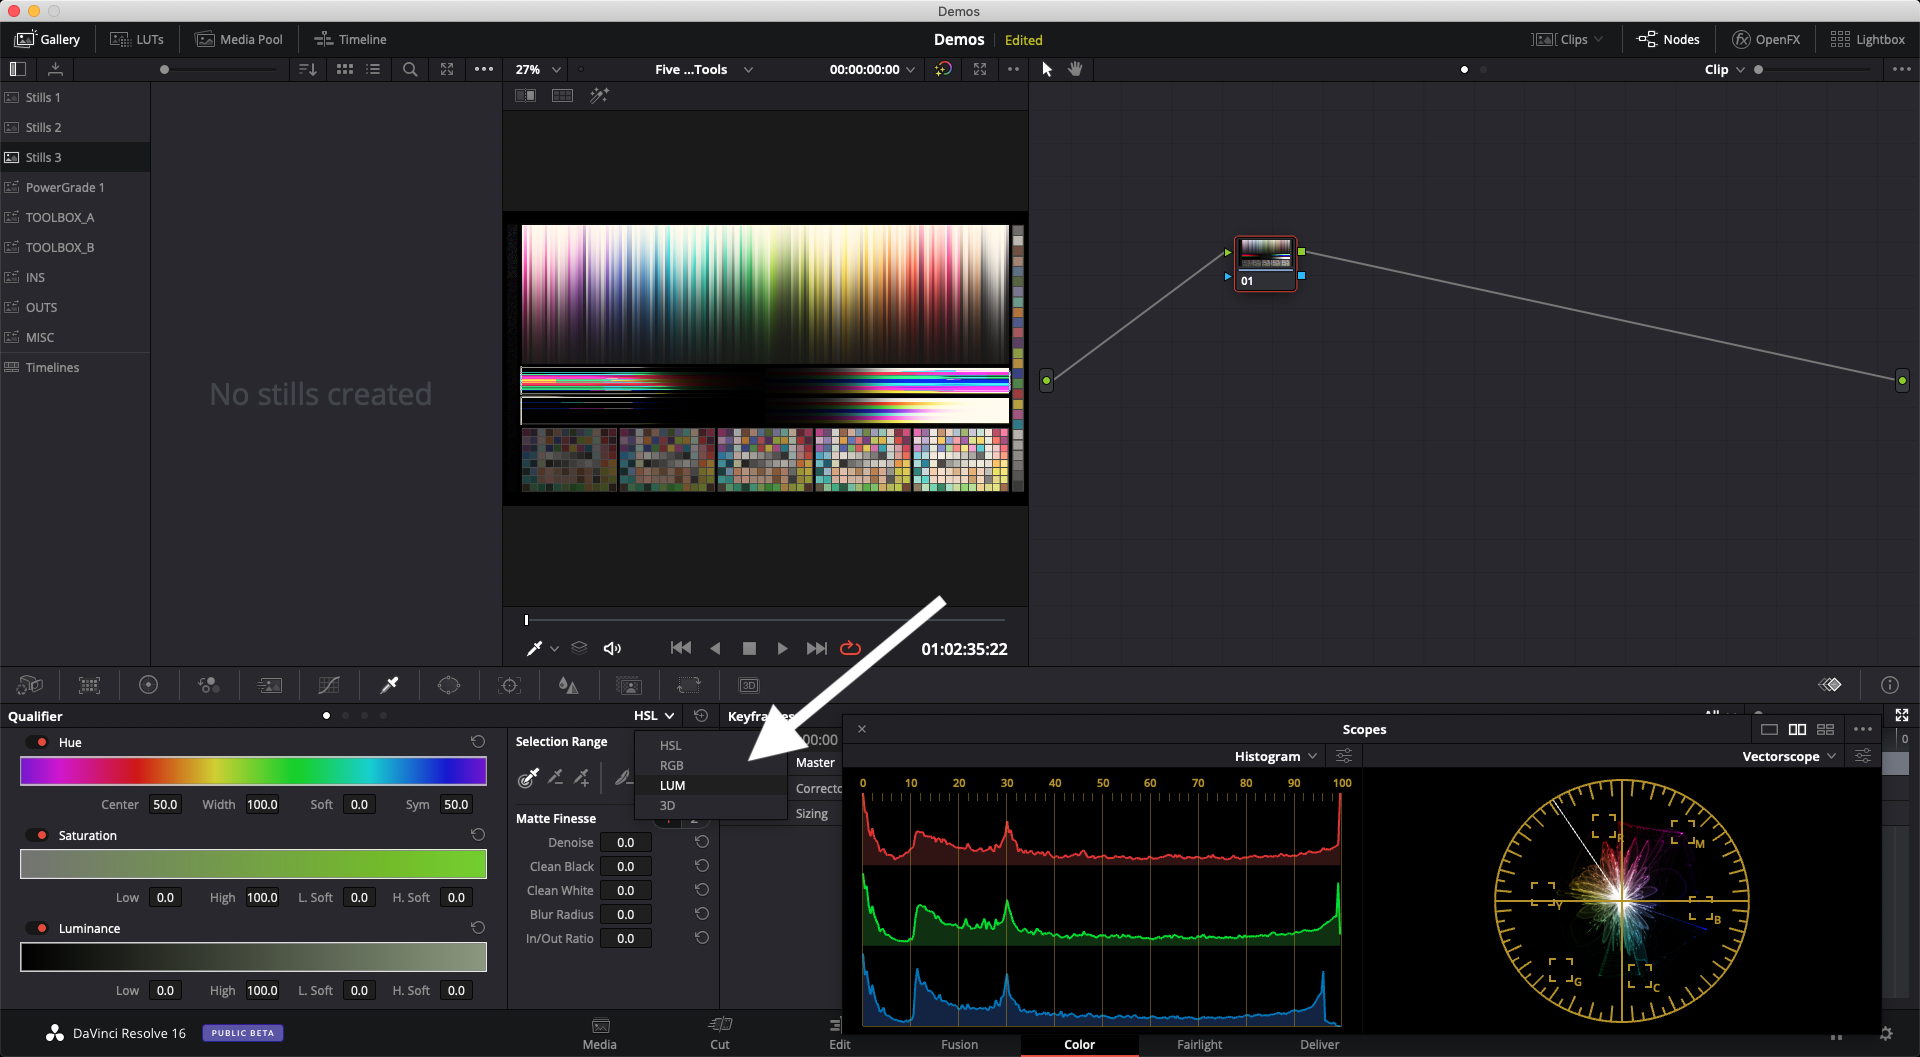
Many Resolve users are familiar with the standard HSL (hue, saturation, luminance) qualifier, but few know that you’ll usually get cleaner keys by qualifying for 1-2 parameters instead of all three.
Pulling keys from the luminance channel only will virtually always produce the cleanest results, because this channel tends to have the least amount of compression, noise, and artifacting. The next time you’re trying to qualify something, try switching the HSL drop-down to LUM, and see if you can isolate your target region without saturation or hue parameters.
Another great use for the lum-only qualifier comes when you have a tracked circular window on a subject framed against a bright background. It’s very easy in this scenario to get a “halo” at the edge of your window that can’t quite be subdued. The fix is to use your lum-only qualifier to qualify everything below the level of the bright background — this will “flag” the adjustment off of the background, perfectly concealing the movement of the window.
Key page
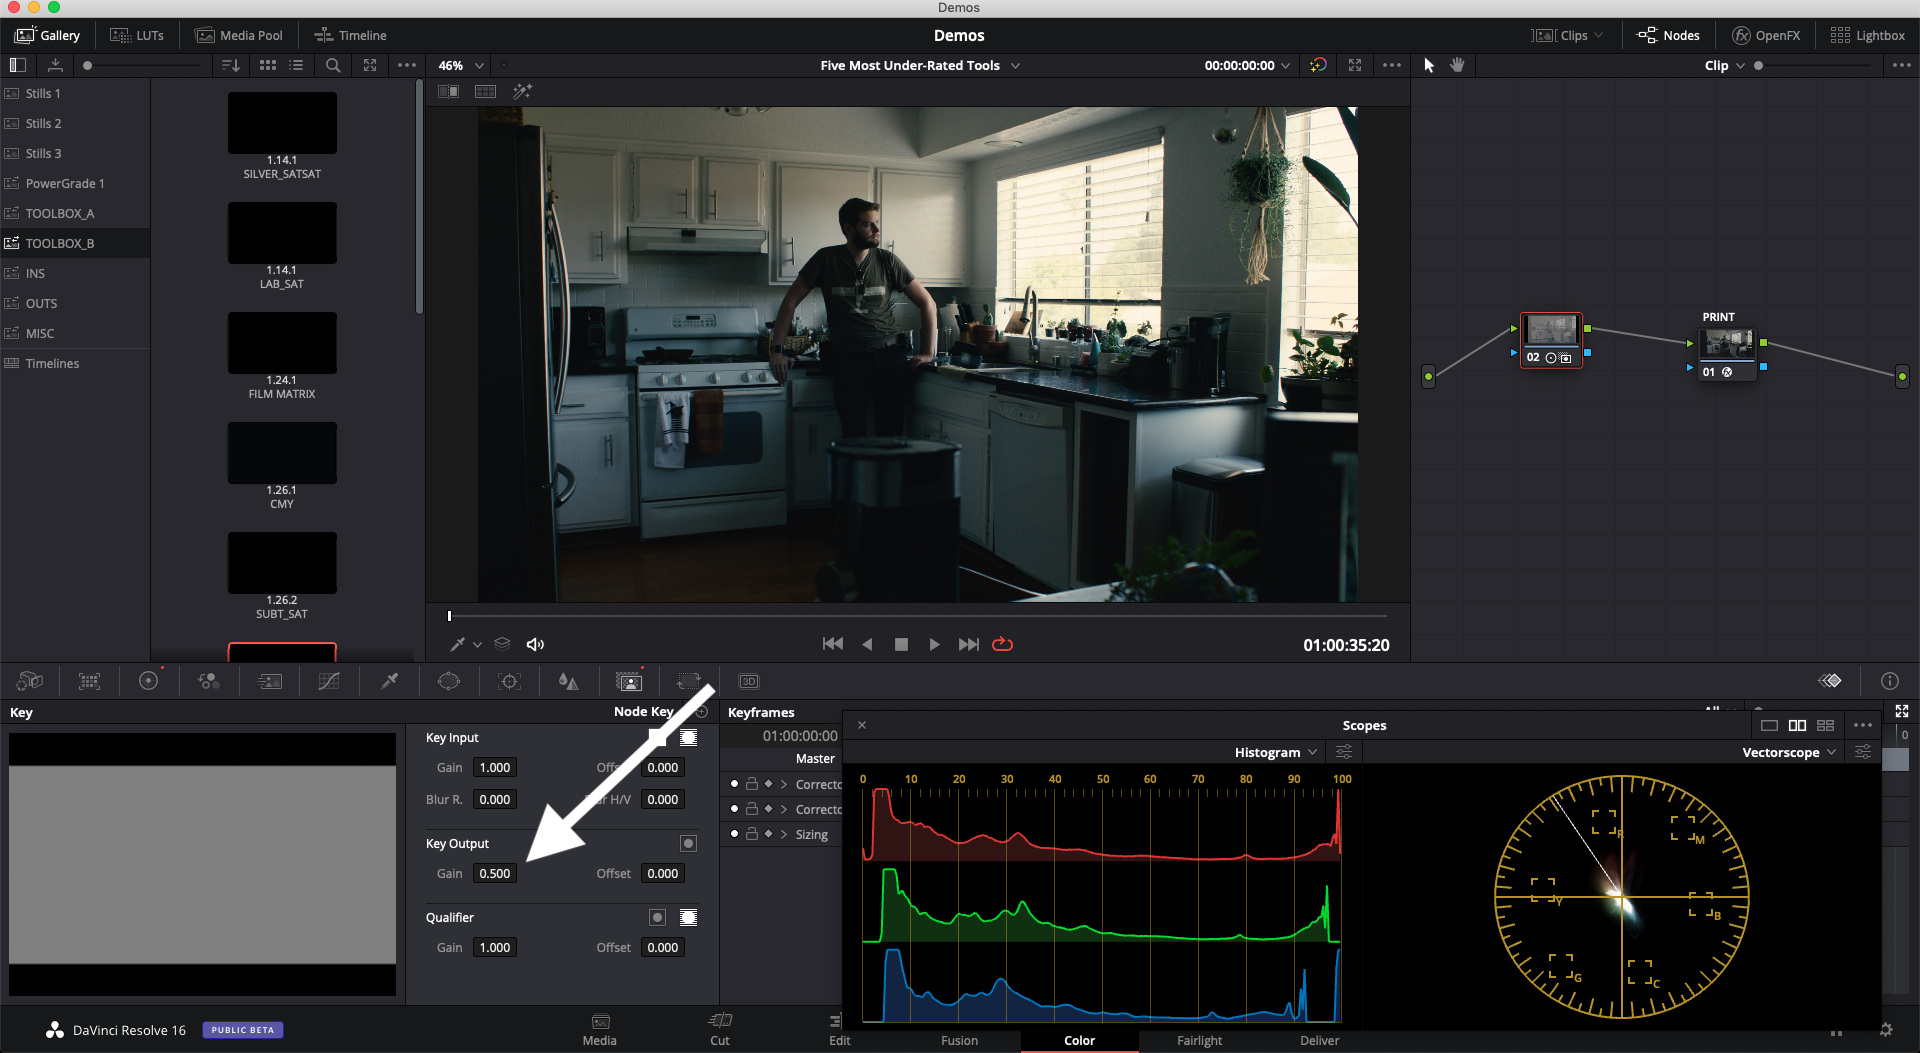
Most of us don’t have much reason to open the key page — or so we think.
Sometimes you’ll feel your way to an adjustment or look that’s exactly what you want, but it’s simply too strong. The ideal solution here is to uniformly reduce the effects of your node, rather than to have to feel your way to a new sweet spot. This can be accomplished with the Key page, by adjusting the Key Output Gain. Try setting the value to .5, then adjust from there.
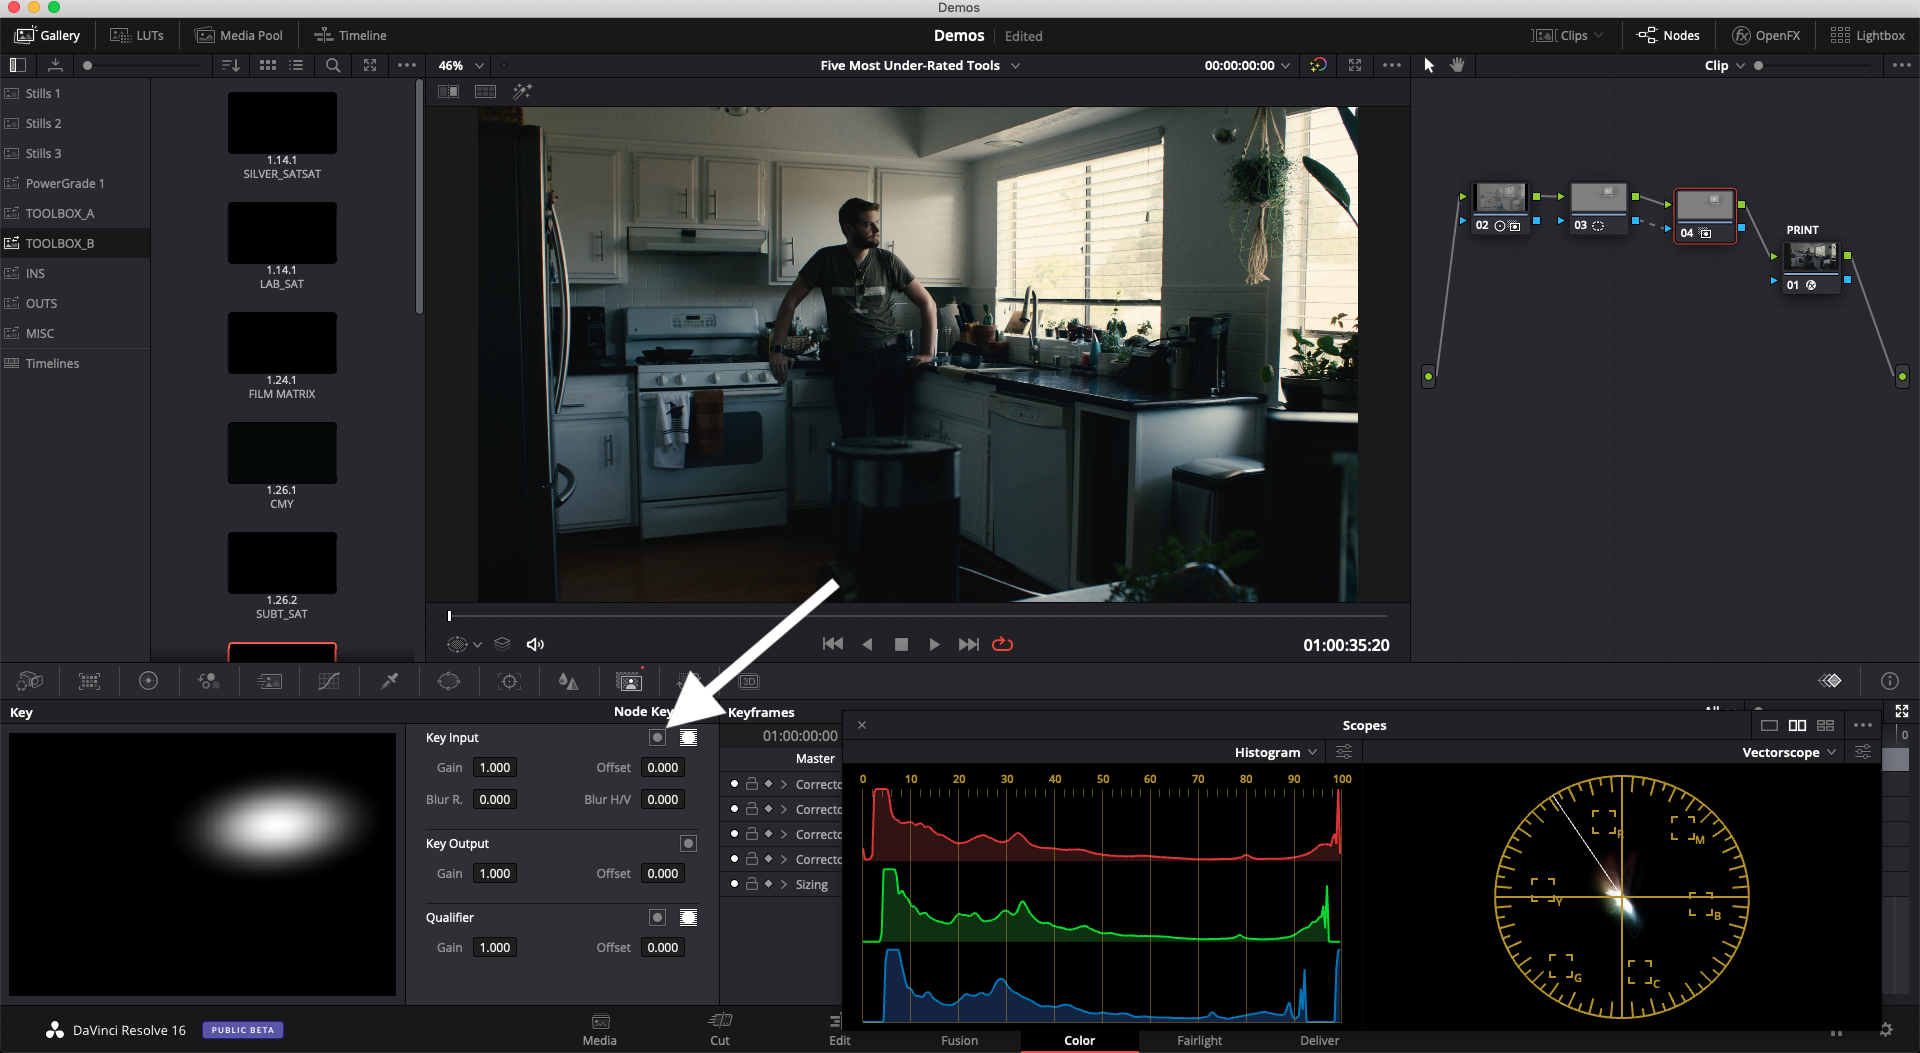
Ever wanted to continue adjusting a windowed or qualified region in a brand new node? You can set this up on the key page as well, by adding an outside node and then inverting the Key Input.
Channel splitter node
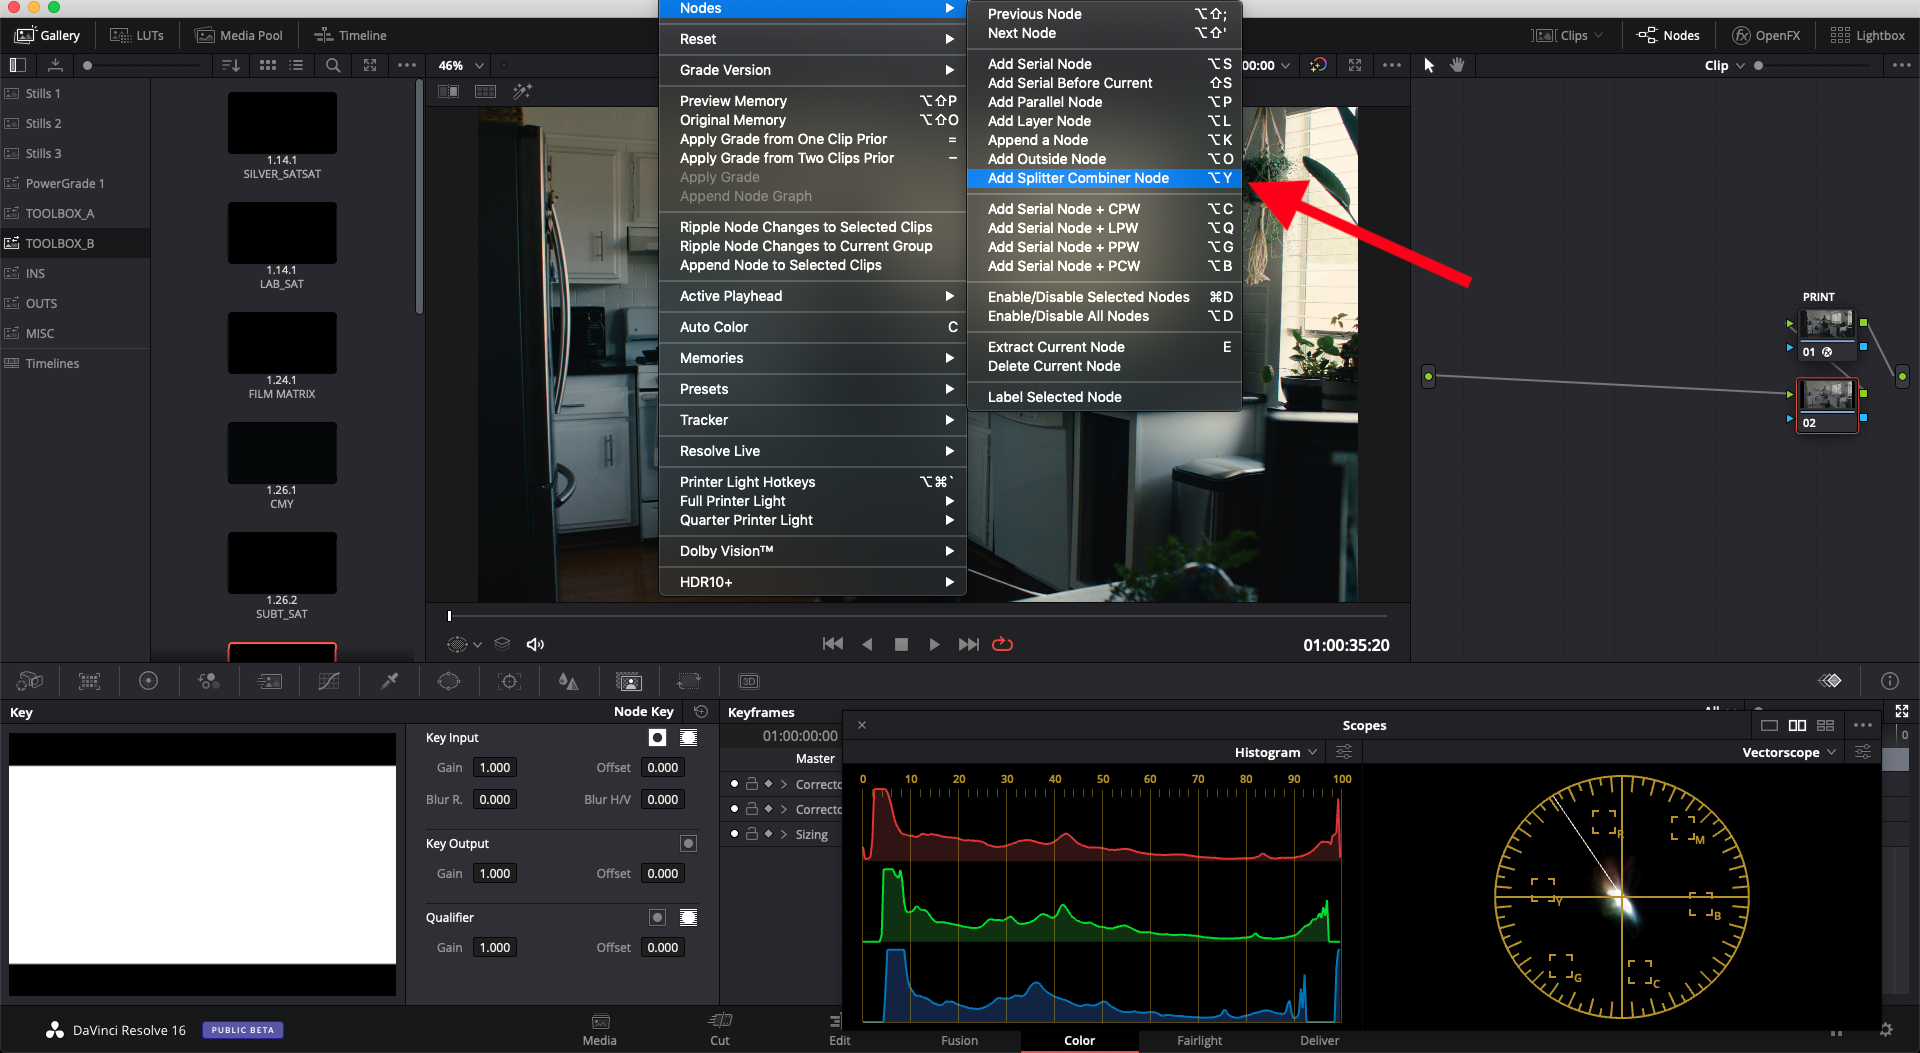
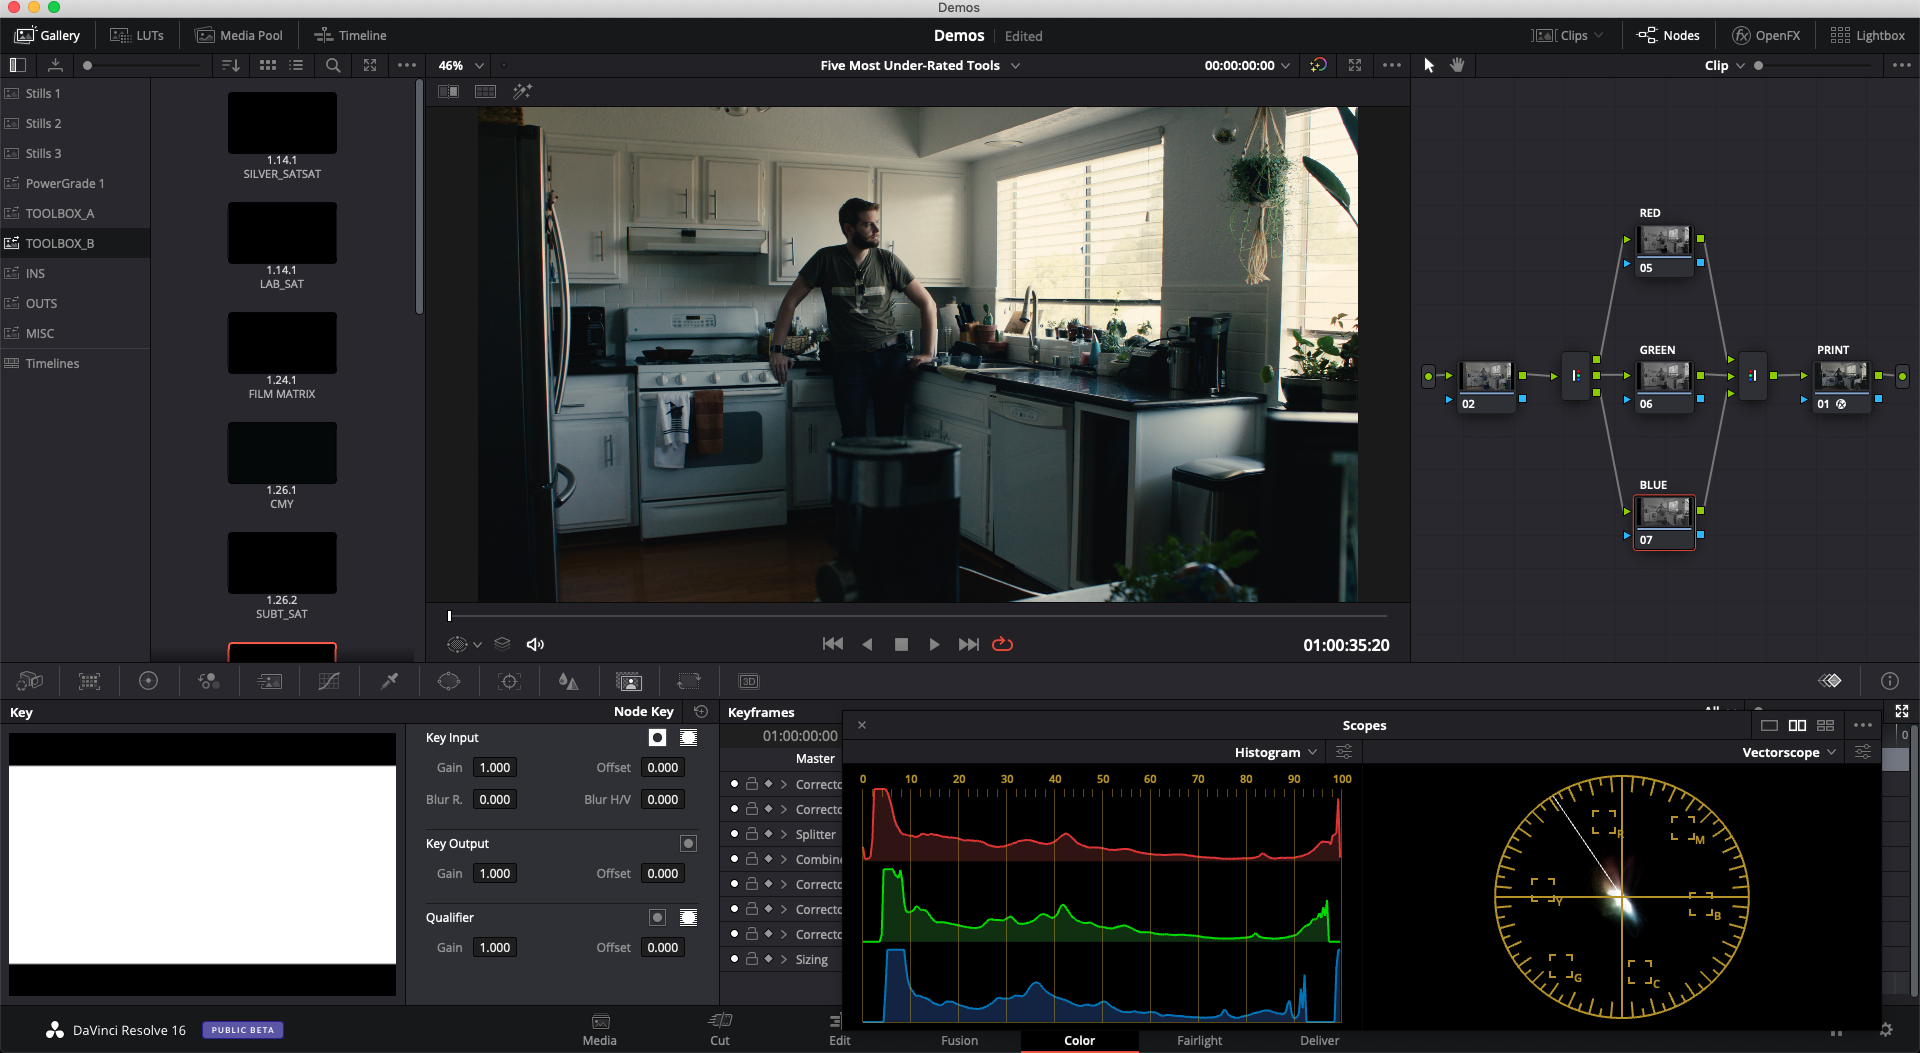
A channel splitter creates a stacked trio of nodes representing the image’s red, green, and blue channels respectively. This gives you a highly visual and intuitive way of manipulating your individual channels, particularly in combination with a control surface, with which you can balance individual channels without getting lost in color ball-driven adjustments.
This is a great technique for balancing or matching a tough shot, as well for intuitively finding a look. The individual R, G, and B nodes can be modified using the offset or gain wheels, or with any other tool. In particular, it can be very helpful to apply noise reduction to a single channel, rather than all three. Noise is often more prevalent in a particular channel, and can be cleaned up more naturally by attacking that channel directly.
Curves
We’ve saved the best for last! Resolve’s curves tools would be my desert island pick, simply because of their versatility. A lot of us have some familiarity with curves, but most aren’t taking nearly full advantage of them. Here are some of the most useful tools within the set, along with ideas on how to incorporate them into your workflows.
Hue vs Sat
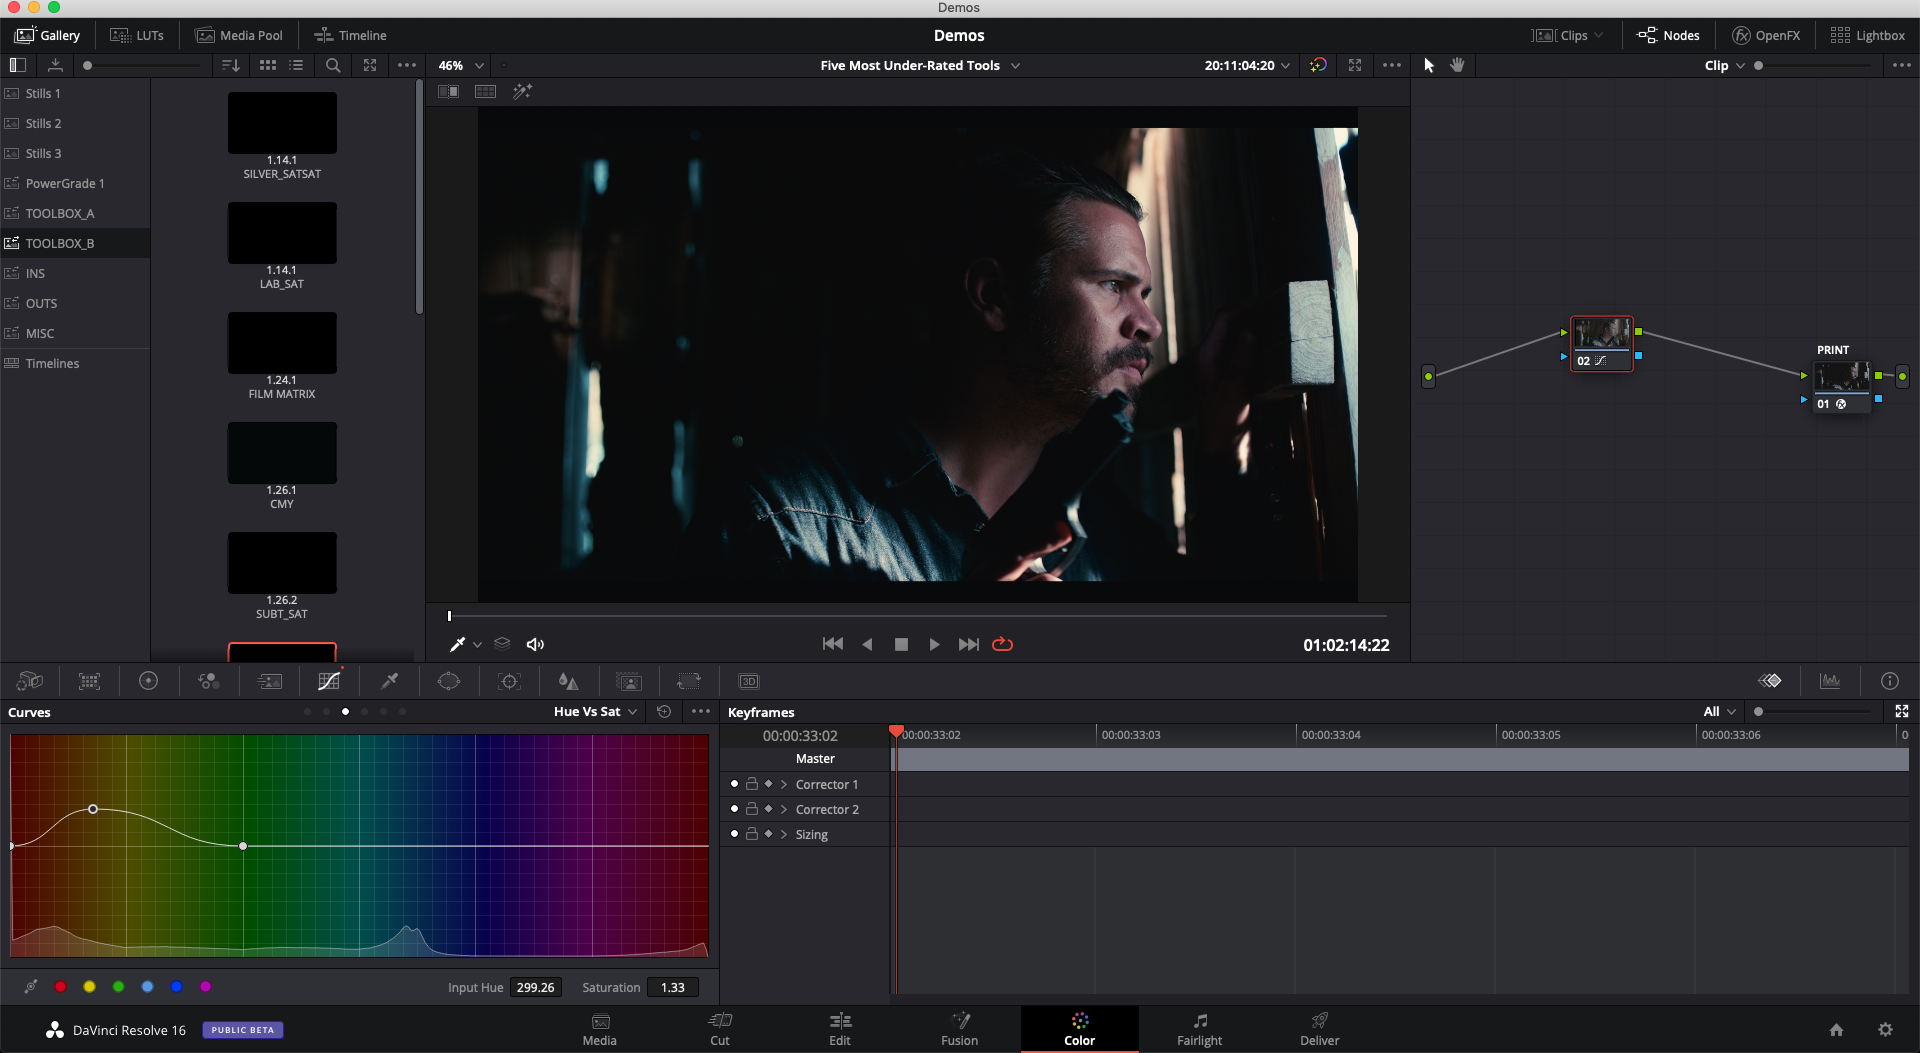
This tool allows you to saturate or desaturate a selected range of hues, and it’s faster than pulling an HSL key. Use the eyedropper to sample your desired range, then gently pull the curve up or down to saturate or desaturate. Here are a few example usages:
- Selecting and boosting the yellow-red region to increase skin saturation
- Decreasing the saturation of sky, grass, or another distracting element in your shot
As with all curves tools, remember to make your adjustment with as few control points as possible, and aim for soft, gradually sloping shapes. This will ensure clean, naturalistic results.
Hue vs Hue
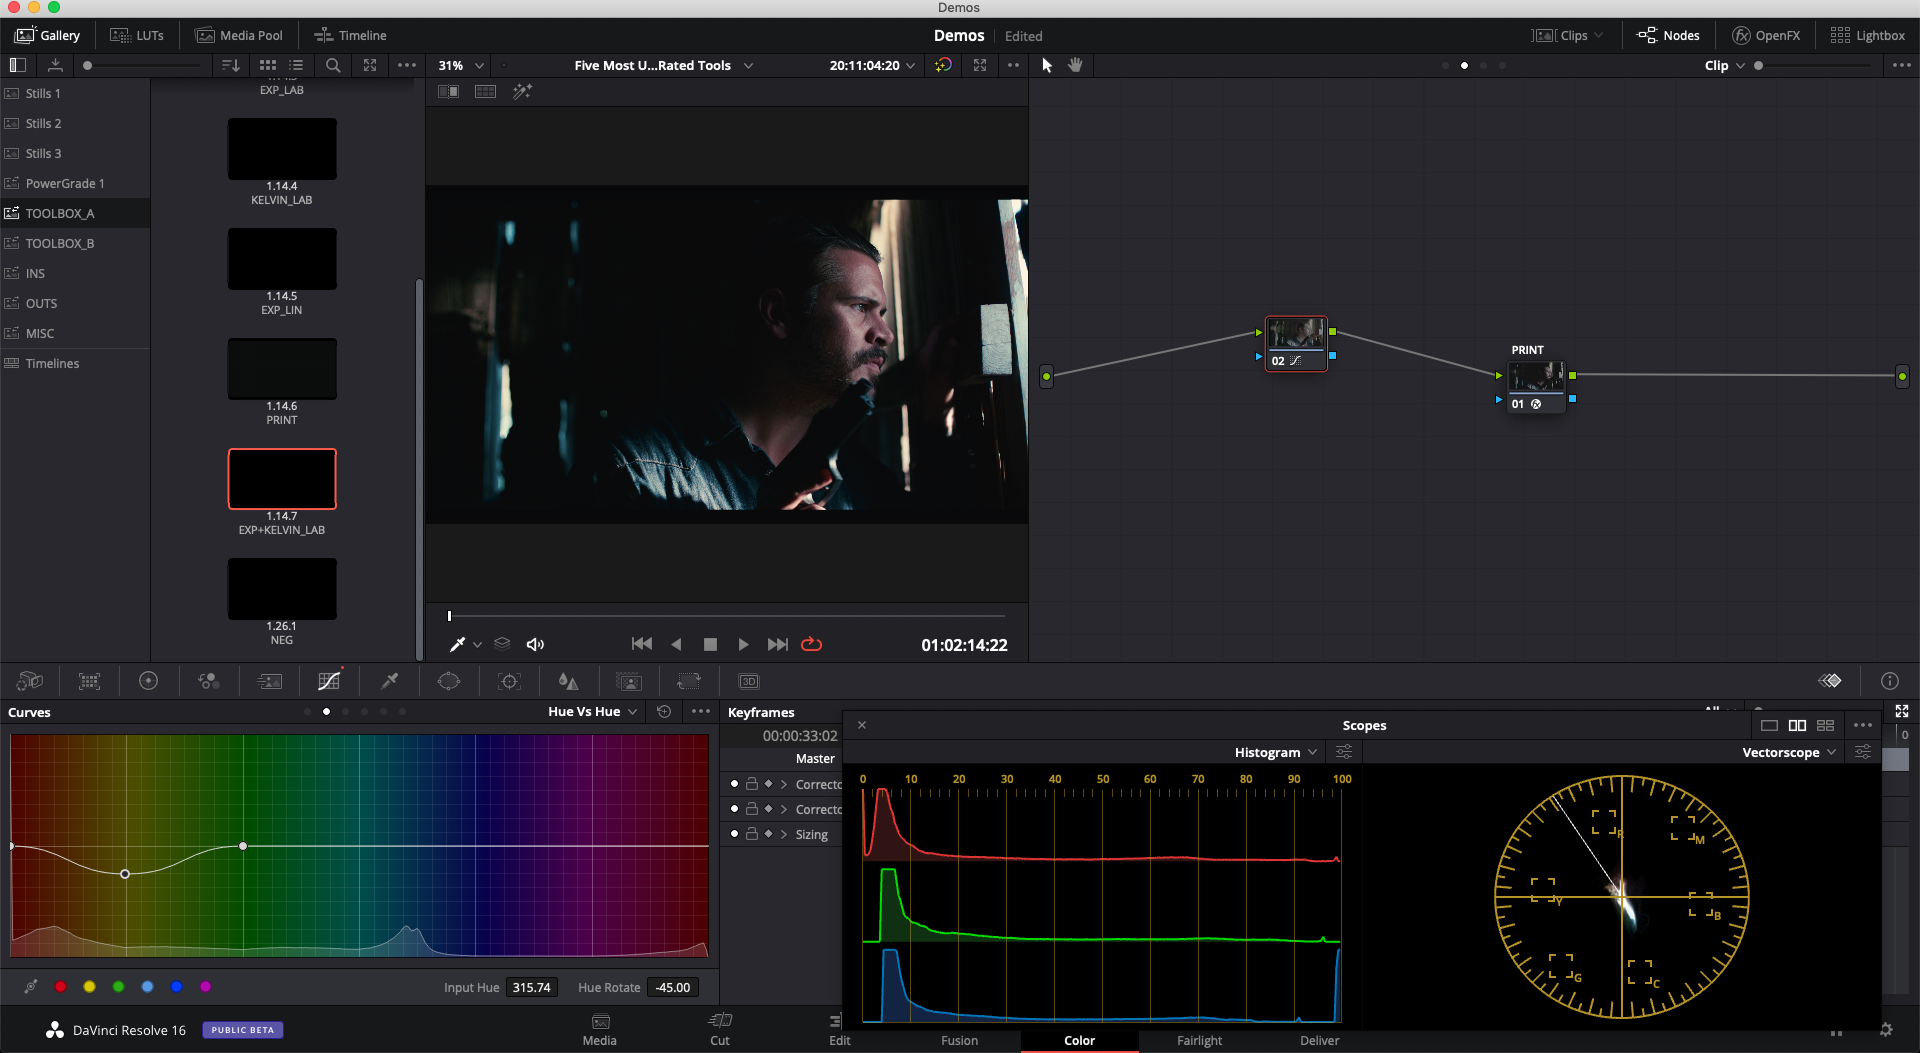
Similar to the Hue vs Sat curve, Hue vs Hue lets you make adjustments to hue rather than saturation. You’ll find these two often work hand in hand, because hue rotations have a secondary effect on perceived saturation. For example, I might use hue vs hue to rotate a yellowish skin color a bit redder, but the new color will likely need to be desaturated a bit to compensate for this purer, more primary hue. The inverse is true as well — when you rotate hue away from a primary color, perceived saturation will often drop, so you may want to re-saturate.
Lum vs Sat
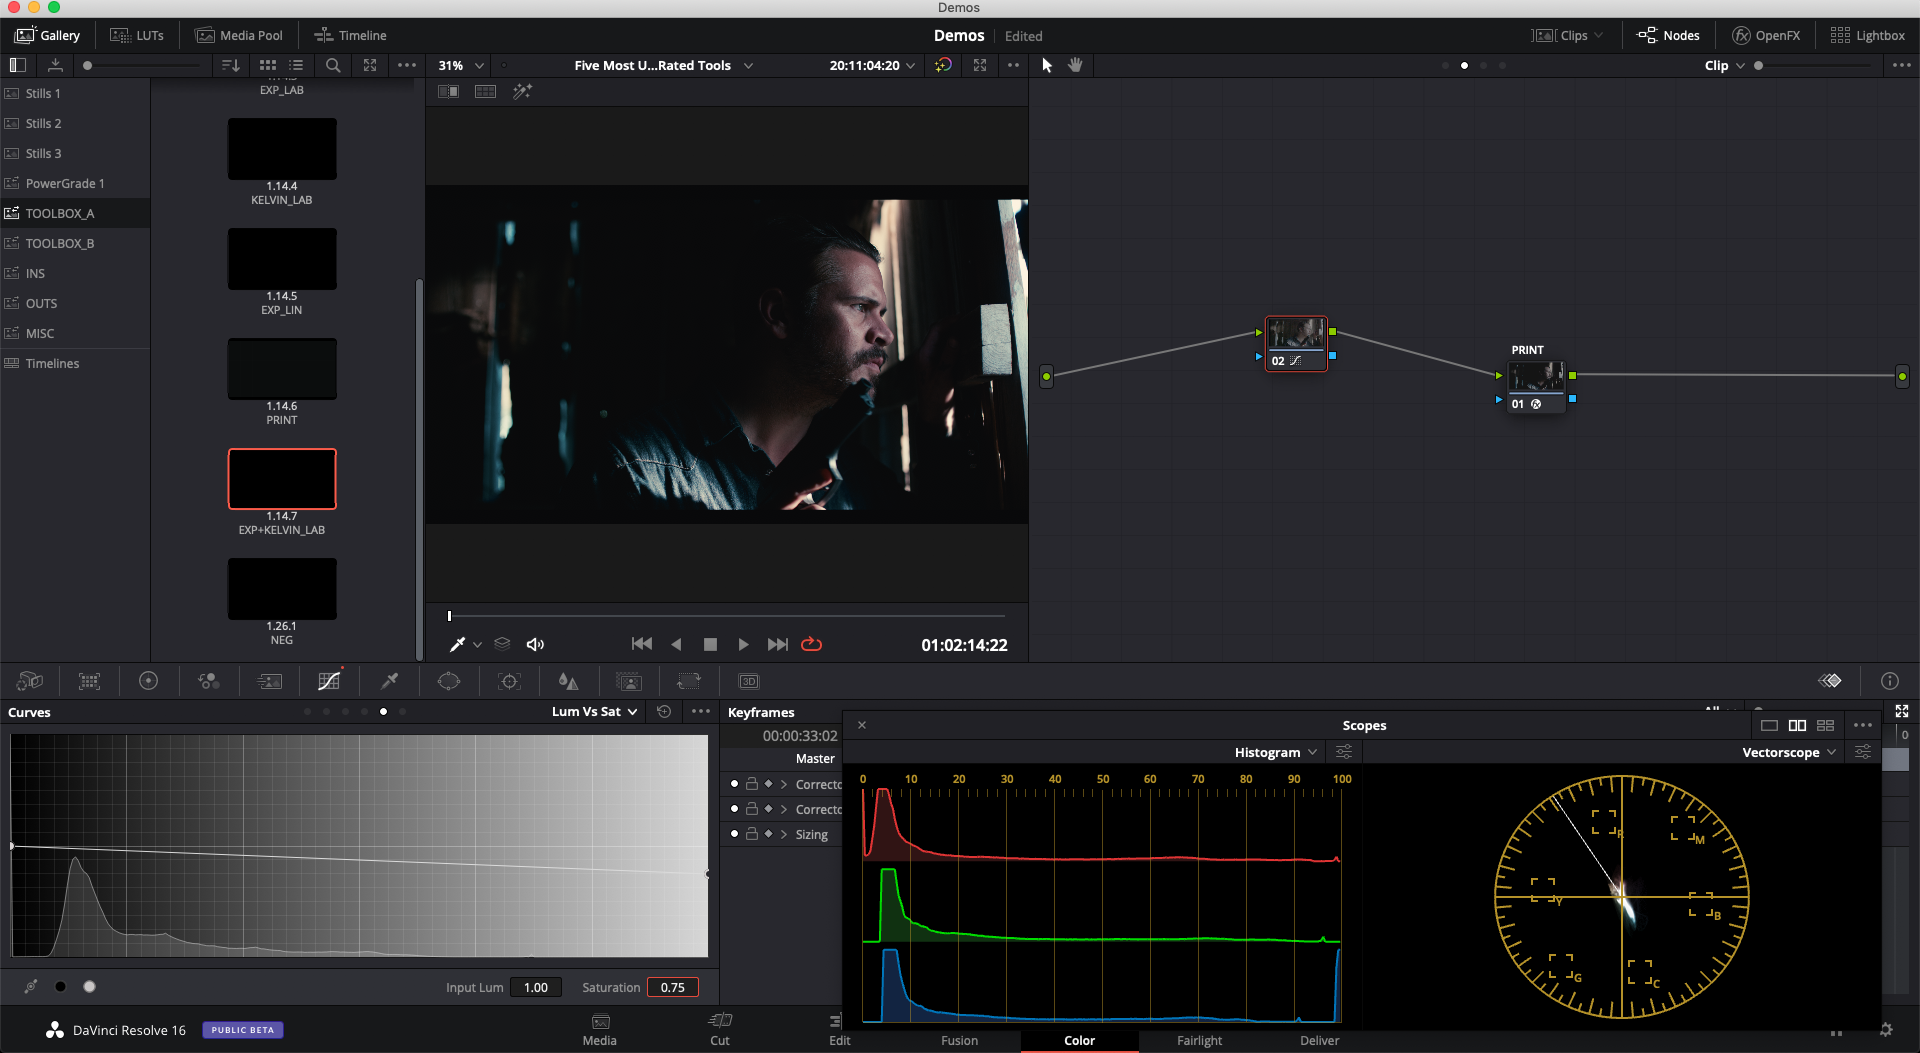
Lum vs Sat offers a great alternative to the primary saturation control, which can easily get “video-y”.
A more filmic way of introducing and removing saturation is to skew the adjustment toward the bottom and top of the image respectively. To introduce saturation, try raising the leftmost control point of Lum vs Sat — this will add saturation in the darker regions of the image more than the top, similar to the response of film negative.
To employ this concept for desaturation, simply do the opposite — lower the rightmost control point, subtracting color from the brighter regions of the shot.
Sat vs Sat
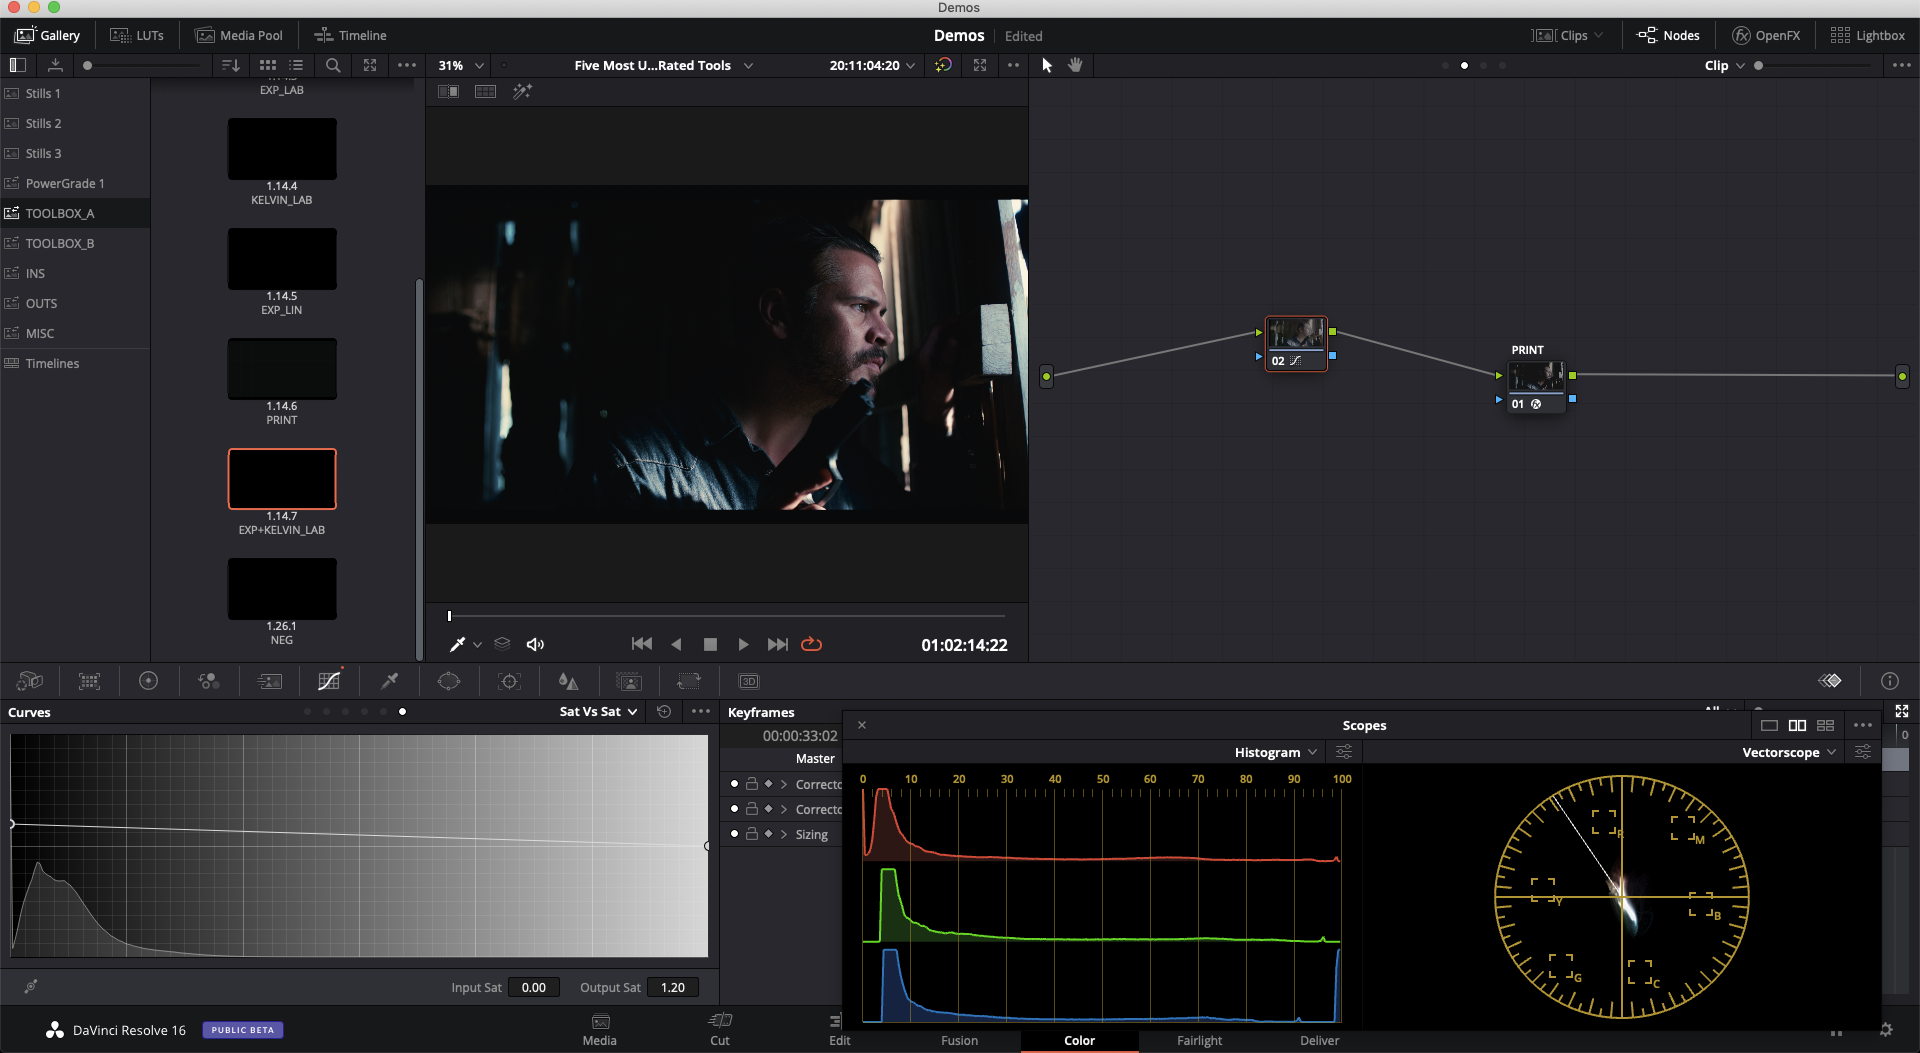
Sat vs Sat is another great curve tool for manipulating perceived colorfulness in your images. It can be particularly useful when you need to reduce saturation, but want to keep the image as vibrant as possible. Slowly lower the rightmost control point — this will desaturate only the most saturated colors, without affecting the rest of the shot.
Another useful technique within Sat vs Sat is to raise the leftmost control point to increase color separation, without affecting colors that are already highly saturated.
You can achieve similar results using the built-in Color Boost control, but unlike Sat vs Sat, Color Boost has a built-in sharpening/softening function that may or may not be right for your image, which is why I prefer the Sat vs Sat approach.
Custom
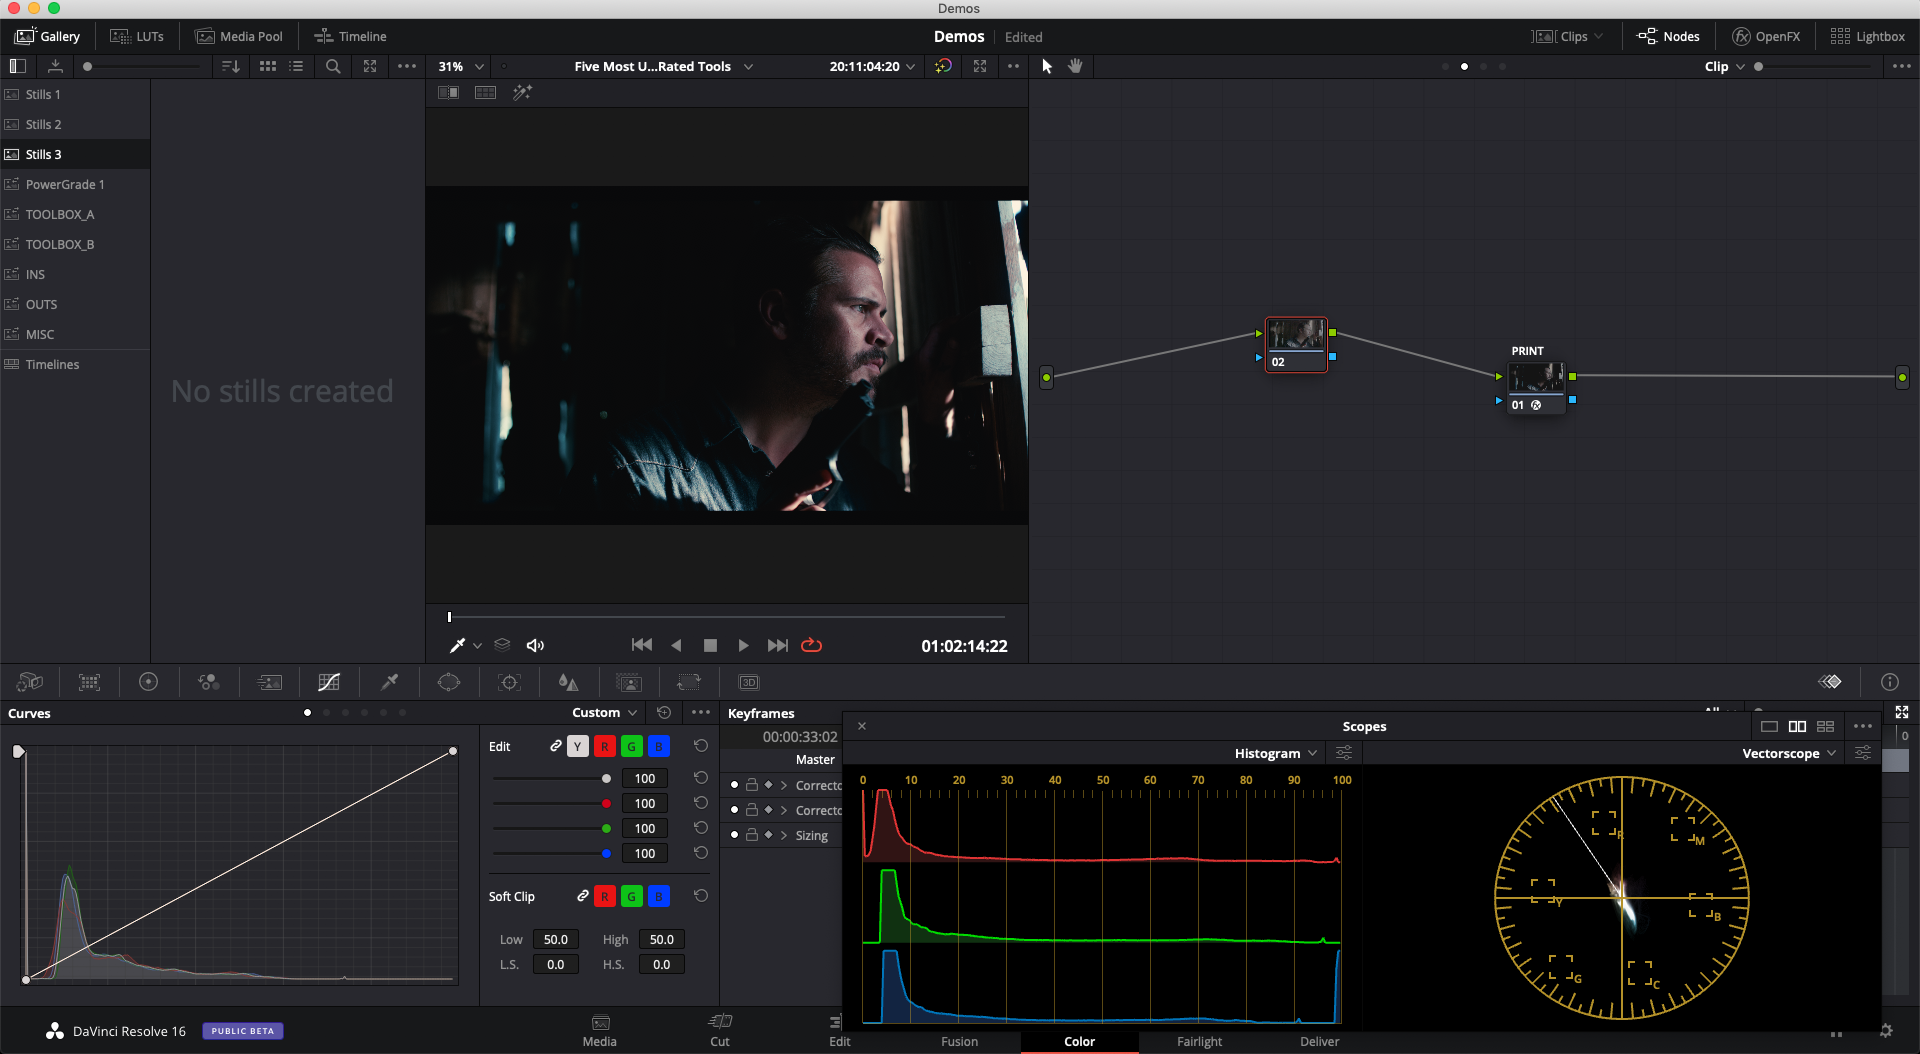
Custom curves are a fantastic way to make large or small adjustments to your image’s tonality. The controls are a bit more delicate than the contrast or lift/gamma/gain controls, but the graph interface makes it far easier to create a reusable adjustment that can be deployed across multiple shots.
This is a great way to establish a consistent baseline look for a piece of content.
Adding tonal contrast
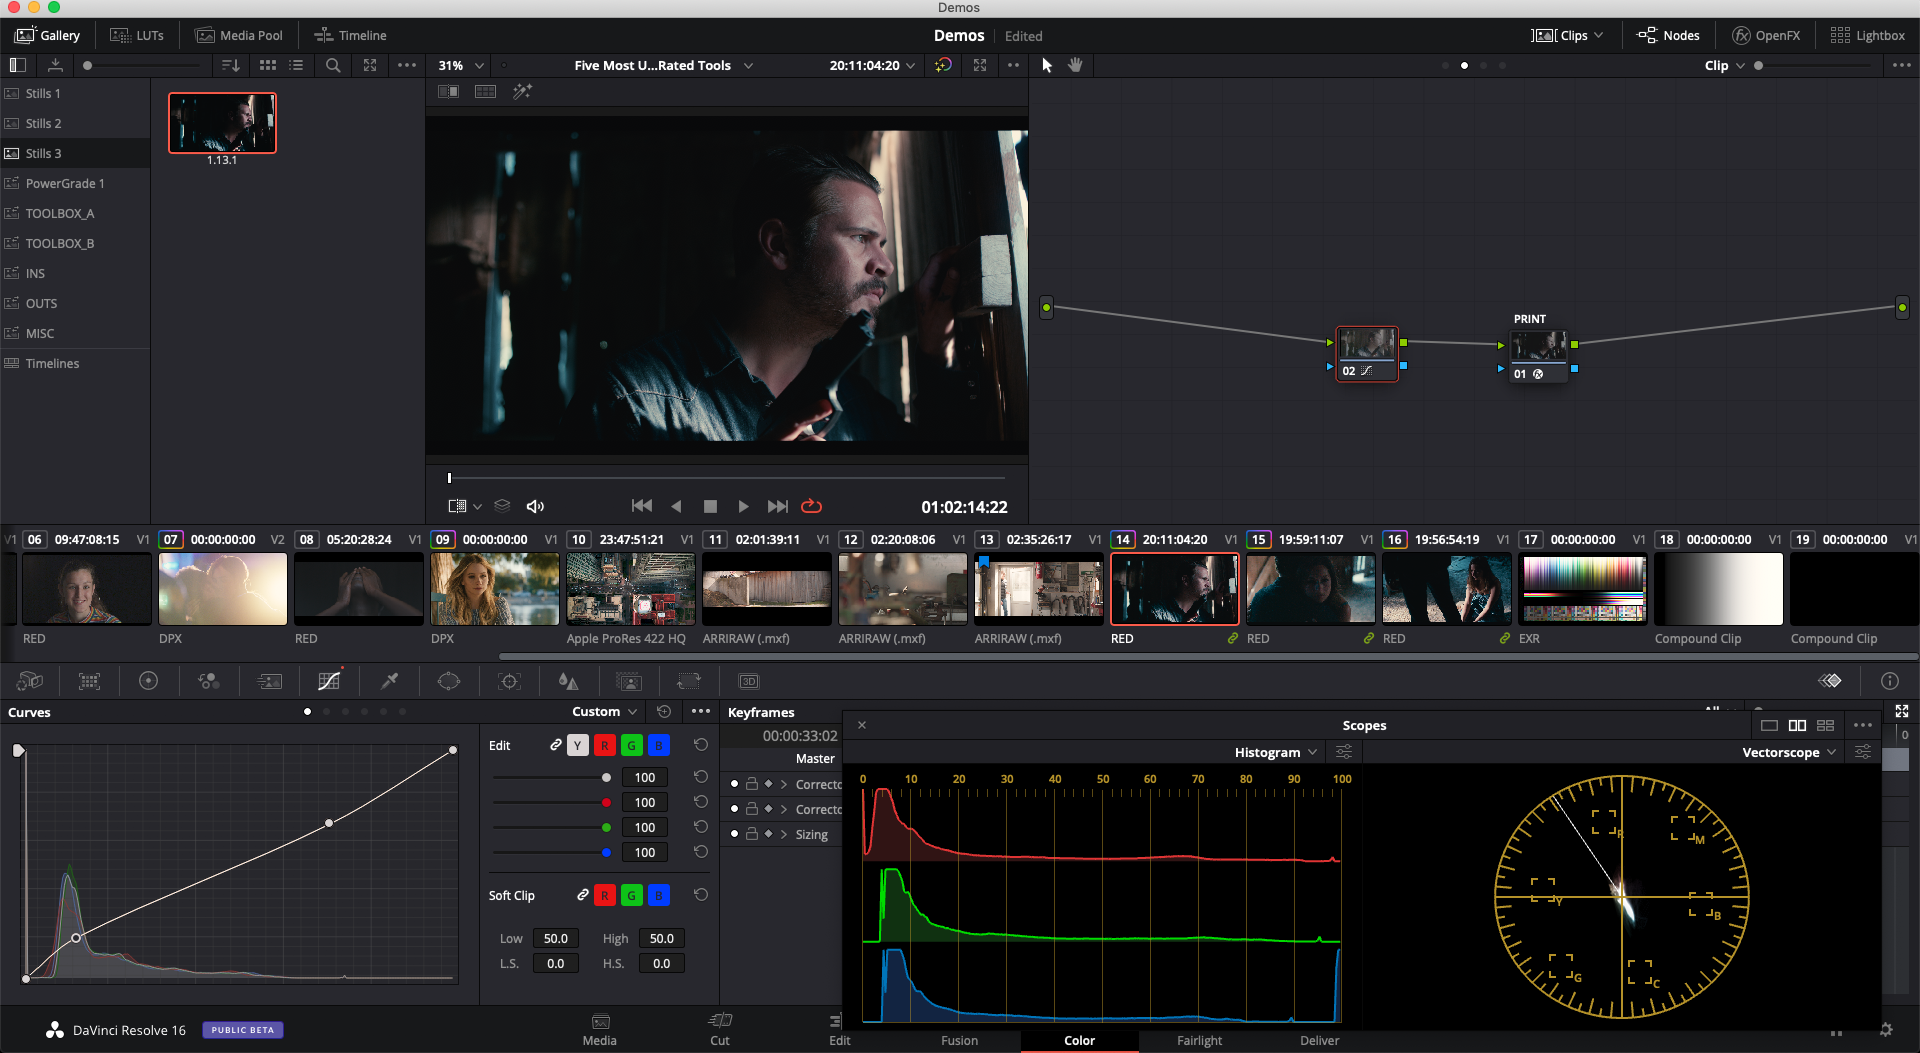
Custom curves provide the perfect interface for drawing a classic “s-curve”, increasing contrast without introducing hard clipping in the shadows or highlights.
For a more filmic look, try setting your bottom control point just above zero — this is the way shadows appear in a film print, and gives a velvety softness to your overall contrast.
Reducing tonal contrast
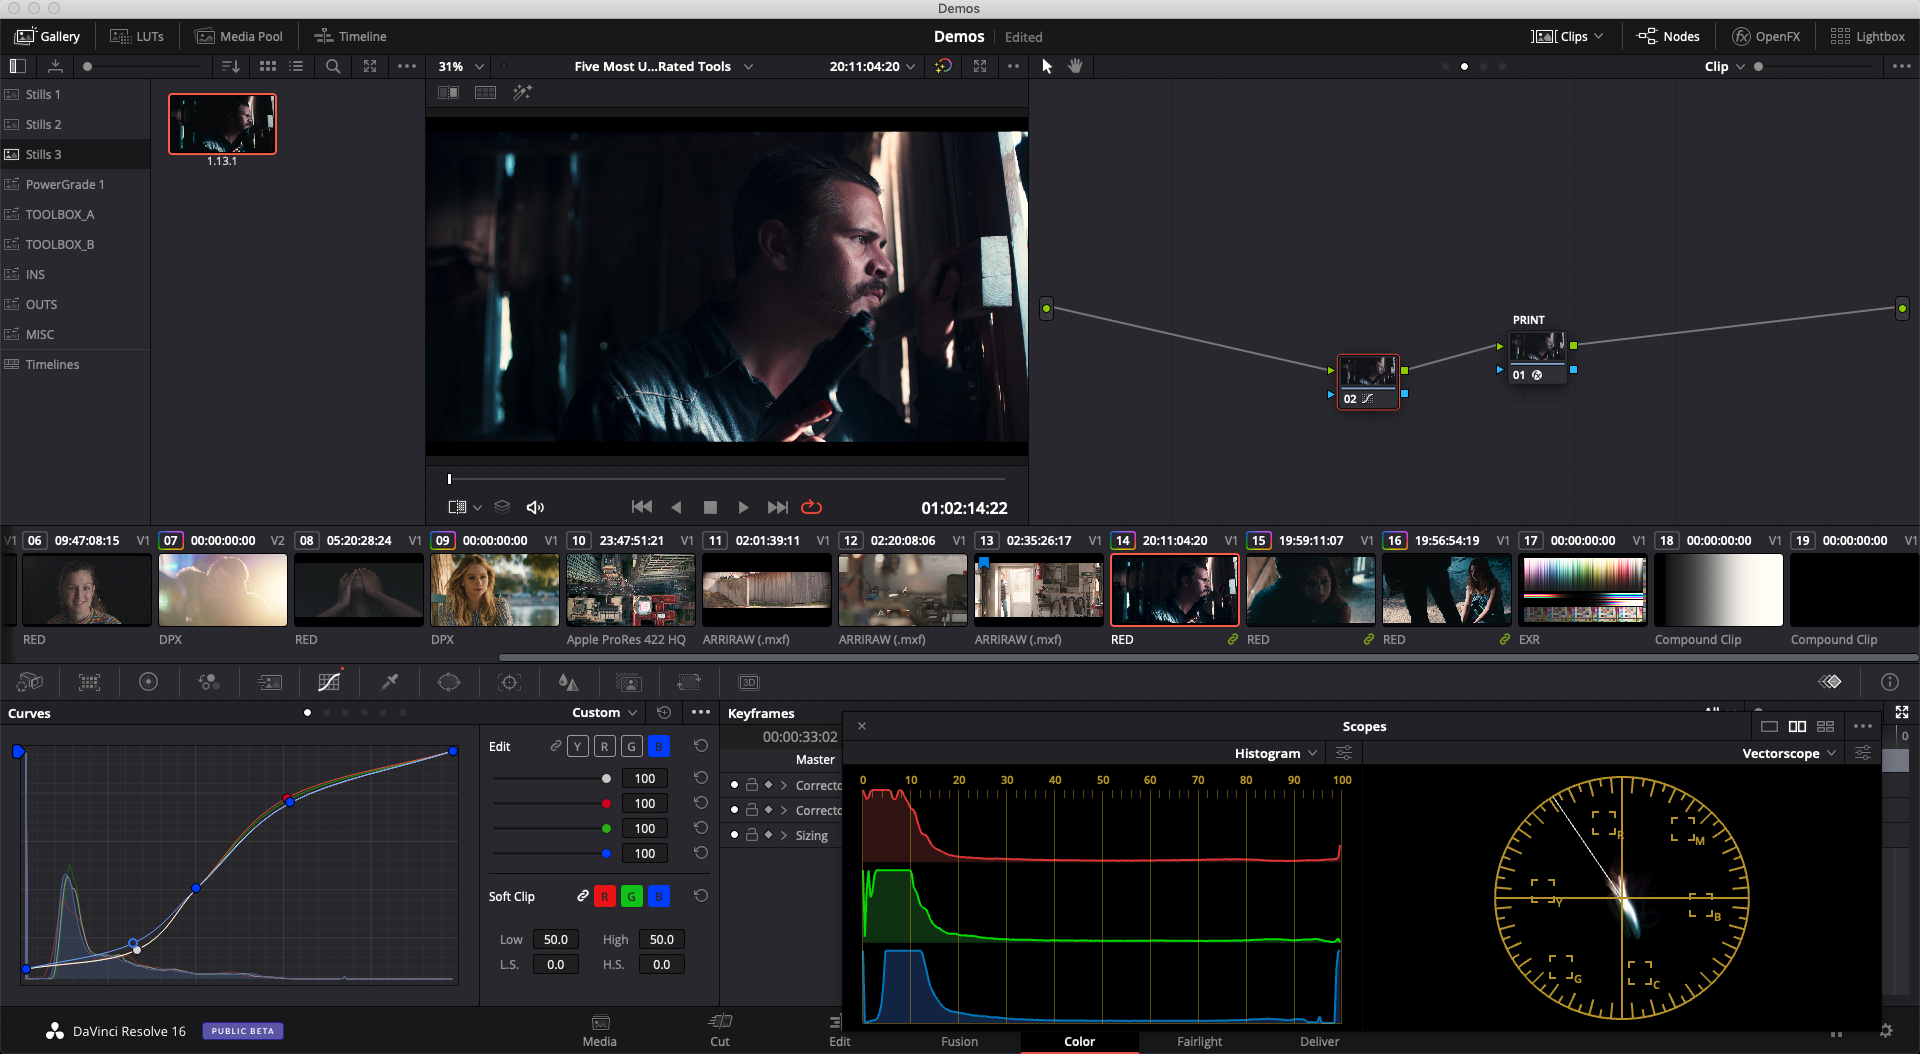
Some shots will come to you with contrast that’s too strong, particularly non-log material with a gamma curve. Lift, gamma, gain, and contrast can all help to reduce this, but the best tool for the job is custom curves. You can draw an inverse S-curve, or simply add a control point 15-20% from the bottom and push it upward.
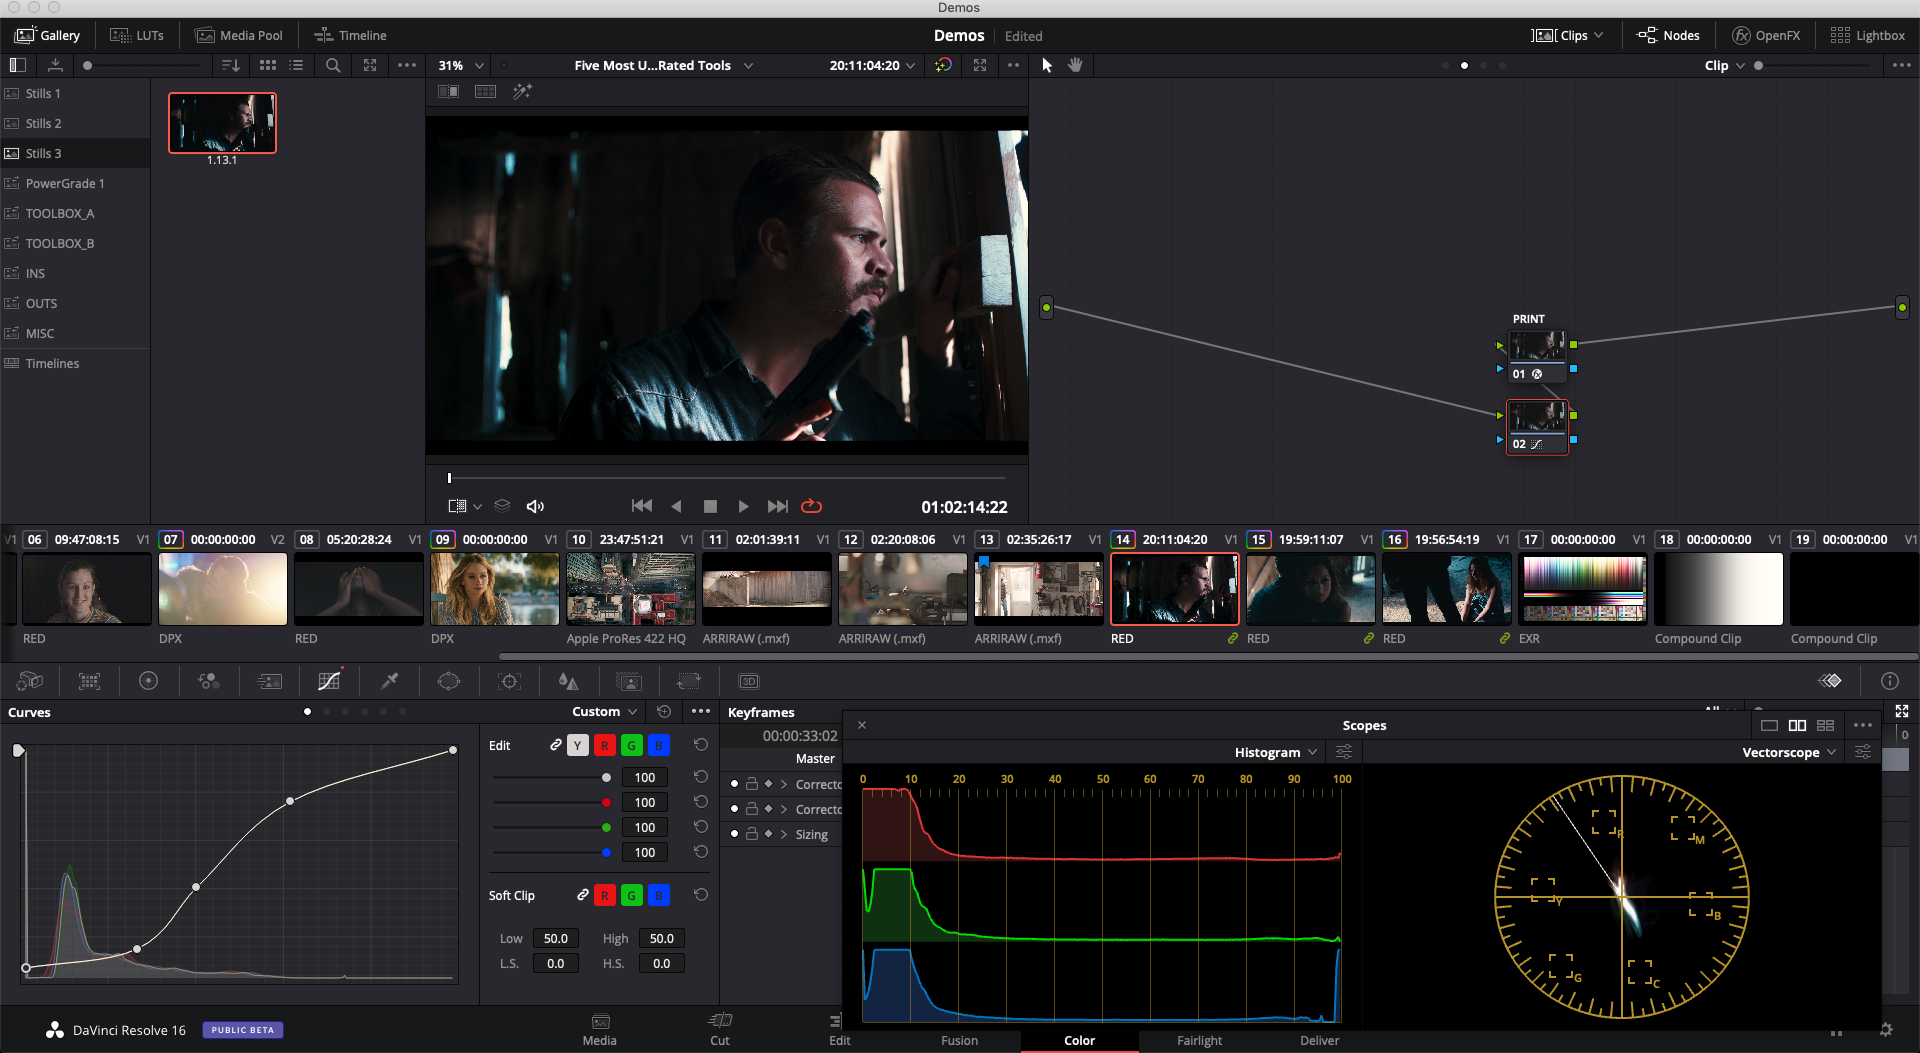
Creating color contrast
After you’ve drawn an S-curve, try un-ganging your RGB channels and making some individual adjustments.
Adding a combination of red and green to the upper part of the curve, and a combination of blue and green to the bottom part of the curve will increase your color contrast in a subtle, filmic way. This is another adjustment that, once dialed in, will translate well when pasted onto other shots.
Here are a few parting tips for using the master curves:
- When reusing a curve you’ve drawn, place the node in the same position within each shot’s node graph — usually either dead last, or first up.
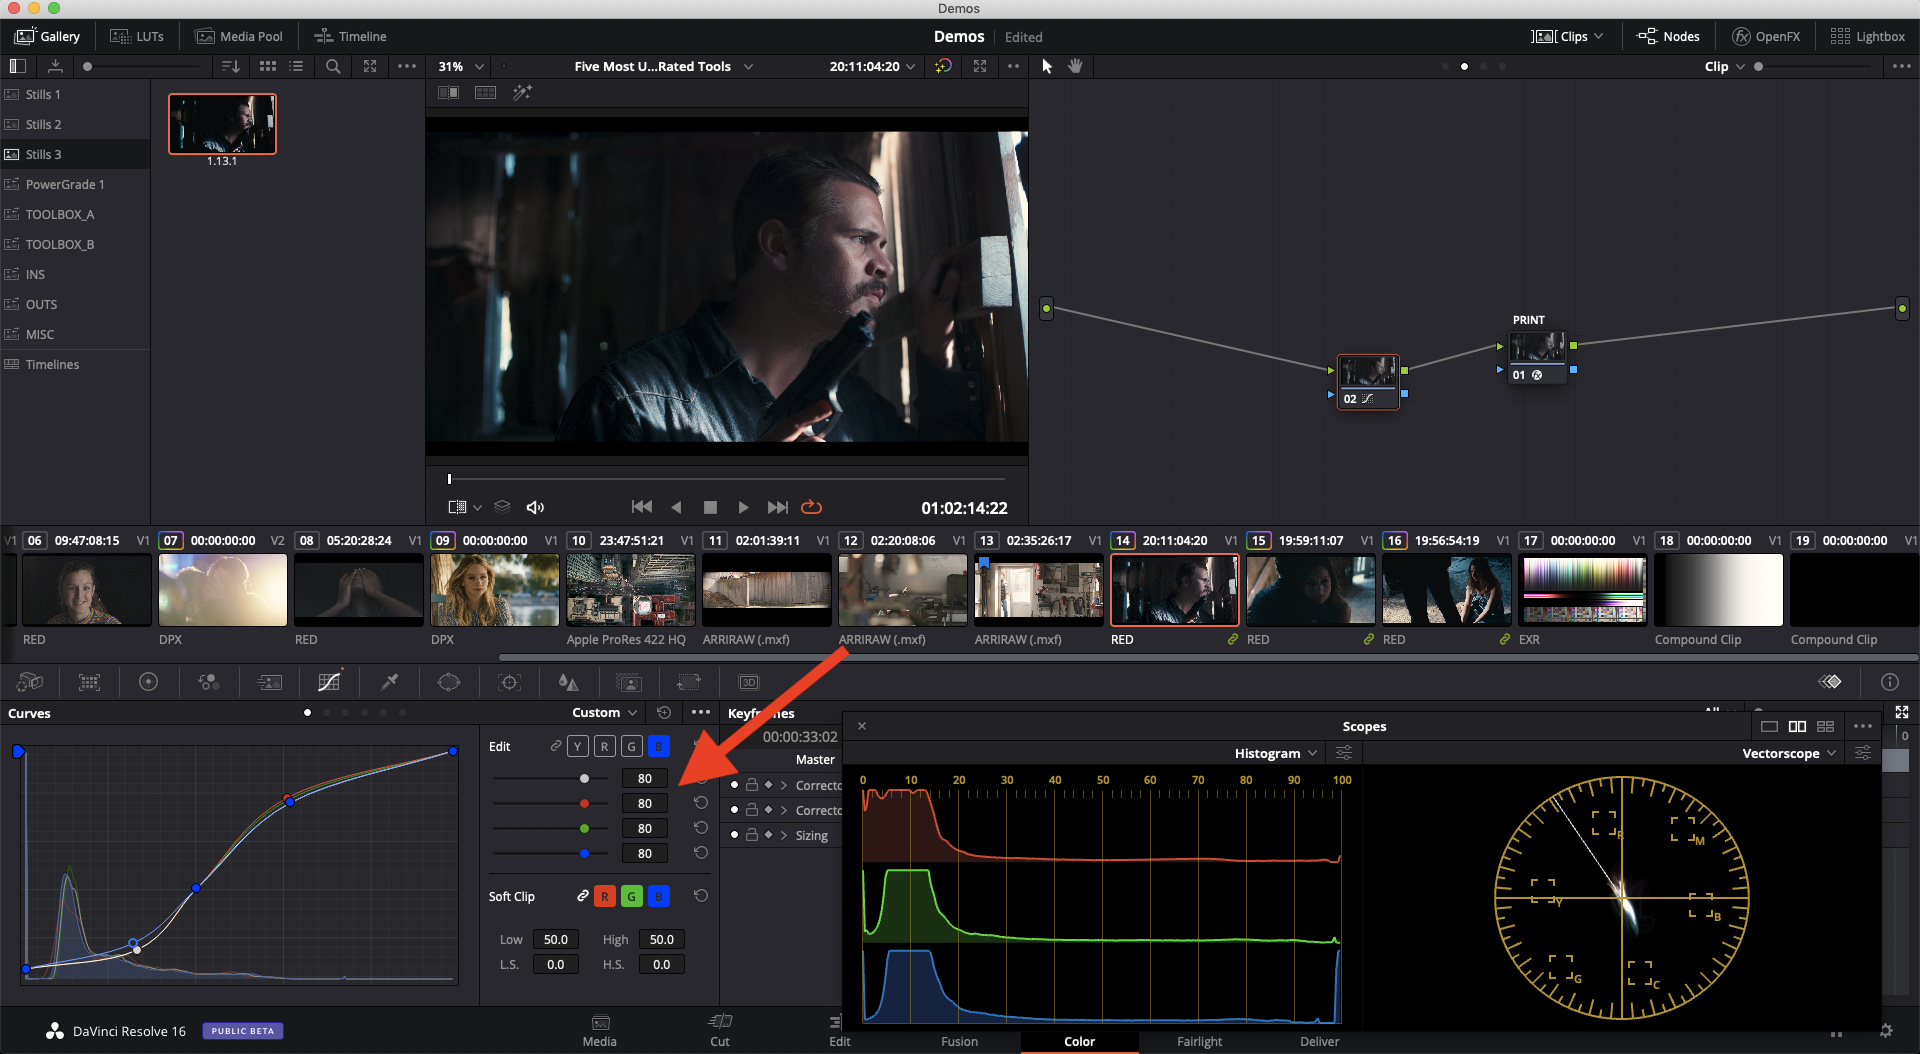
- To refine the intensity of your curve, use the sliders — these are easier to make small adjustments to than control points. Be aware that the effective range of these sliders is not 0-100, but 50-100. Any adjustment below 50 will begin to invert your curve.
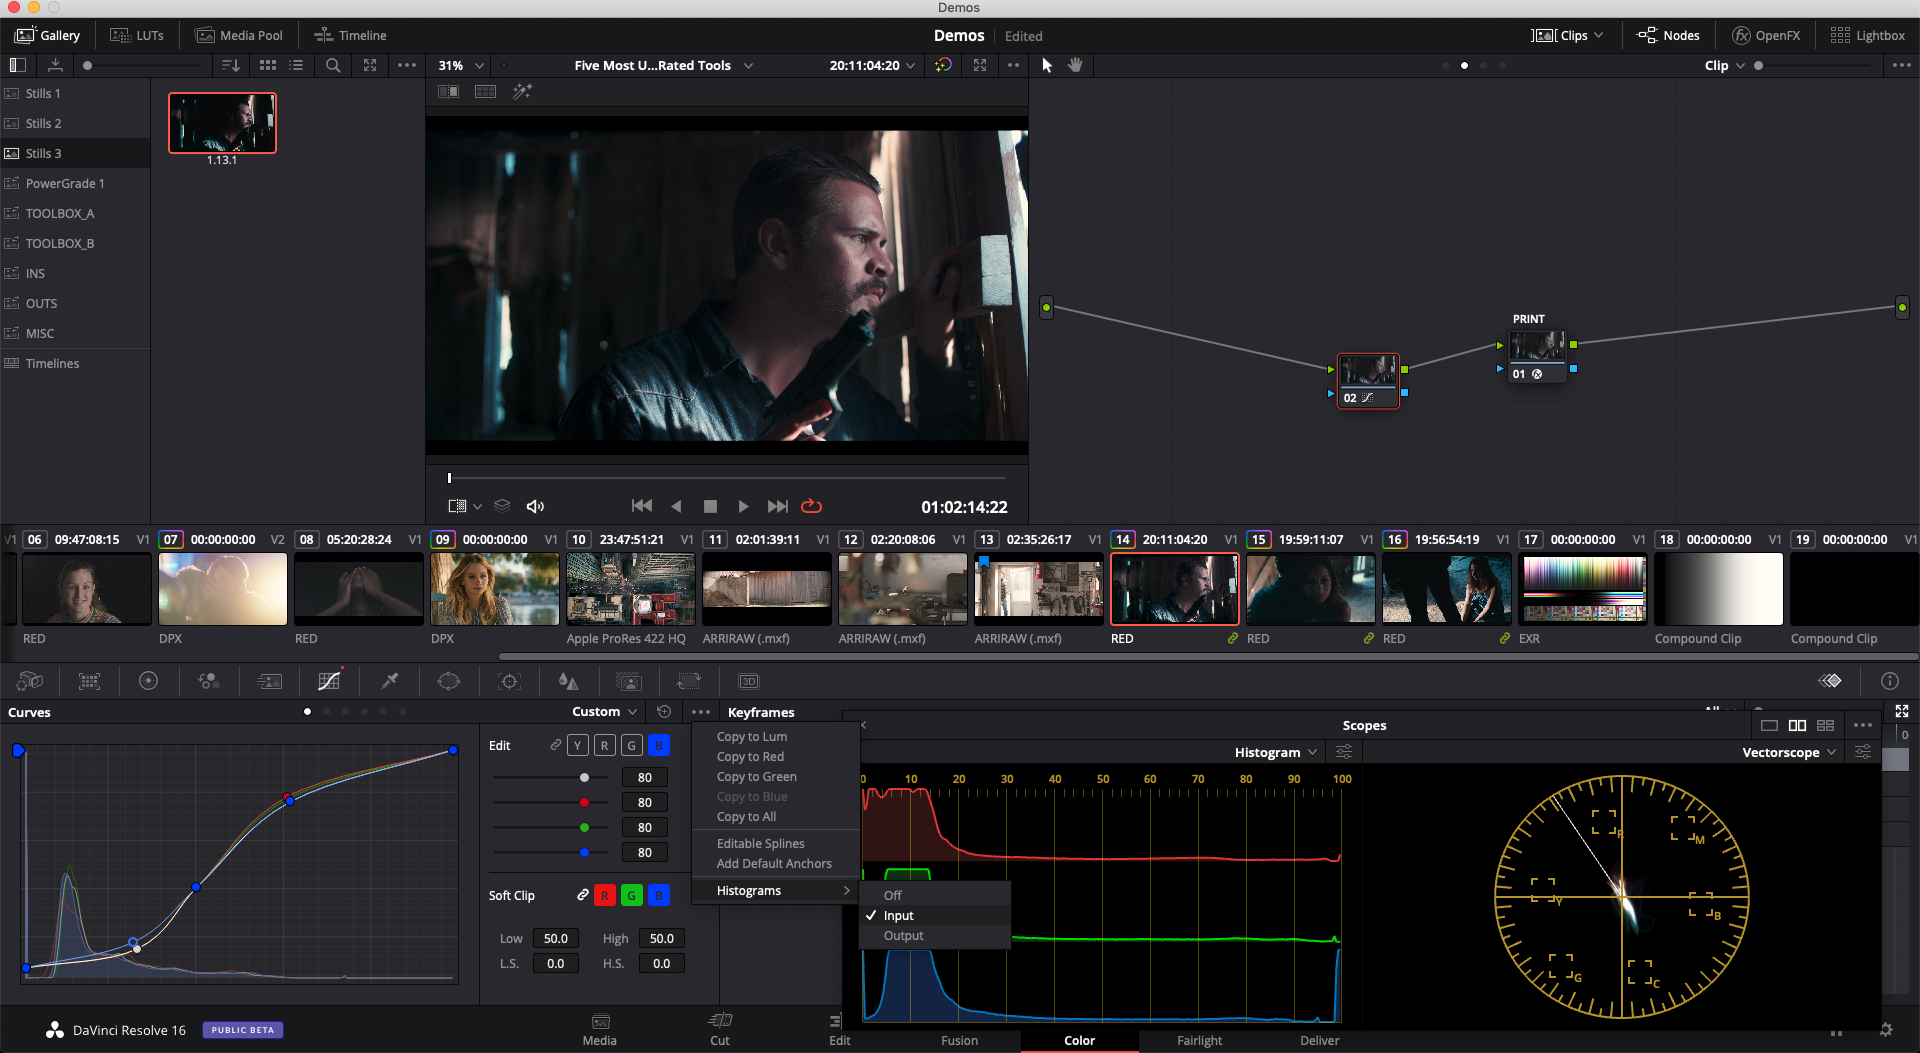
- If you’re in Resolve 16, try turning on your histogram overlay for a contextual scope view of the signal you’re manipulating.
- When dragging a control point, hold the option key to view the “unity” line, and to snap to it when your cursor gets close.
Wrapping up
There’s an old expression that when you’re a hammer, everything looks like a nail. This idea holds especially true with color grading — if you rely on the same approach time after time, you’ll never see the other possibilities.
That’s why exploring and experimenting with new tools is so important: it expands not only your skills, but your creative palette. Over time, you’ll begin to see new solutions and opportunities in your grades — and those little gains are ultimately what makes for a polished grade. Give these tools a try on your next video!