I’ve been a freelance film editor for just shy of two decades and I’m still learning new tricks. In this article I’ll share seven of my all-time favorites.
As the title states, these tips are deceptively simple. But everything’s easy when you know how, right? As Supreme Court Justice Oliver Wendell Holmes Sr. liked to say, “For the simplicity on this side of complexity, I wouldn’t give you a fig. But for the simplicity on the other side of complexity, for that I would give you anything I have.”
There are more complex alternatives to most of these tips and I would know, I spent years using them until I stumbled on more elegant and simple solutions. If you’re new to editing, maybe you’ll find all of these helpful, but I reckon even veterans might pick up a useful tip or two.
Contents
While I might occasionally discuss the specifics of how to apply these tips and tricks in one NLE over another, they’re pretty much all applicable to the ‘big four’ video editing programmes, so regardless of which one you prefer to use, you’ll still hopefully scroll away with some new knowledge.
Cross dissolve is your best friend
I learned this astoundingly simple trick for perfecting your eye-trace across cuts, from trailer editor Derek Lieu. But it has so many useful applications, you’ll use it all the time.
Eye-trace is about making sure that where the audience was looking at the end of one shot, is roughly where they need to be looking at the start of the next shot, for a smooth viewing experience.
Obviously, you may have creative editorial reasons for making edits jar and forcing the audience to scan the frame for where to look next, but during fast-paced cutting, maintaining good eye trace stops your audience from getting lost in the frame.
For years, if I wanted to match up the point of interest across an edit I would do what Derek describes in his tutorial; lift up one clip on top of the other, drop the uppermost to 50% opacity and then re-frame accordingly. Then put everything back where it was and reset the top clip back to 100% opacity.
It worked. But in a cumbersome way.
Derek’s tip is so simple, yet so useful, that you’ll say “Well, why didn’t I think of that?“
- Park your playhead on the cut between the two shots you’re matching
- Add a dissolve transition (you can now see both clips on top of each other)
- Adjust the positioning or timing of the clips to match the eye-trace
- Delete the dissolve
The 4K punch-in
I now use this all the time, but one common method where this really shines is when you’re using 4K footage in an HD timeline and want to ‘punch in’ for a close up that was never separately filmed.
With a cross dissolve, you can ensure that the eye trace of the placement of the subject’s eyes matches up between the wide and the close up, to ensure a smooth edit between them.
Here are the default keyboard shortcuts for adding a dissolve in the ‘big four’ NLEs.
- Adobe Premiere Pro = Cmd+D
- Avid Media Composer = / (backslash)
- Blackmagic Design DaVinci Resolve = Cmd+T
- Apple Final Cut Pro = Cmd+T
Un-nesting
Nesting (or compounding) allows you to group a bunch of clips together to make them look and act like one single clip. I often do this when I have a set of still images and I want to apply the same push-in move to all of them, and have them adjust at the same rate—for example, scaling from 100% to 105%.
If you do this one clip at a time, the trouble can come when you have different resolution media and scaling from 100% to 105% means different things for each clip. So by nesting them into one clip and applying the scale adjustment to that nested/compound clip they all push-in at the same pace.
This technique is called different things in different software; nesting in Premiere Pro, compounding in Resolve and Final Cut Pro and collapsing tracks in Media Composer.
How to nest/compound/collapse
- FCP: Select clips, then hit Alt+G
- Resolve: Right-click on a clip selection and choose New Compound Clip…
- Avid: Select clips, then click Collapse Tracks button (Tool Palette>Other>Collapse)
- Premiere: Right-click on a clip selection and choose Nest. (There is no default shortcut)
How to un-Nest/Decompose/Step-In
- FCP: Select your compound clip, then hit Cmd+Shift+G
- Resolve: Select your compound clip, then right-click and choose Decompose in Place
- Avid: Select your collapsed tracks, then click ‘Step In’ (or double click to open)
- Premiere: See the walkthrough below…
The problem for Premiere Pro users is that there’s no easy ‘Unnest’ button or keyboard shortcut to break apart your clips back onto the timeline, as they were.
The cumbersome work around I used to use was to open the nest as a second timeline and then copy and paste the contents back into my original timeline, which is often fiddly and time-consuming to do.
Until I learned this super-smart yet stupid simple trick from Javier Mercedes.
There may not be a right-click and select ‘Unnest’ option for Premiere Pro users but there is a way to bring your nested sequence, or any sequence for that matter, back into a timeline, not as a single clip but as all of the individual component pieces.
And it is simply a matter of disabling this option in the timeline.
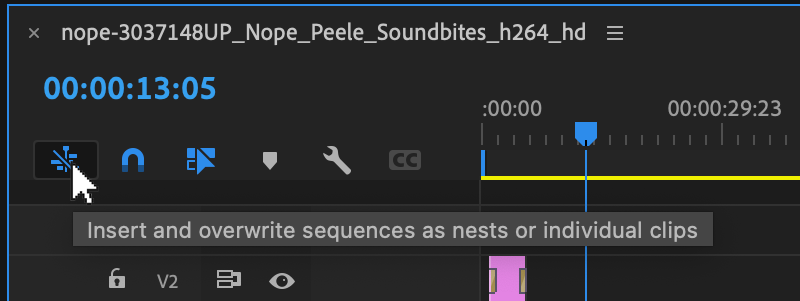
When this icon is blue, then any sequences will be brought into a timeline as nests, but when disabled (gray) then they will be dragged in as a collection of individual clips.
It’s that simple. (And arguably a more powerful approach.)
Track targeting timesaver
Track targeting might not sound like the most engaging topic because, well because it’s not. But it will make you faster in the edit suite and what could be better than that?
Track targeting is the action of specifying which tracks are enabled and which are disabled, which applies to all of the big four except FCPX, which has its fancy magnetic timeline.
This typically comes into play when you copy and paste clips (it determines where the pasted clips land) or if you’re adding edits and only want to cut through specific layers. Or maybe you’re using the arrow keys to move up and down your timeline—to check all your titles on a specific track, for example—but don’t want to move through each and every edit along the way.
What a lot of editors do is use the mouse to toggle their track selections, when what we should be doing is setting up custom keyboard shortcuts, which are far faster!
Here’s my Track Target Toggle set up in Adobe Premiere Pro
- Toggle Target Video 1 = 1 (as in number 1 on the keyboard)
- Toggle Target Video 2 = 2
- Toggle Target Video 3 = 3
- Toggle Target Audio 1 = Alt+1
- Toggle Target Audio 2 = Alt+2
- Toggle Target Audio 3 = Alt+3
- Toggle Target Audio 4 = Alt+4
Add these, or something similar, to your own custom keyboard shortcuts and see how much time you could save!
Always start at the end
This tip may feel a little counterintuitive at first, but a bit like working your way anti-clockwise around a theme park (when everyone else is headed clockwise) it will save you time and help you have more fun in the long run.
Again, it’s embarrassingly simple—which hasn’t stopped me from forgetting to do this more often than I’d like to admit—and that is to always work through timecode notes from the end and work backwards.
Why? Because then any changes that you make won’t affect the timecode placement of the earlier notes.
Here’s an example:
- 00:00:10:17 – Take out this scene entirely
- 00:00:12:19 – Typo on subtitle
- 00:00:16:47 – Remove shot 4 here
- 00:00:19:22 – Extend this shot
If you jump into making these changes and start with the first one, it will knock all of your other timecode notes out by the duration of that scene.
You’ll then spend more time finding and checking you’re in the correct place, than with this alternative approach:
If you start at the end of the list and work backwards, being mindful of keeping your timecodes in sync for as long as possible, you’ll move much faster.
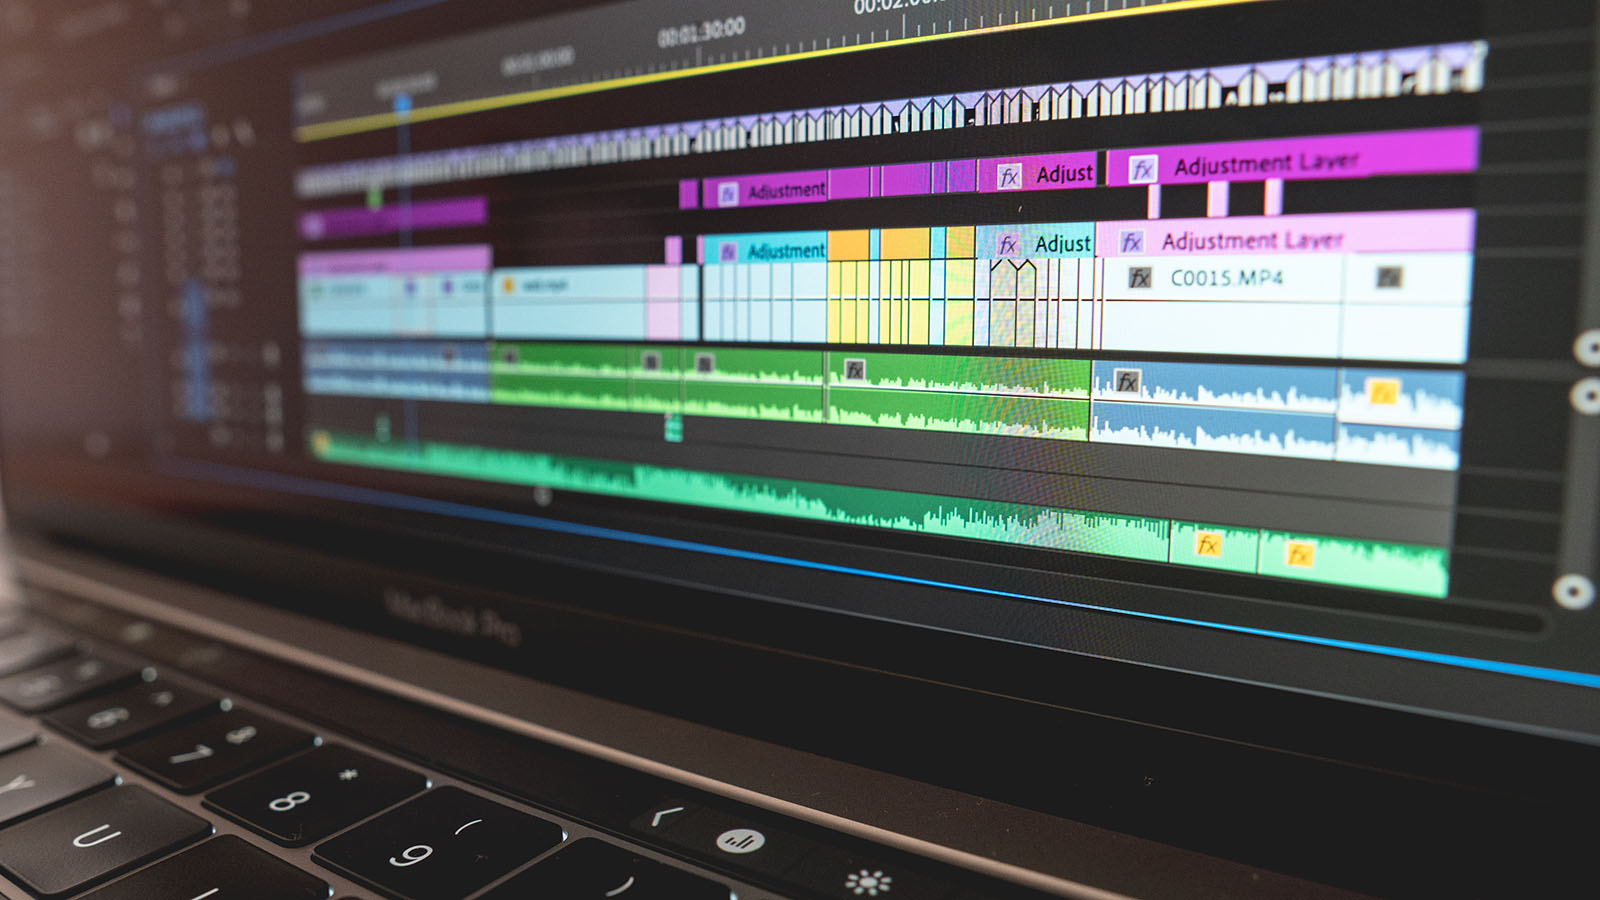
Now, if notes 2 and 3 were swapped then obviously you’d want to fix the typo before removing the shot, otherwise, again, your notes and sequence timecode would be out of sync.
When you have a lot of notes to address, keeping your review copy and your new sequence in sync for as long as possible will save you a ton of time cross-checking and shuttling back and forth in the timeline. Trust me on this.
Edit with one hand
I simply can’t work without these shortcuts. And you shouldn’t either.
J K L may be the bread and butter of any editing workflow but adding H and backslash adds meat and relish to your editorial sandwich. Did I overwork the metaphor? I think I overworked the metaphor.

These five shortcuts, situated with your middle finger on the K key, your index figure doing double duty on H and J, ring finger on L and your pinkie resting on the backslash will allow you to edit with one hand.
- H – Add Edit
- J – Play in Reverse
- K – Pause/Play
- L – Play Forward
- / – Ripple Delete
Hopefully you already know that double tapping J or L will increase the shuttle speed, while (in Premiere at least) holding down K and tapping J or L will step through frame by frame.
Ripple delete will remove the clip and close up the gap that would have been created, in a single stroke.
B is for belly
When it comes to protecting your editorial career over the long haul, there’s no better investment than in a little knowledge of, and adherence to, ergonomics.
Like a tiny calculation error in a spaceship’s interplanetary trajectory, every hour that you work with some kind of ergonomic mistake embedded in, such as bad posture, incorrect layout of your desktop peripherals, poor screen height etc. you’re slowly drifting towards inevitable physical pain or discomfort in some form. And these issues are best avoided rather than treated.
If you’re editing with a mouse for 60 hours a week, you’re increasing the risk of RSI or carpal tunnel issues because the muscles in your wrist just weren’t meant to sustain prolonged left to right ‘waving’ motions.
To ensure a longer, more comfortable career, my advice is to switch to a tablet and pen. These rely on movements which engage the bigger muscles in your arm and shoulder and will help you to avoid painful downtime.
There’s quite a lot to remember when it comes to sitting or standing correctly at your desk but one easy to remember rule of thumb is to line up the B key of your keyboard with your belly button.
That way, especially if you’re using a broader keyboard with a number pad, as most editors are, your body and hand position will be more correctly aligned with the keys from the start.
Plus it’s simple to remember.
Swedish death cleaning
The concept behind Margareta Magnusson’s The Gentle Art of Swedish Death Cleaning is that you should get rid of all your unnecessary junk before you die, so that your loved ones don’t have to try to figure out what’s still worth ebaying after you’re gone.
OK, that might be putting it a little too harshly, but it’s a good framework for figuring out what you can live without right now, so that you (and your loved ones) can enjoy a less cluttered existence, to infinity and beyond.
As with your physical existence, so follows your digital life. But more purposefully in editorial because storage performance—especially with SSDs—tends to decline rapidly as the drive gets full. Keeping at least 20% of free space is a good target to aim for.
Unlike in a house, where junk-filled cupboards are obvious, sometimes your system storage can be stuffed with old cache files and long-forgotten exports hiding under the metaphorical floorboards.
That’s where a free Mac app, OmniDiskSweeper, from Omni Labs, can save the day and help get your ‘death cleaning’ under way. (PC users might want to check out the Storage Sense feature in Windows 10 and 11.)
Get Your Hard Drive Back
OmniDiskSweeper rapidly scans your hard drive and presents you with a list of every folder and file, ordered by size.
This makes it incredibly easy to track down, say 50 GB of After Effects cache files or tame a bloated Downloads folder.
I’ve also regularly used OmniDiskSweeper when trying to fit the contents of one big hard drive onto several other smaller hard drives, since OmniDiskSweeper makes it much faster to figure out which files can end up on each drive.
It is incredibly simple to do, but the results are very liberating. Just like Swedish death cleaning.
Final thought
So there you have it, seven stupidly simple yet amazing editing tips which I hope will prove useful to you at some point and when they do, I hope you’ll pass it on.
If you have a great tip that fits the bill, or just something that you learned recently, then drop a note in the comments section, or find me on Twitter and let me know!


