Now that Adobe MAX has wrapped, many of us will be thinking about downloading the Creative Cloud updates that are released during this yearly event. But updating any software to a new version comes with risk and Premiere Pro is no exception. Hitting that update button can make almost any editor nervous, as getting it wrong can cause unexpected issues that soak up time.
For this reason, we’re all told to never update the software in the middle of a project, but we all know that this isn’t really possible because we’re always in the middle of a project—or rather multiple projects, since they tend to overlap.
Some of my documentary projects have lasted for 3-4 years. If I had followed the “never update in the middle of a project” advice, I’d either be on CS2 still, or I’d have a lot of versions installed—none of which seems very attractive.
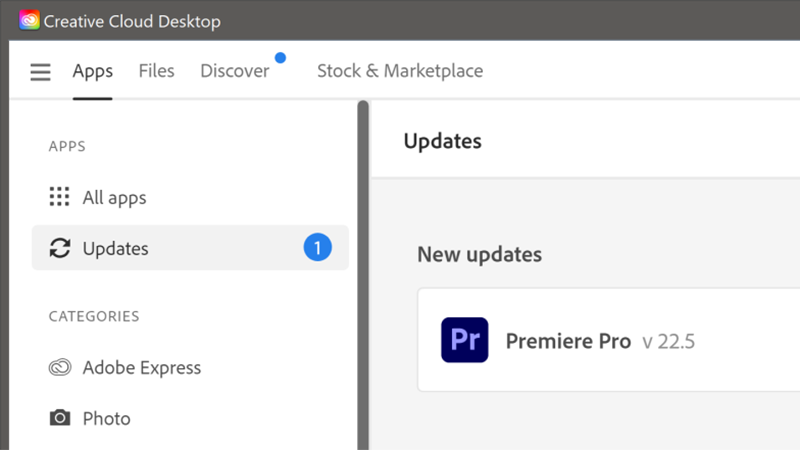
Besides, we need the latest Premiere Pro features, so when we see the little blue update indicator, how do we make sure that everything goes to plan?
Contents
Be prepared
It’s tempting to just hit “Update” when you get a ping about a new version being available. But it’s recommended that you take a deep breath and go through some simple steps before you hit that “Update” button.
Keep Creative Cloud Desktop updated
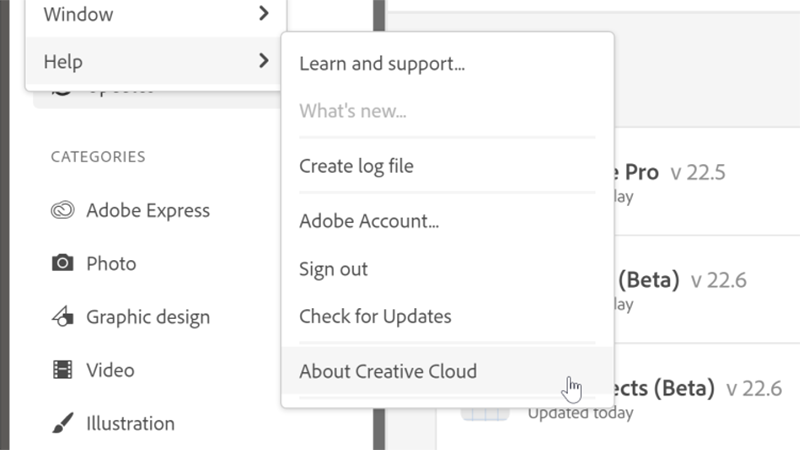
Old versions of the Creative Cloud Desktop app don’t know about the newest versions of your software, so the newest updates may not show if you’ve repeatedly chosen to postpone Creative Cloud Desktop app updates. So first make sure you have the latest version of the app. Menu icon > Help > About Creative Cloud.
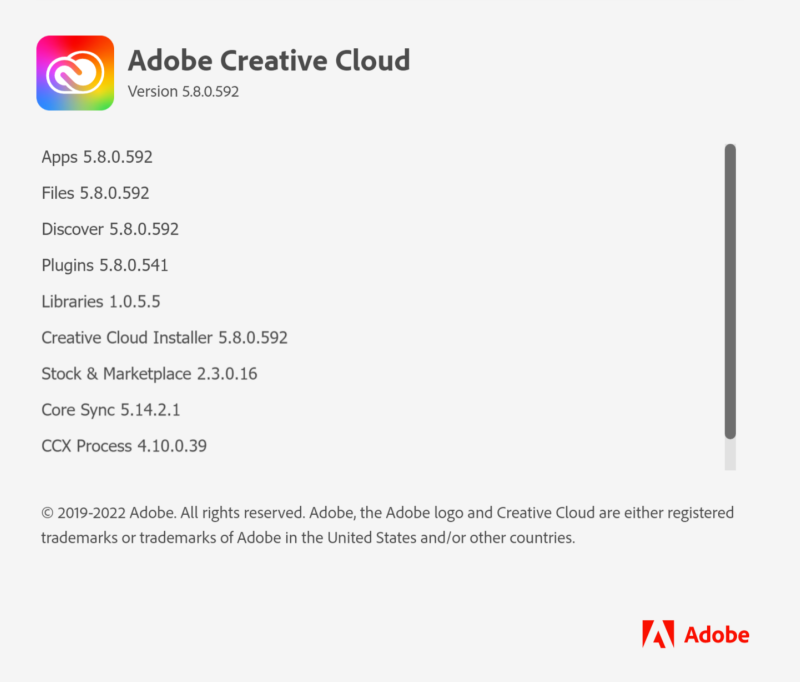
Telling the Creative Cloud Desktop app to keep itself updated (Menu icon > File > Preferences > General) should take care of this, but you can check for the latest version in the release notes.

You can also download the Creative Cloud installer directly from Adobe and run it. If you’ve already got the newest version, the installer will see that and skip the installation, opening the Creative Cloud Desktop app quickly.
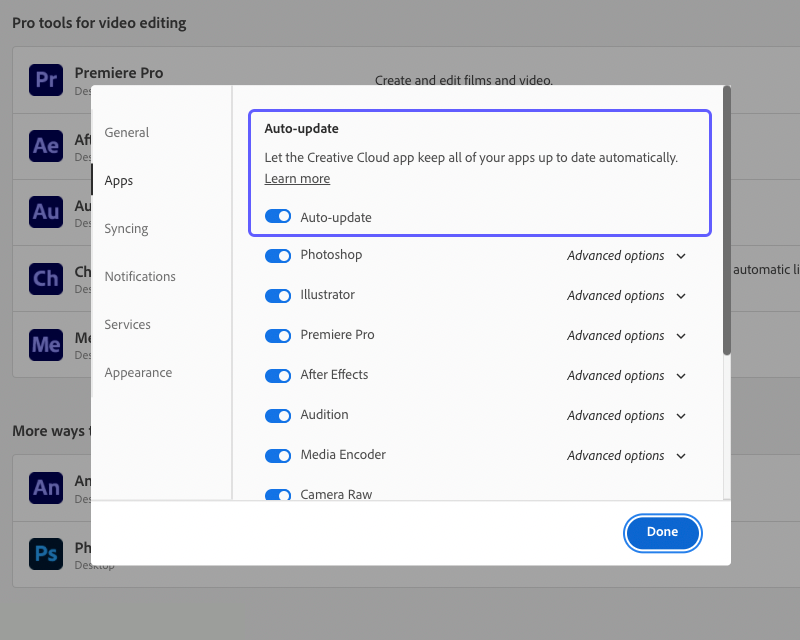
With the Creative Cloud Desktop app updated, I recommend that you disable auto-updates in the Creative Cloud app (Menu icon > File > Preferences > Apps) so that you can manage updates at your own pace.
Back up your customizations
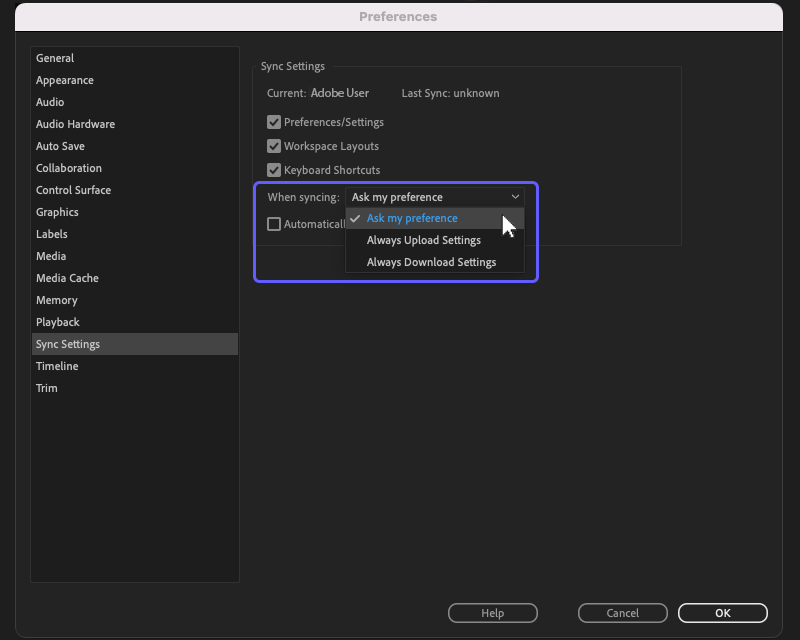
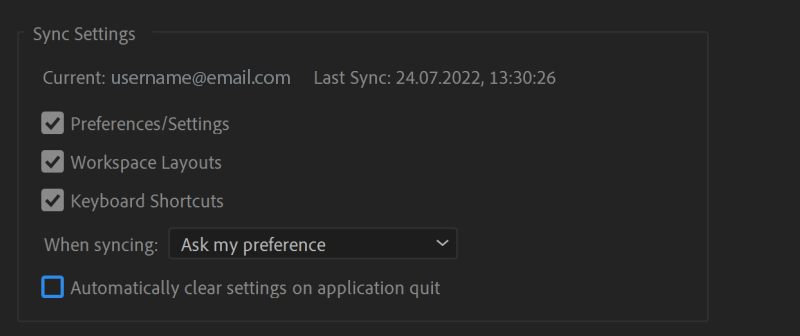
The Sync Settings feature in Premiere Pro lets you copy your settings, preferences, workspaces, and effects presets to the Creative Cloud server, and then download them again when needed. So make sure you set the Preferences for Sync Settings to always ask which way you want to sync—otherwise you may accidentally overwrite settings you wanted to keep.
Sync Settings is great when it works and, if your system clock is correct, it should work most of the time. But to guard against those moments when it might not, I like to manually backup the whole profile folder so I can grab files from it if anything goes wrong.
You might not realize it, but there’s a lot of data in your profile folder, including (but not limited to) preferences, effects presets, keyboard shortcuts, sequence presets, Essential Sound presets, overlay presets, project view Presets, source patcher presets, timecode presets, track height presets, audio channel presets, metadata presets, workspaces, and guides. Did I miss anything?
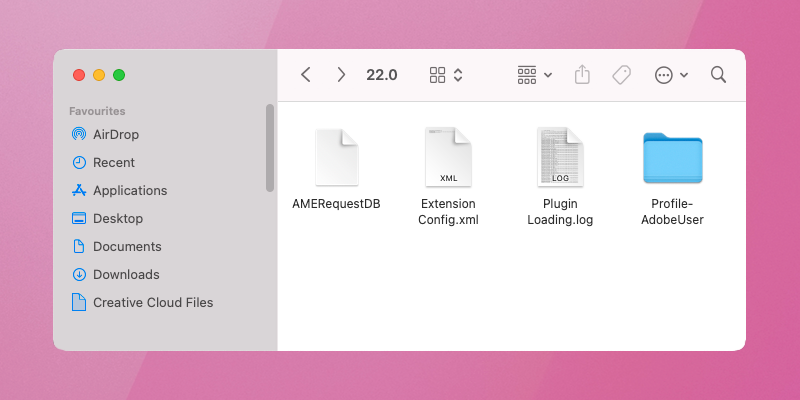
And you’ll find your profile folder in the following locations:
- For Windows: \Documents\Adobe\Premiere Pro\<version>\Profile-<user name>
- For Mac OS: /Documents/Adobe/Premiere Pro/<version>/Profile-<user name>
After you have used Sync Settings, these will be copied to a folder besides your old Profile-<user name> folder named Profile-CreativeCloud-.
Note: Some of the files you’re backing up may not be compatible with your updated version, so only use files from this backup when something went wrong and you need to roll back.
Backing up selected effects presets
I use Effects Presets a lot and I will often have stray Effects Presets that I don’t really want to keep. If you don’t want to keep all your Effects Presets, you can export only your favorite ones to keep. Create a Custom folder in the Effects panel and drag all your favorites there. Then right-click that folder and choose Export Presets to save them as a .prfpset file.
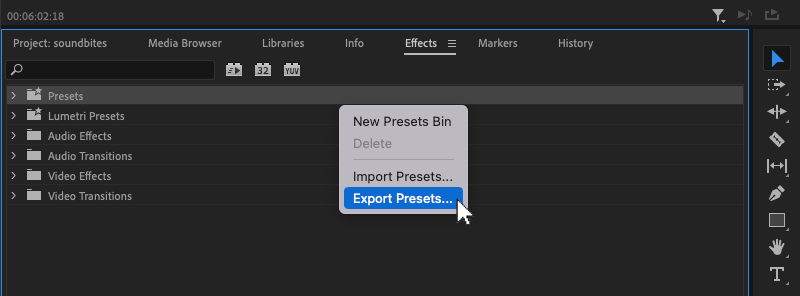
I know this step may not be strictly necessary, but it’s very easy to lose them if an update fails and you’re starting to try to fix things. After you’ve exported your favorites, you can delete the Effect Presets and Custom Items.prfpset file in your profile folder. Premiere Pro will build a new one next time you launch it, without your custom ones.
Later you can import the custom .prfpset file into the new version from the same right-click menu in the Presets part of the Effects panel. This is how I made my preset pack, which is currently at version 4 and free to download from premierepro.net.
Update your GPU Driver
The new versions of Premiere Pro are only tested with the latest versions of GPU drivers. Using older versions may cause both known and unknown issues. On macOS, you can’t really update the GPU drivers, so you’ll have to update the OS.
On Windows you can get new GPU drivers from the makers of the GPU (most likely AMD or NVIDIA. Download the new driver and install it. You may need admin rights to be able to do it—or ask your IT department to do it for you. If there’s an option, choose the Studio drivers, rather than the Game Ready drivers.
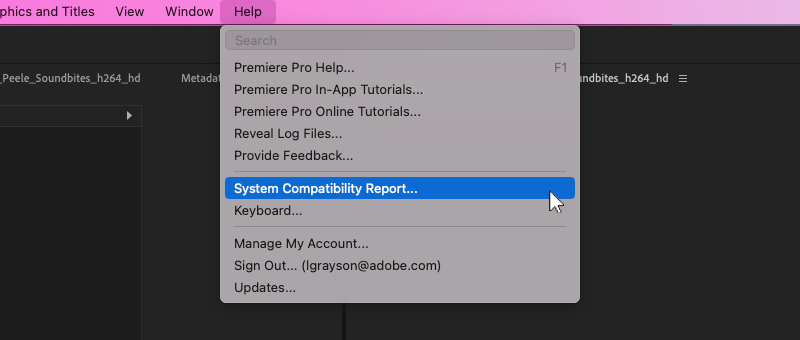
System Compatibility
The System Compatibility Report can help you find known issues with your system. Click Help > System Compatibility Report. Hopefully it will tell you that no issues were found, but if there are issues, you should fix them—or export the report and send it to your IT people.
Note that a “no conflicts to report” message from the System Compatibility Report doesn’t mean there are no issues, it just means that there are no issues that were known when the version was released. Updating the GPU driver (or the OS) may still help.
Normally, the latest drivers will work fine. But unfortunately, GPU manufacturers have been known to release drivers with bugs. That means that the newest version of the GPU driver may not always be the best. If Premiere Pro starts acting up, it may be a good idea to try alternative/earlier versions.
Keeping the older version
Many users don’t have to, but if you’re in the middle of a project, it’s sometimes best to finish the project in the older version, especially if you rely on plugins that may not have been updated. To do this, uncheck “Remove older versions” when you install a new version, so it will leave your current version intact. You can always uninstall the new version after some test driving.
The more complex your project is, the bigger the risk that something goes wrong. Now, huge projects would benefit from being converted to a Production anyway.
If you can, take the new version for a quick spin on a small project to see if everything seems to be working on your system. When you’re happy that things are stable, you can decide to move the big important project to the new version and remove the old version of Premiere Pro.
NOTE: When you have multiple versions installed, the Media Cache files may not be fully compatible between them. Try not to use the same media files in different Premiere Pro versions.
The Media Cache for a particular media file will be created in the version you import the media file to first. This may lead to problems with that media file in other versions.
Delete your Media Cache files
Media Cache files are accelerator files. They make the playback and scrubbing the timeline smoother. Support for new codecs is added in new versions, and existing format support gets optimized for performance. This means the accelerator files will also have to change.
Media Cache files from a different version may lead to trouble. We don’t like trouble.
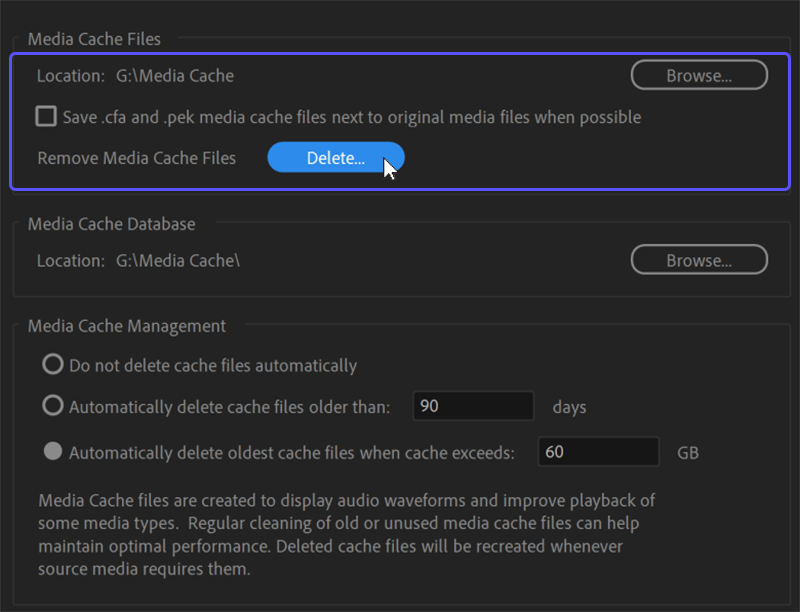
To delete all Media Cache files, close all projects and go to Preferences for Media Cache and click the Delete button. You want to Delete all the Media Cache files from the system. Deleting the ones that are not in use will not fix anything, it will only free some space on the drive. The Delete all… choice is only available when there’s no project open.
If you want to make absolutely sure that the files are gone, go to the location that’s showing in your Media Cache preferences and check.
Tip: You should store Media Cache files on a fast drive, preferably an internal SSD or NVMe drive.
There will also be some Media Cache Database files—and sometimes even other cache files—in the Common folder. If you want a complete rebuild of the Media Cache and the database, go to that folder and delete everything inside it.
You’ll find the Common folder in the following locations:
- For macOS: <user name>/Library/Application Support/Adobe/Common
- For Windows: <user name>\AppData\Roaming\Adobe\Common
In macOS open the Go menu and press the Option button to see a Library option. In Windows, open a folder and select View > Show > Hidden items to see the AppData folder.
Delete your After Effects Disc Cache, too, if you’re using Dynamic Link. In After Effects, choose Edit->Purge->All Memory & Disk Cache.
For convenience, I store my Media Cache Files, audio Peak Files, After Effects Disk Cache, and Audition temp files in the same folder. That way, when I want to delete them, I can just delete everything in that folder.
Decide what settings to keep
To keep your old settings you can use the Sync Settings feature or copy settings files manually from the backup folder you made.
Ideally, you should be able to keep all the preferences and custom settings that you’ve made in earlier versions. But as the software evolves, some settings need to change too, and older settings may no longer be compatible.
This is especially true with .0 updates, but it may also happen with smaller updates, too. Let’s have a look at some of the settings that sometimes should not be carried over to new versions.
Proactively avoiding problems
In a perfect world, this should be the time that you just install the new version, and everything works perfectly. Sometimes, that is the case, and everyone’s happy. Other times, we just need to anticipate problems and take steps to avoid them.
Rebuild your Workspaces
Workspaces may change in new versions, and new panels are added. Most recently we got the Text panel and the Review panel. Before that, the Essential Graphics panel and the Essential Sound panels, and before those we got the Lumetri panels. Workspaces they are a-changin’.
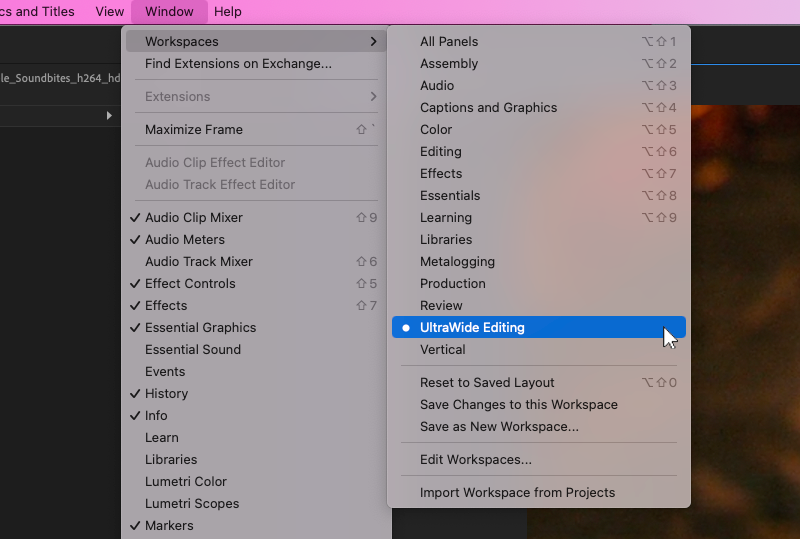
Old custom workspaces are known to cause strange and seemingly unrelated problems, so I recommend you ditch your workspaces between versions. It’s much safer to re-build your custom workspaces. It takes just a few minutes, and may keep you out of trouble.
Tip: Take a screenshot of the workspace in the old version, and use that as a reference to rebuild it. Start with one of the built-in ones and make the necessary changes to mimic your old custom one.
Trash your Preferences and recreate them
New preferences are often added to support new features in Premiere Pro. This means your Adobe Premiere Pro Prefs file will change and conflicts can emerge. It’s always safest to reset the preferences and then make the necessary changes to get them back to what you want.
To reset Preferences, press and hold Alt (Windows) or Option (macOS) while starting Premiere Pro. If you’re not able to reset preferences, you can try setting the Profile folder to read-write—OS updates have a habit of sometimes setting folders to “read only”. On macOS, repairing permissions may help.
Again, screenshots of your old preferences will help you quickly rebuild a fresh Adobe Premiere Pro Prefs file.
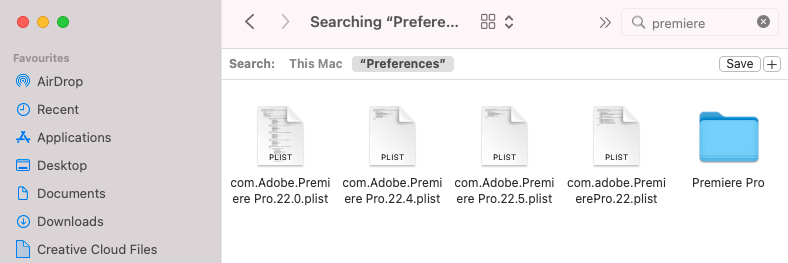
On macOS you can also try trashing the .plist (preferences) file for Premiere Pro. Open the Library folder in Finder and find the Preferences folder. Drag the Premiere Pro .plist file from there to the trash, and then restart the system. (If you find multiple .plist files, as in the example below, you can remove them all—Premiere Pro will rebuild the current version when you restart.)
Update third-party plug-ins, extensions etc.
New versions of Premiere Pro may require new versions of plug-ins. Check for new plug-ins, and uninstall and reinstall them after updating Premiere Pro.
As I mentioned earlier, some may not be fully compatible with a newly released version of Premiere Pro. Another good reason to keep older versions.
Rebuild the plugin cache
Premiere Pro will automatically rebuild the plugin cache the first time you launch a new version, but if you discover some incompatibility issues with a plug-in later, you should update the plugin, and then rebuild the cache again manually.
To do this, press and hold Alt+Shift (Windows) or Option+Shift (macOS) while starting Premiere Pro.
What about custom keyboard shortcuts?
The .kys files that hold the Premiere Pro keyboard shortcuts are very simple XML files. It seems safe to keep them between versions. But beware that you may not be able to follow tutorials etc. correctly because your old shortcuts are not set for the new options.
It’s a good idea to rebuild your shortcuts from the default once in a while, and pay attention to what options you’re changing or removing.
A recent example would be that hitting Ctrl+V in the 22.5 version on my Windows system now pastes to the same track when I use the Adobe Premiere Pro Default option in the Keyboard Shortcuts Editor panel, and to the lowest targeted track when I use my old Jarle’s Shortcuts option.
To make sure you don’t miss new improvements like this in the software, it’s a good idea to rebuild your shortcuts from the default once in a while, and pay attention to what options you’re changing or removing. It may be a very useful one.
Create a new project and import the old one
Open the new version of Premiere Pro. This may take longer than usual as it’s building plugin cache etc. Now create a new project and import the old project file into the new one that you made in the newest version. You do this instead of just opening the project in the new version and saving it. Importing a project into a new one is a well known way to fix certain project file-related problems.
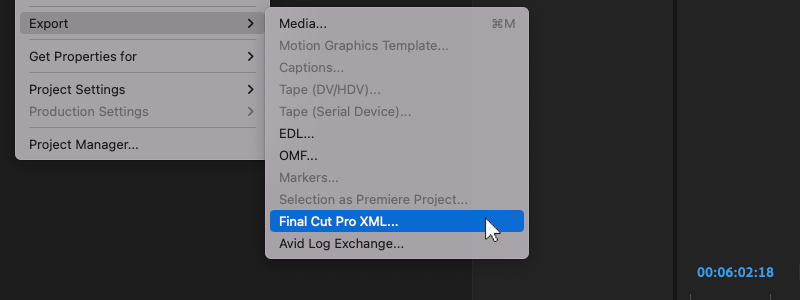
If you’re a wee bit paranoid, export an XML of the project out of the old version before updating. You can reinstall the old version and import the XML if everything goes awry.
Remove previous versions
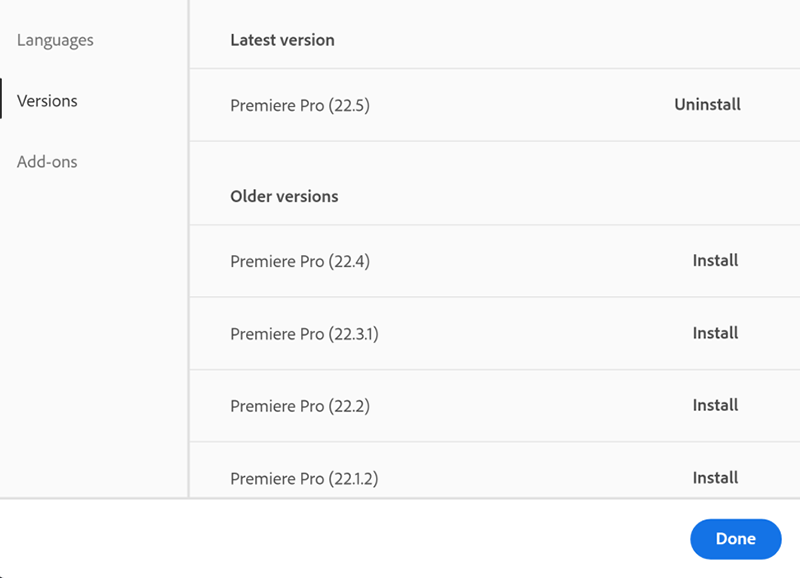
When you’ve made sure that the new installation works fine, you can choose to uninstall the old versions using the Creative Cloud Desktop app. You can choose to reinstall them later. The software itself will be gone after this, but often, stray folders and files remain after uninstalling.
Files from a failed or removed installation take up disk space and, according to Adobe, they can cause problems when you install or run a newer version. Here’s how to remove such files on macOS.
On Windows, deleting the old folders from Program Files (\Program Files\Adobe) and from Documents (\Documents\Adobe\Premiere Pro) should be enough to avoid such problems.
What if it doesn’t work?
Sometimes, no matter what you do, the new version doesn’t work properly. That’s when we bring in the sledgehammer and remove all traces of it.
If everything else fails, do a clean install
If the update went horribly wrong and nothing else works, it’s time to do a clean install. Use the Creative Cloud Cleaner Tool to remove the Creative Cloud app and Premiere Pro.
Then reinstall the Creative Cloud app using the installer.
Note: Before installing Premiere Pro, make sure you choose the default app language. This does not change the language in the Creative Cloud app itself, just in the apps it controls.
And when you’ve reinstalled, don’t forget to turn off auto-updates in the Creative Cloud app (Preferences->Apps)
Revert to an older version
If not even a clean install works, it may be best to just revert to an earlier version and wait for the next update. At least that means you can work.
Run the Creative Cloud Cleaner Tool and then install an earlier version using the Creative Cloud Desktop app.
Finishing up
It’s extremely unlikely that you’ll need to follow all of these steps each time you update Premiere Pro. But at least now you know where things can go wrong and how to avoid most of the trouble.
If Premiere Pro is at the core of your editing workflow, it’s always a good idea to be proactive about keeping it running smoothly. All it takes is a little effort to avoid downtime and keep your timelines moving. And if you’re interested in getting things moving even faster, maybe you should check out the latest C2C update from RED and Fujifilm?