It may seem counterintuitive, but jumping right into an edit on your timeline isn’t the fastest way to cut down an interview. The greatest timesaver I’ve ever found in editing interviews is planning. In this article, I’ll show you how I take advantage of the unique tools in Final Cut Pro X to create an interview workflow that shaves significant time from my interview editing tasks.
I’m assuming you’ve read the first part of this article in Make the Most of FCP X: Better Interview Logging Part I. I’ll be referring to nearly all the tips with an emphasis of editing in the browser, before you hit the timeline.
Contents
Step 1 – Define objectives
My workflow begins with defining some objectives for my work as well as the finished product.
First, I want to reduce needless tasks and work quickly. Going keyword crazy and applying subject keywords without a plan nearly always proves confusing and fruitless. Also I want to avoid playing back in the timeline just to find my place in the browser and timeline.
Second, I want my interview to be concise yet complete. I therefore need to know the content of my interview thoroughly so I can summarize it well.
Finally I want my finished interview to be compelling. I want to shape the finished interview so the most compelling elements are used to the fullest.
Step 2- Logging setup
As I mentioned in the first part of this article, I start with a few basics:
- I place my interview in a multicam clip, syncing up any second source audio as needed.
- Place the multicam interview clip in a fresh event
- Switch the browser to List View, rearranging columns so the notes column is to the right of name.
- Setup keyboard shortcuts for star ratings corresponding to control-1 through control-5
Step 3 – Create, rate and summarize content ranges
Although I’m often tempted to quickly scrub through the interview and get right to editing, I need to take the necessary step to know and analyze the content. If time permits I’ll watch the interview straight through without stopping to try to get an overall broad impression. I like to watch in away from my edit station, on a iPhone or separate client monitor so I can watch distraction free.
First pass
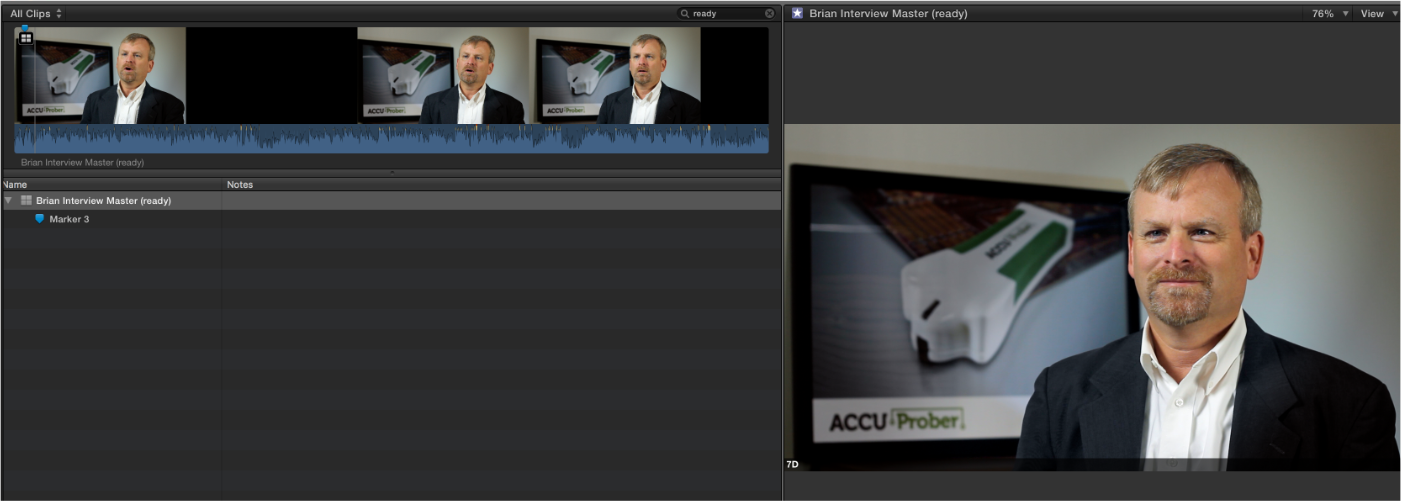
In the first logging of the interview my goal is to identify content with a range, rate with a star rating and summarize it. Content entries typically will be a sentence, but on longer interviews, content will encompass several sentences.
FCP X has excellent keyboard shortcuts for logging so I’m able to keep my hands on the keyboard. I also use my Contour Shuttle Pro with a customized setting (which you can download here) to locate specific frames even faster than they keyboard.
Here is how I identify content, rate and summarize using just the keyboard.
Note: For this to work properly you’ll need to mark something on the clip and twirl down the disclosure triangle. I’ll typically add a temporary marker before I start logging so I can show the items marked in the clip.
- Use the waveform as my guide, I’ll play with spacebar and press “I” to set the in point of my range.
- Spacebar to begin playback, then press “O” to set my out and spacebar to stop.
- To move faster, press L multiple times to speed up playback.
- Assign a star rating for the range by pressing ctrl-1 through control-5. For me 1 is “mess”, 3 is “passable”, 5 is “fantastic”.
- Press the “TAB” key twice to enter and activate the notes field. I’ll then type or speak a summary using the macOS built in dication.
- To review your content range again, press Return to exit the memo field then press forward slash (same key as the ?) to play the selected range range. Re-enter the memo field by pressing TAB, even while playback continues.
- With the notes field by pressing “RETURN” then start playback with space bar and start your process again.
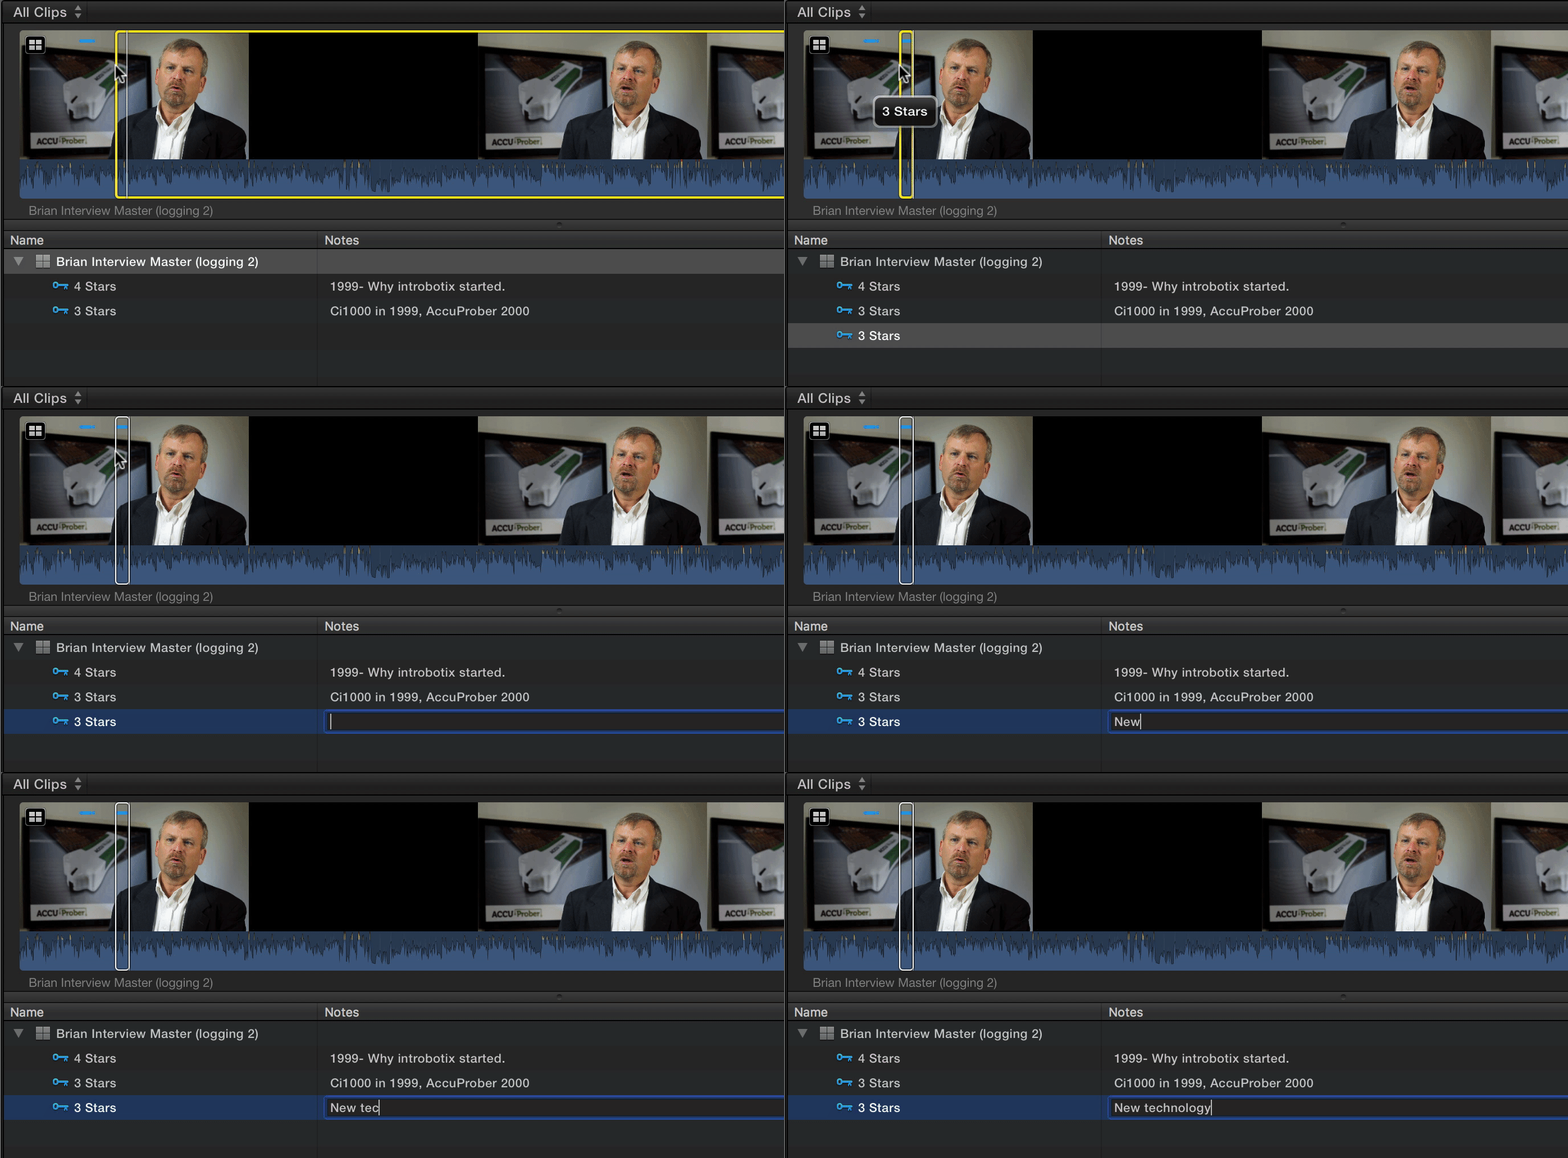
Optionally, I’ll also add todo markers for glaring audio or video issues to be address later. Pressing option-M with create and edit a marker, then press Tab to change it to a todo maker then I”ll type my note.
Note: using transcripts
Interview Transcripts are a timesaving way to understand the content of an interview. FCP X has a great option with Intelligent Assistance Lumberjack that will take a transcript and create ranges with notes right on your clip. It is indispensable for documentaries or projects with a large number of interviews. However, you can’t get emotion and tone from a transcripts. So I find that although I understand the subject matter from the transcript, I still need to review the playback and assign ratings. Therefore, for projects with a small number of interviews, I find it allows the project to take the least amount of time as a whole when the editor to logs and rate the interview themselves.
Step 4 – Discover the structure by grouping content
Interview are like mini-documentaries that requires you as the editor to discover the story and create the best way to present it to your audience. Therefore instead of putting down my best content and organizing and rearranging on the timeline, I get away from FCP X and start brainstorming how to group my content to present it best.
Grouping Content
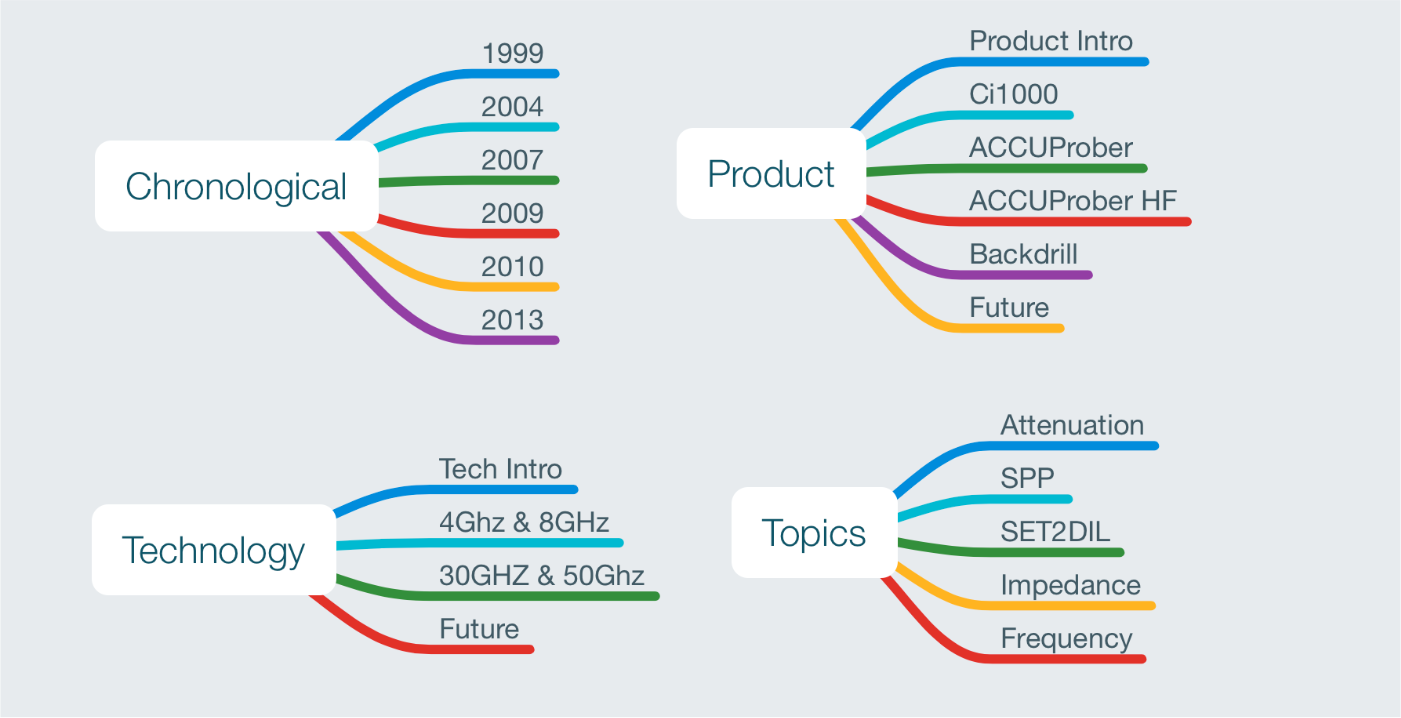
Grouping is organizing and further summarizing my content to understand the essence of the interview. I find my projects typically fall into these basic types:
- Story – a retelling of a story with a clear beginning, middle and end
- Topics – several topics that fit in a larger theme. Like products, or people.
- Sequential – steps in a process, a chronological series of dates
Away from my edit station, I’ll use a whiteboard or mind mapping software to write out some possible groupings. My goal is to shrink it to 2-5 broad groups, summarized in just a few words. I’ll try to do this from memory, rather that continually looking at my content so I can concentrate on the broader themes, rather than specific details.
Creating structure
My next goal is to create an ordered structure for my finished interview which contain these groupings. The best way to present your interview is often not the same order it was captured. I also sometimes find that one or more of the groups I created is actually unneeded in the finished interview. Often I realize I need additions such as an introduction or conclusion. I’m surprised how often re-ordering of groups can make a story more or less compelling.
Step 5 – Add groups to content ranges
My next tasks is to add my group information to the content, and I have a couple of ways to accomplish that.
Groups in notes
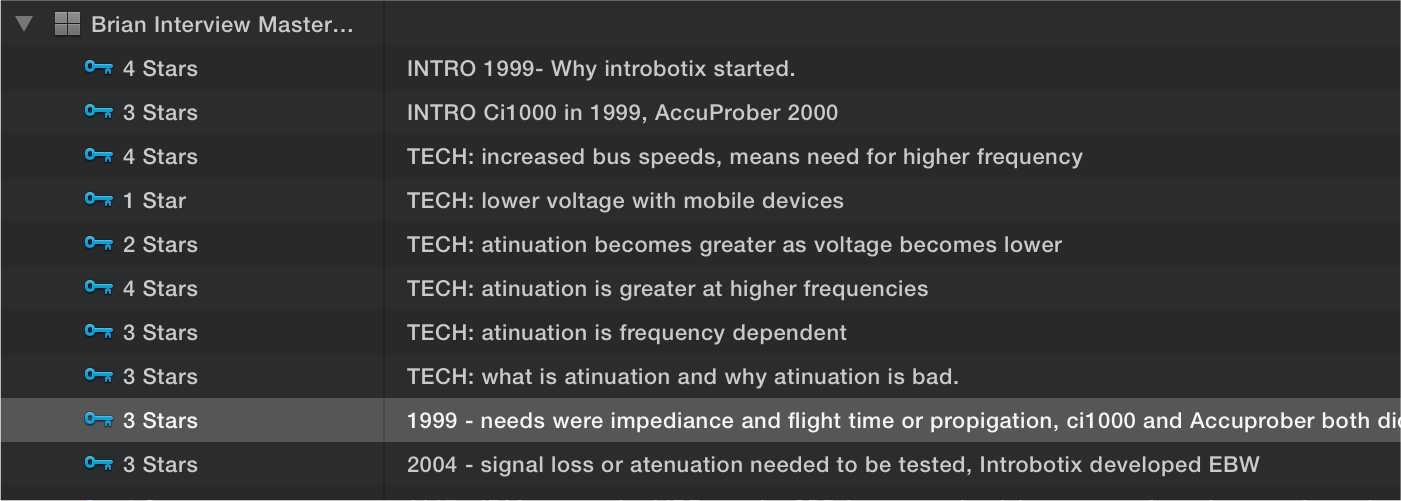
My first option is to precede each note with a group description. This works best when I have a small number of content ranges and a fairly simple interview as there are limitations to this method.. First it is slower as I can apply groups to multiple content and I also can’t rename groups easily. It also takes some work to isolate the content in the browser.
Groups in keywords
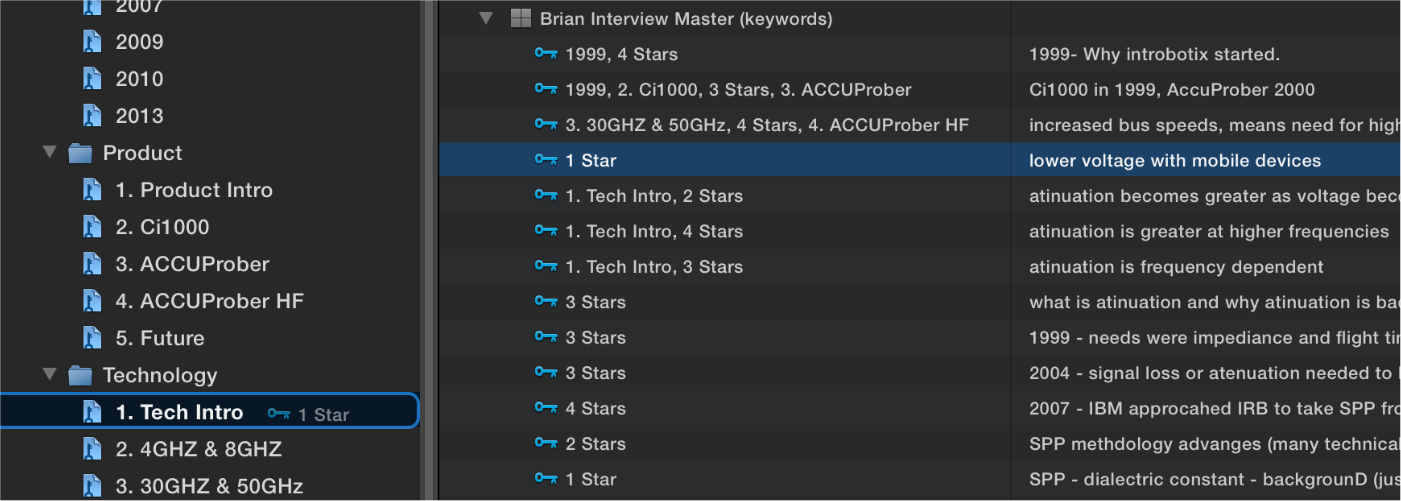
My second approach is to create keywords collections for each group and then drag each range to that keyword. This is fast to assign a group to multiple content ranges that I have command-clicked or shift-clicked in the browser. This also lets you see all the content ranges in a group quickly. However, I need to be careful to not add too many keywords, as it adds unnecessary clutter, especially when I’ve viewing keywords for my content in the Timeline Index.
Step 6 – Create a log line
We’re almost ready to move to the timeline, but one more task is needed to make my time in the timeline move even faster.
Crafting a log line
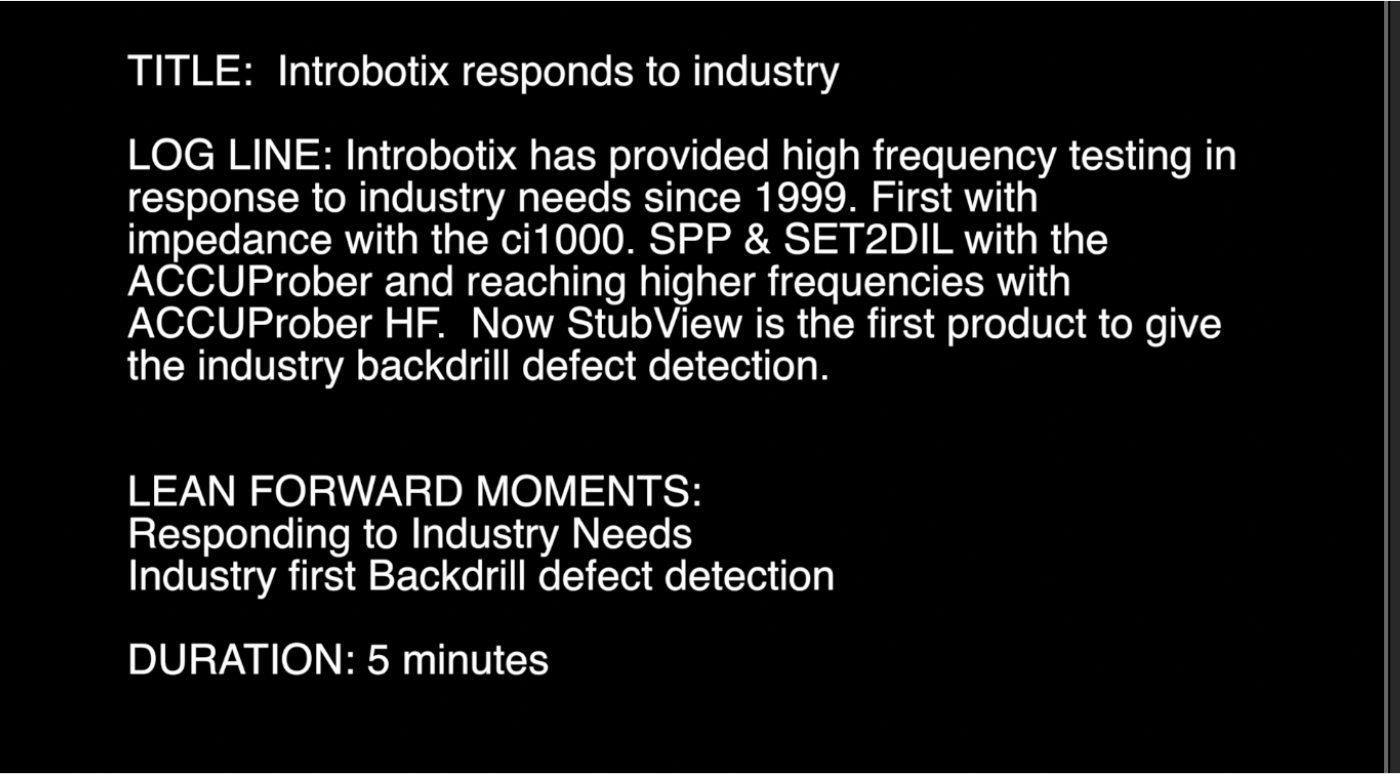
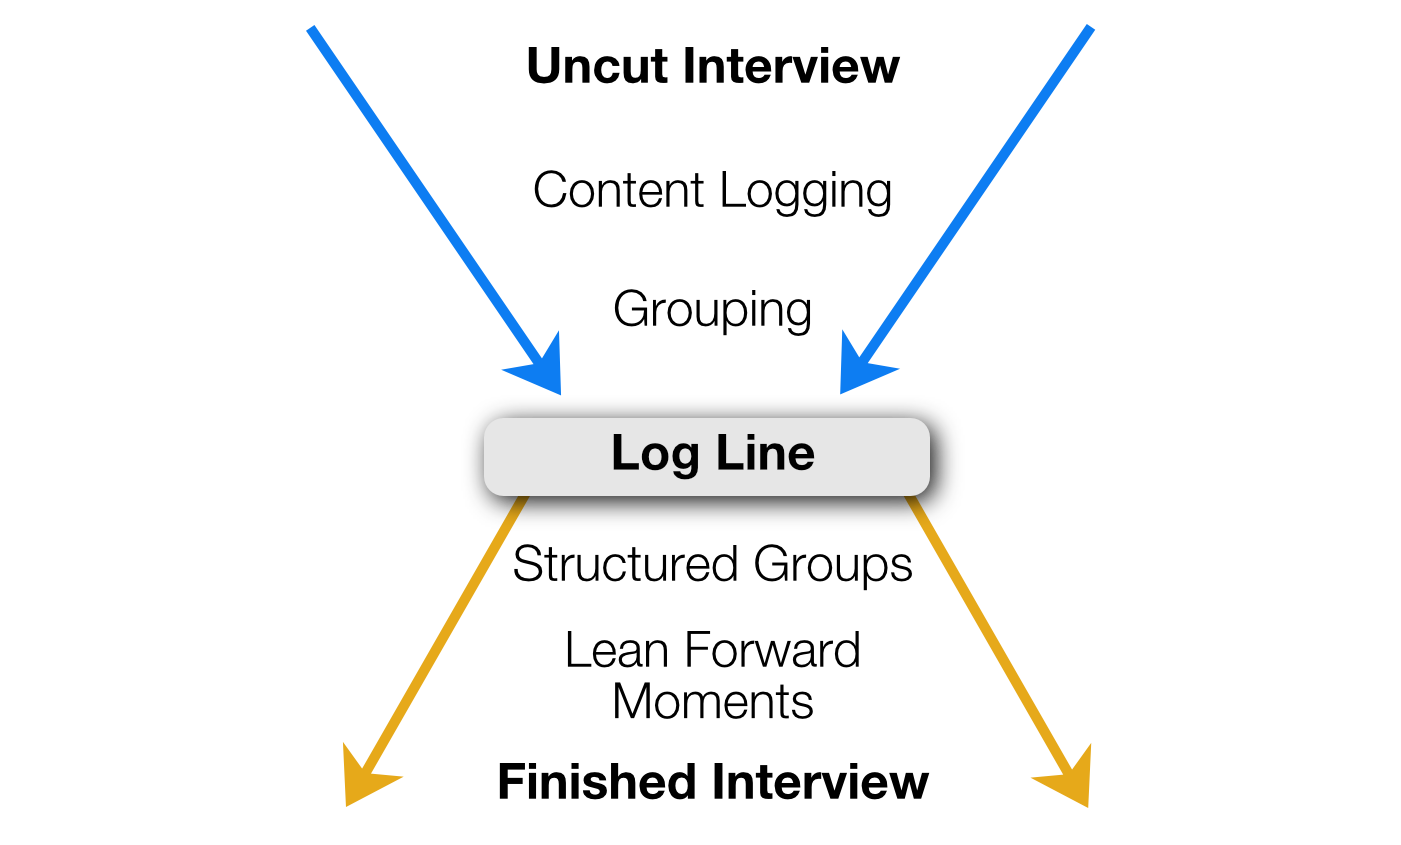
A log line is a sentence or short paragraph giving synopsis of the finished interview. I don’t need to be clever, just get something down in a readable form that includes all the elements in my structure. I think of a log line as the “elevator speech” so that in 30 seconds or so I can communicate to the director or client the essence of the cut down interview. For a documentary style project made up of many interviews I’ll create a log line for the complete story arc, followed by a log line for each scene.
Lean forward moments
With my log line in mind, I’ll follow what Norman Hollyn at USC calls “Lean Forward Moments,” which he writes about in the book of the same name. Lean forward moments are the critical moments in a scene, sequence and complete story arc. If you happen to be a lynda.com subscriber you can get a crash course in a few hours with Norman Hollyn’s excellent course “Foundations of Video: The Art of Editing”.
Target duration
In this last step, I will also create (or guess) on a target duration for the finished interview or sequence.
Client or director review
My log line, lean forward moments and target duration now broadly describes my finished interview and the approach I have taken before I even start the finished edit. Therefore I am able to share with with my client/director and together we are free to refine and restructure and I haven’t spent valuable time refining the edit in my timeline.
Step 7 – Edit in the timeline.
Because of the organization, analysis, and planning assembling the interview on my timeline is amazingly smooth.
Title card plan
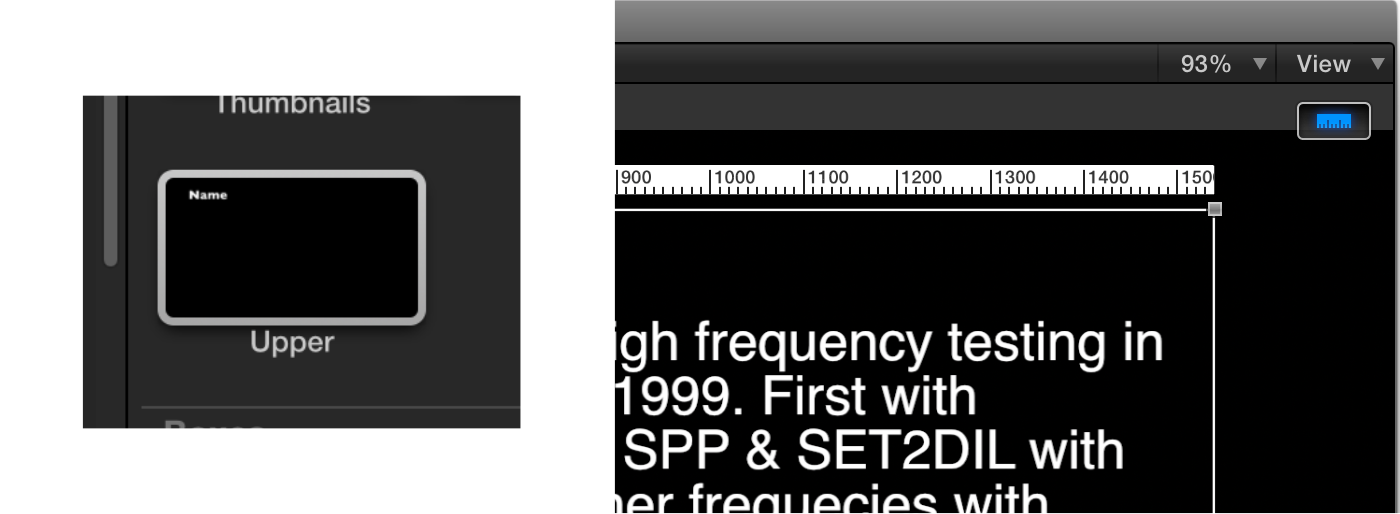
I start by placing a title card at the head of my timeline with my logline, lean forward moments and duration. This constant reminder of the plan for my edit has done wonders to speed up my editing. It keeps me focused on the goal, and my edit devoid of uncluttered with irrelevant content.
Adding content
I’ll add content to my timeline, following my log line and structure plan and paying attention to my content star rating for each. I will have plenty of extraneous content still in my timeline which I’ll remove later. I’ll keep an eye on the total duration of my timeline to stay in my ballpark duration. I tend to put gaps between each element of my structure and add chapter markers to indicate learn forward moments.
Editing during playback
I’ll review my timeline rearranging and trimming as needed. I like to edit during playback so I avoid unnecessary review, and selecting edges with the mouse and trim to the tail of a clip with option-“]” (left bracket) which keeps the playhead moving.
Searching the timeline index
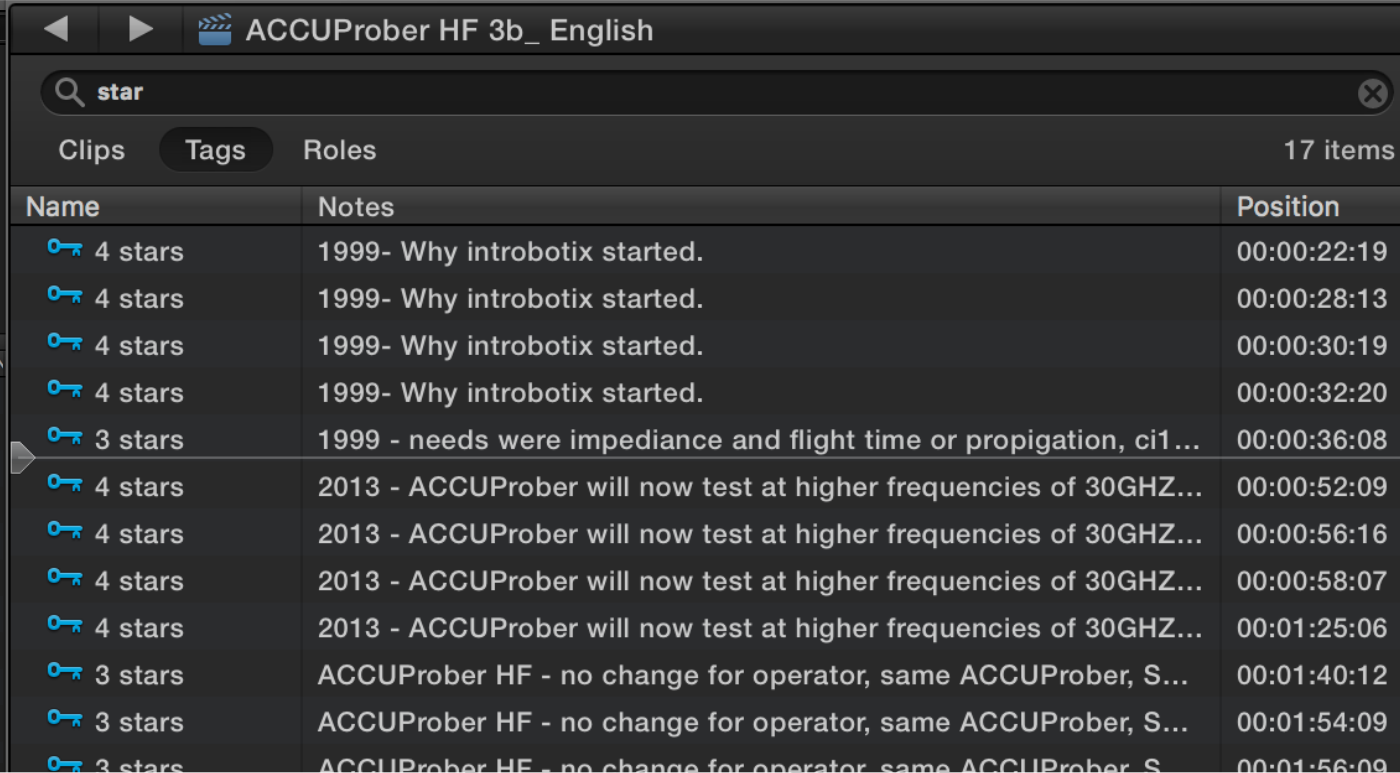
I keep my timeline index open on Tags and keywords selected so I can see the arrangement of my content without needing to play it. As needed I’ll filter the keyword by name or notes to quickly locate items in my timeline. Filtering by “star” will let me see just my star rated content.
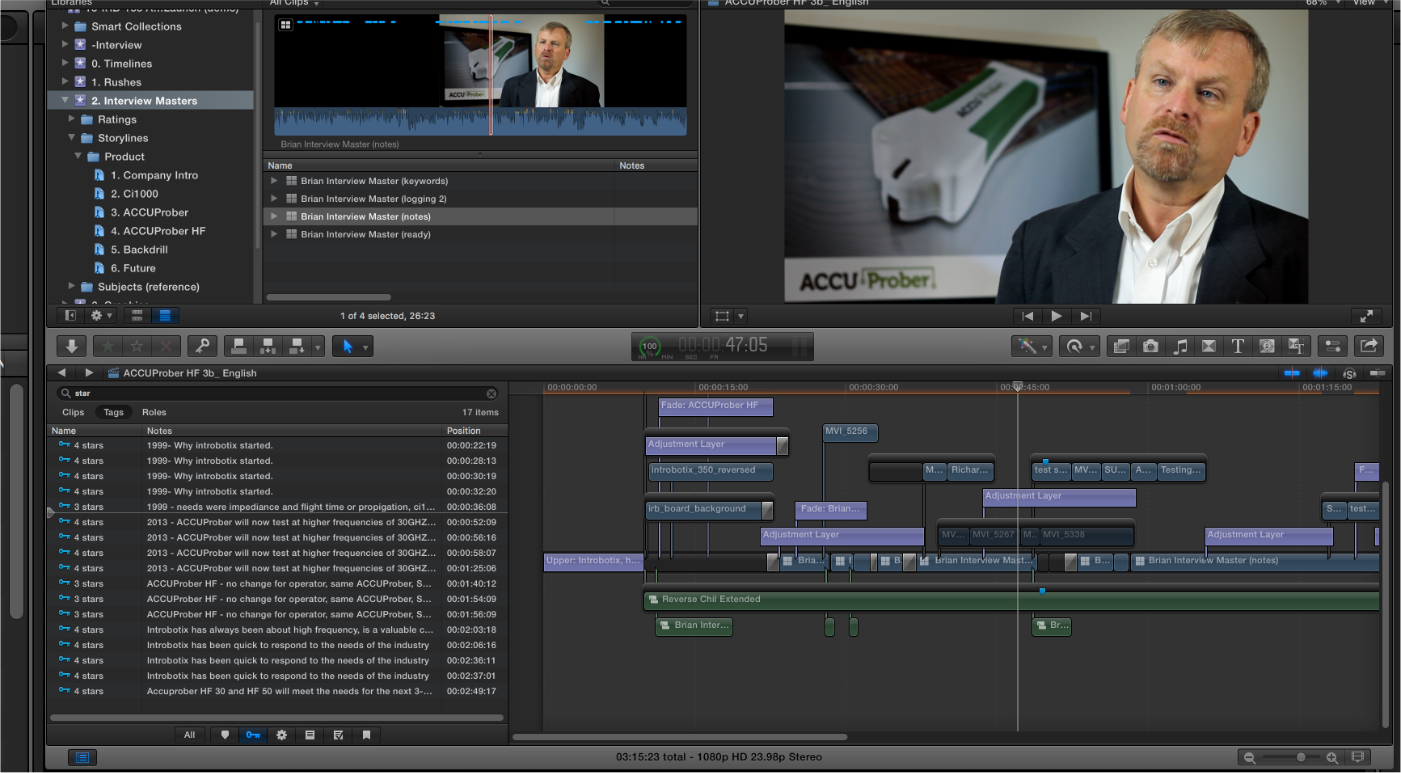
Finding content in the Browser
To add additional content, I can quickly view just relevant ranges in the browser by selecting my “Ratings” folder and then entering my search term in the browser search. Because the folder is selected, this will show all the individual ranges that contain the search term in the notes rather than the whole clips.
Reviews
When showing draft for review, I’ll include the title card with my interview plan so all can collectively evaluate how the edit jives with the plan. When using frame.io for collaboration I find it very helpful to add markers so my client/director is aware of issues not yet resolved.
Step 8 – Finish
Once I get a sign-off on the interview I’ll take it to finishing and adding much-needed b-roll to paint pictures and cover up interview jump cuts. Because my interview is in a multicam clip I can refine the picture with color correction or repairs, and then sweeten the audio in the multicam clip and have it ripple to all instances of the interview clip. I also address any needed items I have placed with Todo markers. See my previous articles on Maximizing Multicam for some great tips on working with multicam.
This workflow has radically changed how I approach and even enjoy editing interviews. What was once a dreaded task has not only become faster, but a far better storytelling process. I hope my workflow encourages you to customized it for your own needs and allows you to craft concise and compelling interviews.

