Every week, Frame.io Insider asks one of our expert contributors to share a tip, tool, or technique that they use all the time and couldn’t live without. This week, Charles Haine looks into the differences between local and remote grades in DaVinci Resolve.
Resolve’s remote grades can speed up your edits.
One of the secret power tools of Resolve that many regular users have missed is its “remote” grading feature. This doesn’t refer to working remotely from your client (there are other tools built for that). Instead “remote” here means “shots in the media pool” while “local” means shots on the timeline. While this is a somewhat odd phrasing, the principle at play here offers a tremendous amount of power when working on projects with repeated shots.
For example, in a typical local workflow, you grade one shot at a time, working through the project. Each individual clip in the timeline gets its own grade. With a “remote” workflow each media pool clip gets a grade.
So if that particular clip in the media pool is cut into your timeline 15 times—like an interview you keep cutting back to—once you grade the first shot, all 15 instances of that shot in the timeline end up with the same correction.
Seeing double
This can be incredibly powerful when working on projects like documentaries that might repeatedly cut back to the same shot. As soon as you see the little pink double square, you know the shot shows up more than once in the timeline and it’s linked.
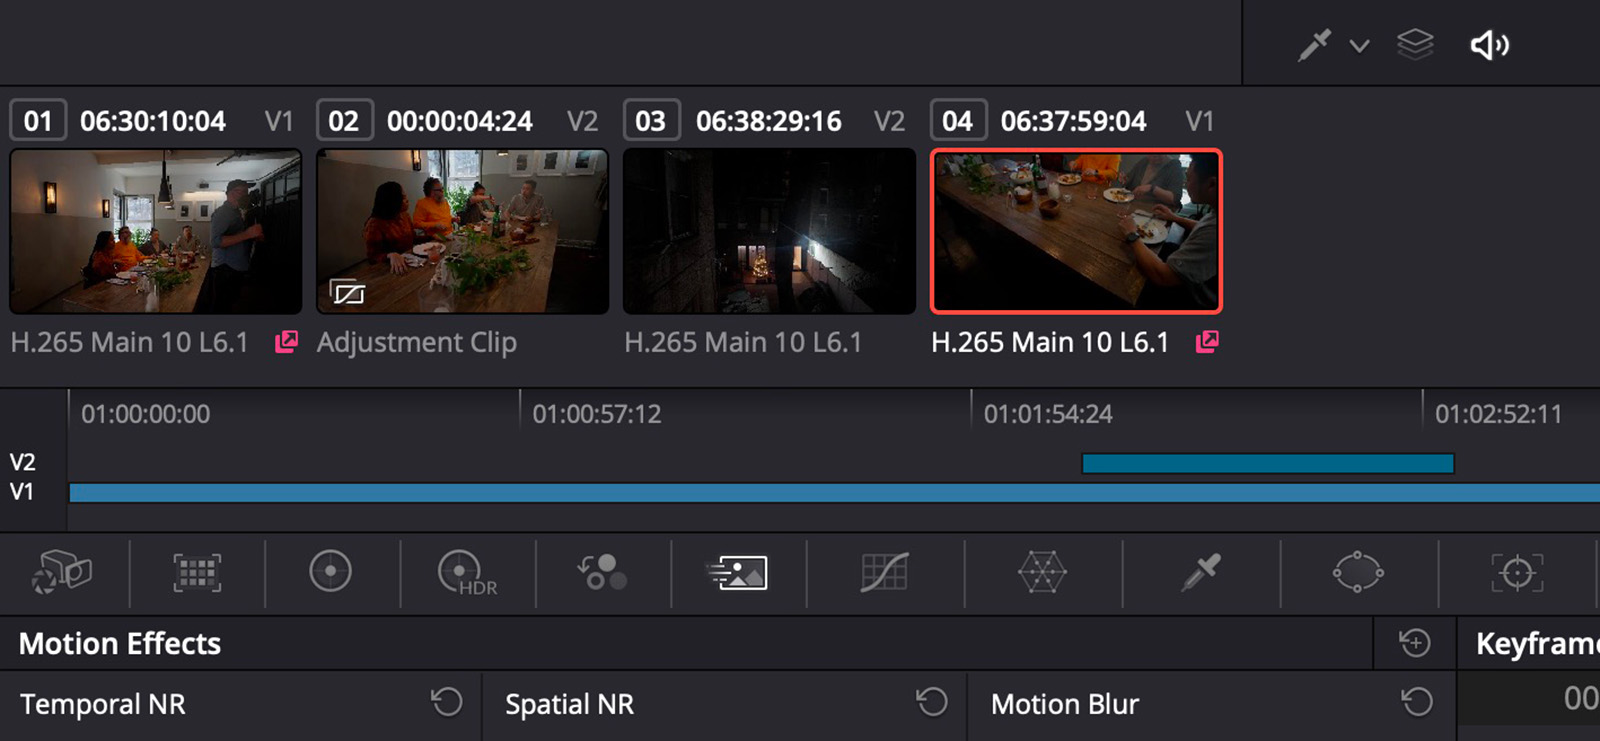
Resolve takes this one step further by letting you have multiple versions of a remote grade. Say in your documentary you keep cutting back to a shot that was captured outside with the sun moving in and out of the clouds. You can make a “bright” version and a “dark” version of your grade to match the footage, and then select the correct version every time the shot shows up, instead of having to regrade from scratch.
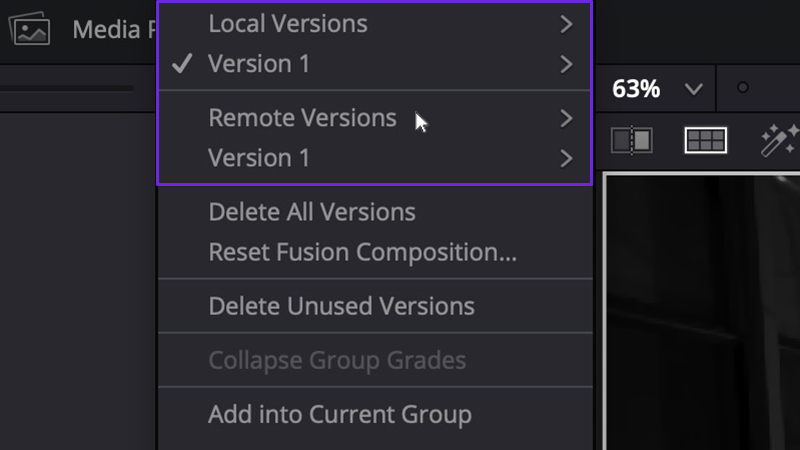
To switch back and forth between local and remote simply right click on your clips in the color room and select “use remote grades” or “use local grades.” You can even copy from one to the other. You might use remote grades to start, then do your last pass having copied those remote grades to local. This will give you the power to tweak individual shots without worrying that it might ripple to other instances of that shot in the timeline.
Insider Tips are helpful weekly posts brought to you by Frame.io’s awesome writers and industry experts. Come back for a new Insider Tip every Wednesday, or subscribe to our newsletter to get a reminder each week.
Frame.io V4 is now available for all! Check out the launch announcement here.


