Every week, Frame.io Insider asks one of our expert contributors to share a tip, tool, or technique that they use all the time and couldn’t live without. This week, Laurence Grayson shares the perfect companion to DaVinci Resolve’s skin tone line—Qualifier Focus.
Using Resolve’s Qualifier Focus to Get Your Skin Tones Right
Whether we’re working on feature films or corporate videos, most colorists will place the importance of skin tone above everything else in our grades. You probably already know about the skin tone line in DaVinci Resolve’s vectorscope—which is designed to help you identify natural looking skin tones in your frame—but are you also using the Qualifier Focus tool?
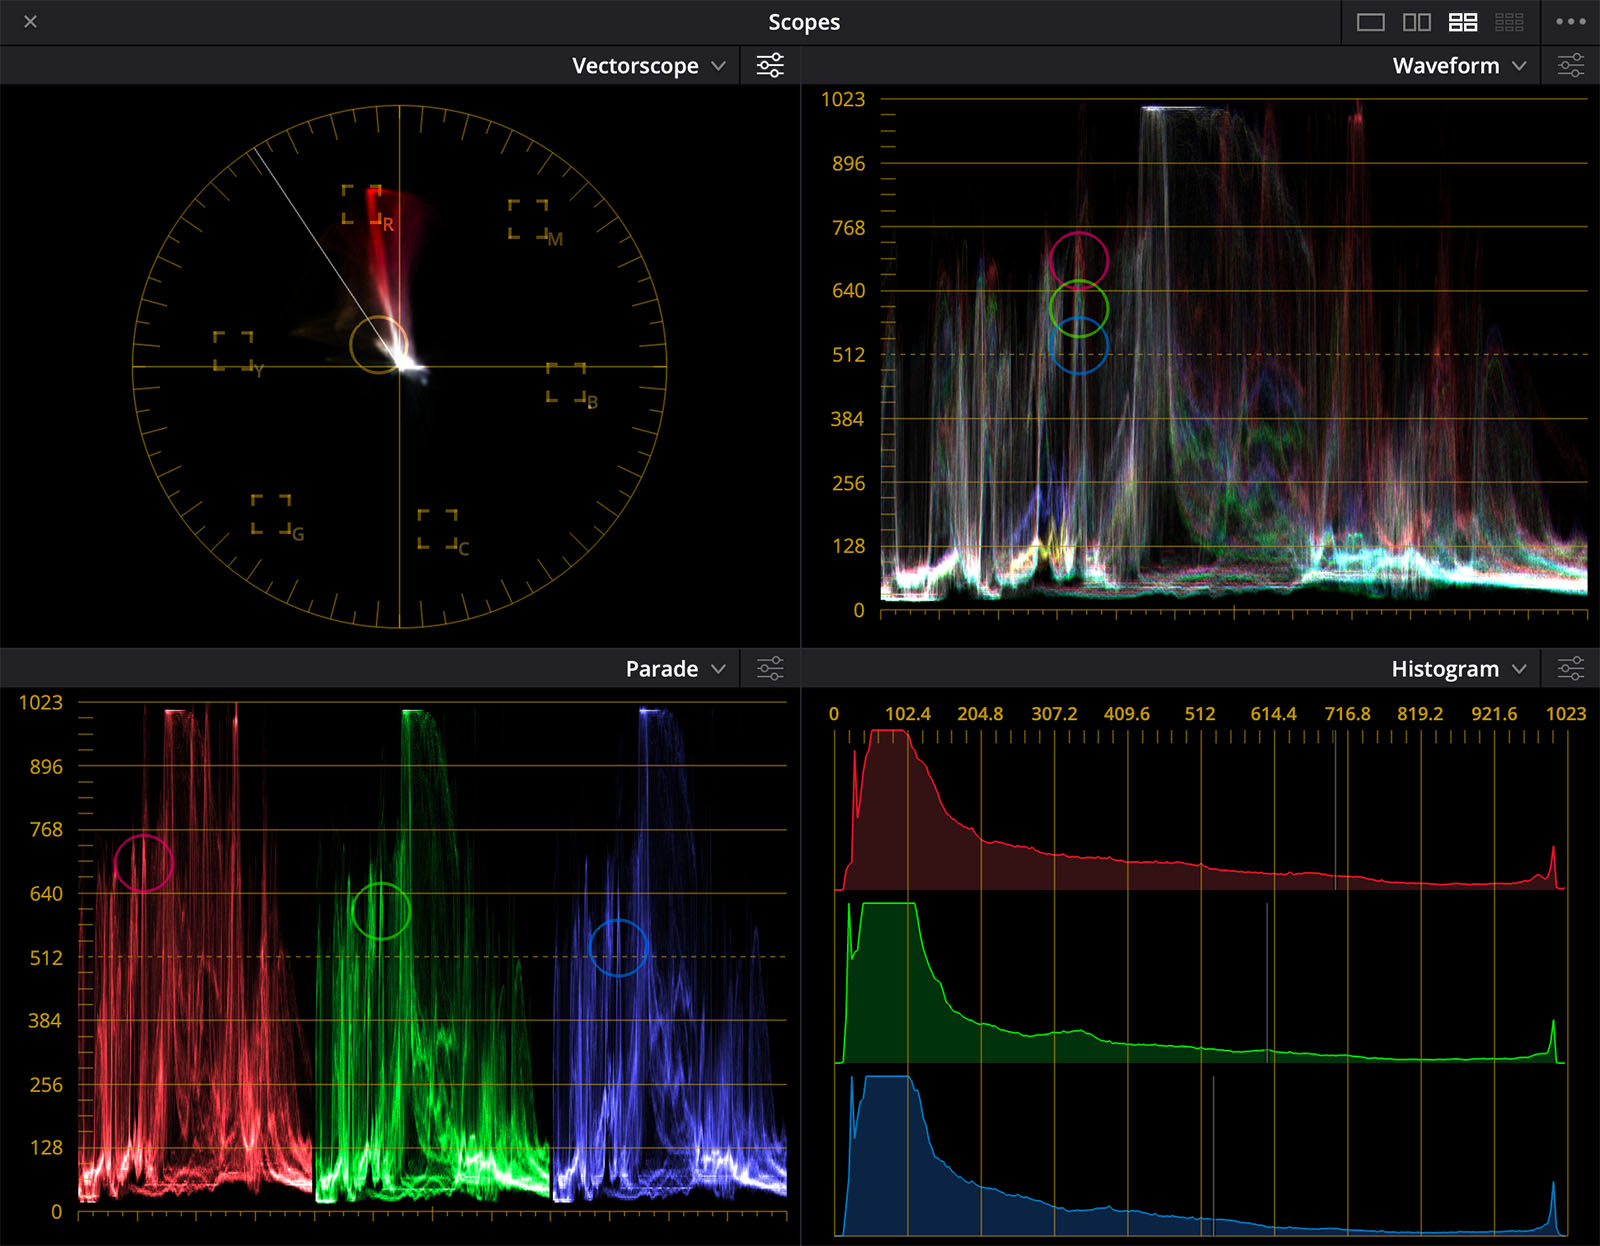
The Qualifier Focus tool is a great way to quickly check areas of skin tone in your grade by highlighting the sample color under the Qualifier (eyedropper) tool with an indicator on the accompanying vectorscope display for that frame. (It also works with Waveform, Parade, and Histogram views, but these don’t have the Vectorscope’s skin tone line.) No masking or image isolation is required.

How to enable Resolve’s Qualifier Focus tool
- Make sure you’re in Resolve’s Color workspace, then go to your Scopes panel and click on the ellipsis/kebab menu icon in the top right.
- Select Display Qualifier Focus.
- Then look for the dropdown menu at the bottom-left of your preview pane and select the Qualifier tool.

Now, as you move the qualifier across the frame, you’ll see a corresponding indicator on the vectorscope for the colors beneath. If the circle sits directly over the vectorscope’s skin tone line, you know you’re on the right track.
Insider Tips are helpful weekly posts brought to you by Frame.io’s awesome writers and industry experts. Come back for a new Insider Tip every Wednesday, or subscribe to our newsletter to get a reminder each week.
Frame.io V4 is now available for all! Check out the launch announcement here.


