Every week, Frame.io Insider asks one of our expert contributors to share a tip, tool, or technique that they use all the time and couldn’t live without. This week, Chris Tennant shares how to use Media Composer’s Graph Editor to finesse your Avid keyframes.
Animating properties is an effective way to add dynamism to your edits, and really make them pop. For example, you may want to add a slow zoom-in on a static shot to infuse it with a little bit of energy. This effect is achieved by keyframing the Scale property within a 3D Warp effect in Avid.

By default, Avid animates motion between keyframes linearly, ensuring a smooth transition from one keyframe to the next. This linear approach is ideal for straightforward animations, like a property that needs to move consistently from the start to the end of a clip. However, for more nuanced animations—like a zoom that gradually comes to a stop—you should acquaint yourself with the Graph editor.

It’s like having a fine control dial for your animations, allowing you to accelerate or decelerate motion between keyframes. This is handy when you want that zoom effect to ease into a gentle stop, rather than abruptly halting mid-clip.
Using Avid’s Graph Editor
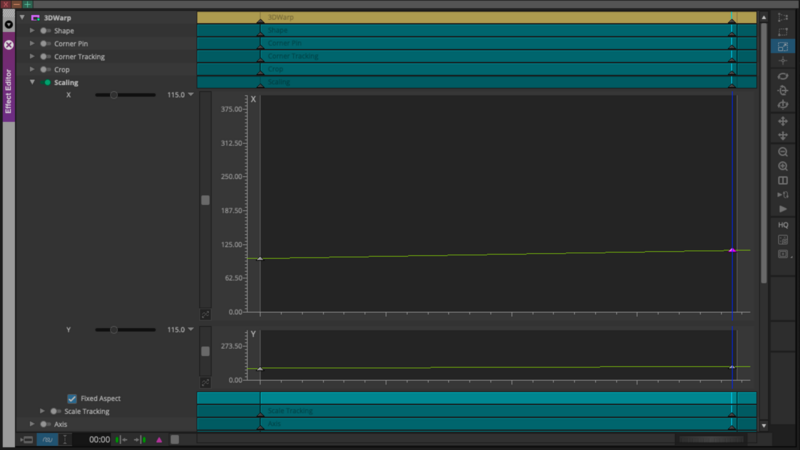
To use the graph editor, click on the arrow next to the property slider in Effect Editor. You have a number of controls here. The left-side scroll bar controls the zoom, and you can expand the graph by dragging down its lower edge.

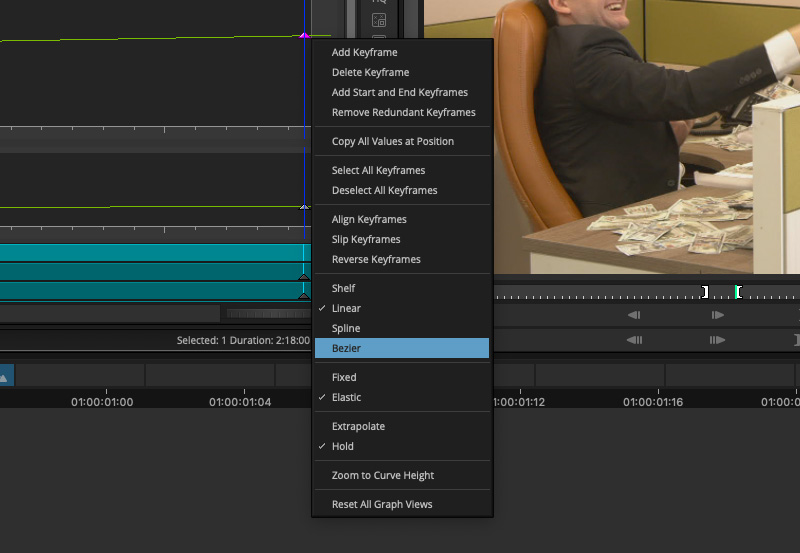
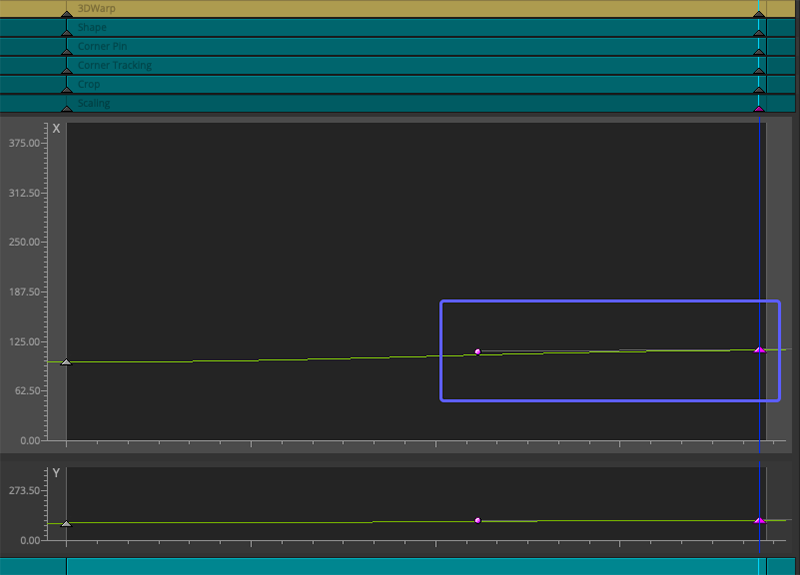
Right-click on a keyframe and select “Bezier.” This adds a small dot to your graph editor, called a bezier handle. By dragging this dot around the graph, you’ll control the velocity of your animated keyframe, represented by the curve. Use these handles to dial in the precise motion you want.
Insider Tips are helpful weekly posts brought to you by Frame.io’s awesome writers and industry experts. Come back for a new Insider Tip every Wednesday, or subscribe to our newsletter to get a reminder each week.
Frame.io V4 is now available for all! Check out the launch announcement here.


